Do you have a question about the Chamberlain 3240 and is the answer not in the manual?
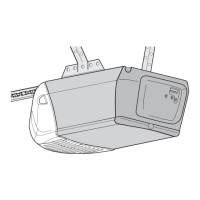
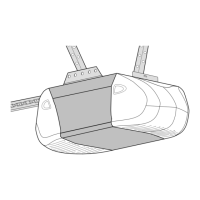
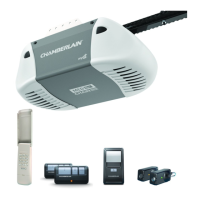
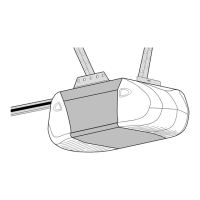
Presents the LiftMaster Professional garage door opener models covered in this manual.
Explains hazard symbols and signal words used in the manual for safety.
Details critical safety warnings and cautions before starting installation.
Lists and illustrates all necessary hand tools for assembly and installation.
Outlines different door types and factors to consider for opener installation.
Lists all parts included in the opener's packaging and hardware bags.
Guides attaching the rail assembly securely to the motor unit using specific hardware.
Provides essential safety warnings to prevent severe injury or death during installation.
Details how to find and mark the correct position for the header bracket based on door type.
Instructions for securely attaching the header bracket to a wall structure.
Instructions for securely attaching the header bracket to a ceiling structure.
Guides connecting the rail assembly to the installed header bracket using specific hardware.
Details installing the safety reversing sensor, crucial for door closing safety.
Preferred method for attaching sensor brackets directly to the garage door track.
Instructions for mounting sensor brackets to the wall, with options for extensions.
Instructions for mounting sensor brackets to the floor, often requiring elevation.
Covers fastening sensors to brackets and routing wires along the rail.
Guides positioning the opener for sectional or one-piece doors with tracks using a 2x4.
Guides positioning the opener for one-piece doors without tracks using a 2x4.
Instructions for attaching the opener to the ceiling or wall supports using brackets.
Details installing the wall-mounted door control and connecting its wiring.
Guides installing the light bulb and lens into the opener's end panel.
Details attaching the red rope and handle for manual emergency disengagement.
Covers electrical requirements, grounding, and permanent wiring options for the opener.
Details how to align the sensors for proper operation and troubleshooting common issues.
Instructions for attaching the bracket to sectional garage doors, including reinforcement needs.
Details attaching the bracket to one-piece metal or wood garage doors.
Guides attaching the door arm sections to the trolley for sectional garage doors.
Covers assembling the door arm and setting UP/DOWN travel limits for one-piece doors.
Explains how to set the door's fully open and fully closed positions.
Details how to set the amount of force needed for safe door operation.
Explains how to test the door's ability to reverse upon encountering an obstruction.
Guides testing the safety reversing sensor to ensure it detects obstructions.
Provides critical safety guidelines for operating the garage door opener.
Explains how to use remote controls, wall controls, and keypads to operate the opener.
Details functions of the multi-function door control, including light and lock features.
Explains how to manually disconnect and reconnect the trolley for emergency door operation.
Addresses common adjustments needed due to weather and periodic checks.
Provides instructions and warnings for replacing the battery in the remote control.
Addresses issues like door not closing, remotes not working, and unexpected reversals.
Explains how to use the diagnostic LED and chart to identify potential opener issues.
Step-by-step guide to adding or reprogramming hand-held remote controls to the opener.
Instructions to erase all previously programmed remote codes from the motor unit's memory.
Guides for setting up or modifying the PIN for keyless entry access.
Instructions for creating a temporary PIN for guests or service personnel.
Lists and identifies all parts for the opener's rail assembly.
Lists and identifies various parts required for the opener's installation.
Provides an exploded view and list of parts for the motor unit assembly.
Describes various optional accessories like remote controls, keyless entry, and monitors.
Specifies the necessary details (part number, name, model) when ordering replacement parts.
Outlines the product's warranty period, coverage, exclusions, and claim procedures.
| Type | Chain Drive |
|---|---|
| Horsepower | 1/2 HP |
| Max Door Height | 7 feet |
| Remote Control | Yes |
| Voltage | 120V |
| Speed | 7 inches per second |
| Motor | DC motor |
| Remote Controls Included | 2 |
| Security | Rolling code technology |
| Battery Backup | No |
| Motor Warranty | Lifetime |
| Safety Features | Safety sensors |
| Warranty | 1 year |