EasyManua.ls Logo

Chamberlain BILT B6753T User Manual

Chamberlain BILT B6753T
52 pages
To Next Page IconTo Next Page
Page #1 background imageLoading...
Page #1 background image
Easy step-by-step
interactive 3D instructions
for this product can be found in
DOWNLOAD THE FREE APP
Available on most iOS and Android Devices
AFTER YOUR ASSEMBLY WITH BILT,
DOWNLOAD THE myQ® APP
Installation Manual Inside
Question and Answer IconNeed help?

Do you have a question about the Chamberlain BILT B6753T and is the answer not in the manual?

Chamberlain BILT B6753T Specifications

General IconGeneral
TypeBelt Drive
SmartYes
Battery BackupYes
LightingLED
Quiet OperationYes
Remote Controls Included2
Drive SystemBelt
ConnectivityWi-Fi
Lift CapacityUp to 7 feet
Speed7 inches per second
Safety and Security FeaturesSecurity+ 2.0, PosiLock

Summary

Understanding Safety Symbols and Warnings

Interpreting Warning and Caution Labels

Explains the meaning and significance of different safety signals used in the manual.

Preparation and Initial Checks

Pre-Installation Door Inspection

Crucial steps to check door balance, binding, and bottom seal for safe operation.

Assembly Step 1: Rail and Trolley

Assembly Step 2: Rail to Motor Unit

Assembly Step 4: Belt Installation

Assembly Step 5 & 6: Belt Tension & Cover

Critical Installation Instructions

Mandatory Safety Precautions

Essential safety warnings covering power, door balance, child safety, and general handling.

Post-Installation Safety Checks

Procedures for testing safety systems and applying warning labels after installation.

Installation: Header Bracket Placement

Determining Header Bracket Height

Calculating the correct vertical position for the header bracket relative to the door's highest travel point.

Installation: Mounting the Header Bracket

Securing Header Bracket to Wall

Detailed steps for wall-mounting the header bracket onto structural supports.

Securing Header Bracket to Ceiling

Detailed steps for ceiling-mounting the header bracket onto structural supports.

Installation: Rail and Opener Positioning

Installation: Hanging the Garage Door Opener

Mounting Opener to Ceiling Supports

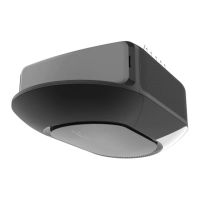
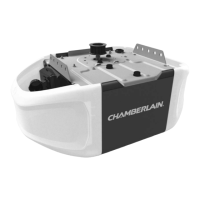
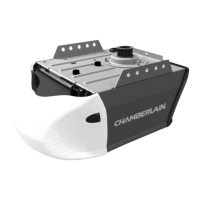
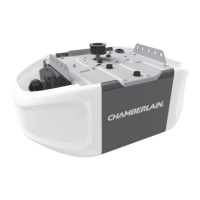
Securing the opener unit to ceiling structural supports using hanging brackets.

Installation: Emergency Release Mechanism

Installation: Door Bracket Attachment

Installing Door Bracket on Sectional Doors

Attaching the door bracket to sectional doors, noting reinforcement needs.

Installation: Door Bracket for One-Piece Doors

Installation: Connecting Door Arms

Installation: Door Arms for One-Piece Doors

Installation: Wall Control Panel

Installation: Wiring and Safety Labels

Installation: Safety Reversing Sensors

Mounting Sensors on Door Track

Attaching safety reversing sensors to the garage door track using brackets.

Installation: Safety Sensor Mounting Options

Installation: Wiring Safety Sensors (No Pre-wiring)

Installation: Wiring Safety Sensors (Pre-wired)

Installation: Power Connection

Connecting via Standard Outlet

Instructions for plugging the opener into a grounded electrical outlet.

Making a Permanent Wire Connection

Steps for hardwiring the opener to the electrical system.

Installation: Sensor Alignment & Control Check

Aligning Safety Reversing Sensors

Proper alignment of safety sensors for correct operation and LED indication.

Adjustments and Control Panel Features

Importance of Travel Limit Adjustment

Explains the necessity of adjusting travel limits and testing the safety reversal system.

Adjustments: Programming Travel Limits

Setting Door Open (UP) and Close (DOWN) Positions

Step-by-step process to program the desired travel limits for the garage door.

Adjustments: Testing Safety Systems

Testing the Safety Reversal System

Procedure to verify the door reverses upon encountering an obstruction.

Testing the Protector System Sensors

Verifying the functionality of the safety reversing sensors by checking beam obstruction.

Battery Backup Functionality

myQ® App Connectivity

Setting Up and Using the myQ® App

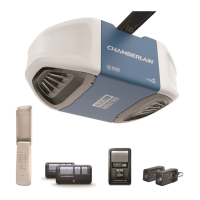
Instructions for downloading, configuring, and using the myQ® application.

Camera Integration and Status

Operating the Garage Door Opener

Essential Safety Rules for Operation

Critical safety guidelines for operating the opener, emphasizing child safety and obstruction awareness.

Control Panel Features and Operation

Remote and Keyless Entry Programming

Programming Remote Controls

Instructions for pairing remote controls with the garage door opener.

Programming Keyless Entry Keypads

Steps to program a PIN for the keyless entry keypad.

Operation: Memory Management and Manual Override

Troubleshooting: Diagnostic Codes Explained

Interpreting Opener Flash Codes

A chart detailing diagnostic codes indicated by opener light flashes and their solutions.

Troubleshooting Common Problems

Opener Malfunctions and Lights

Solutions for issues like unexpected stops, reversals, and operational lights.

Garage Door Opener Safety Overview

Understanding Opener Safety Risks

Explains inherent dangers of garage doors and openers, focusing on entrapment and child safety.

Child Safety Guidelines

Recommendations for child safety, including control accessibility and education.

Routine Maintenance and Testing

Testing Door Balance and Safety Features

Procedures for testing the door's balance and the opener's safety mechanisms.
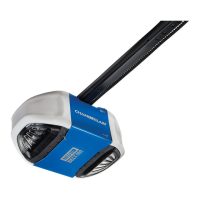
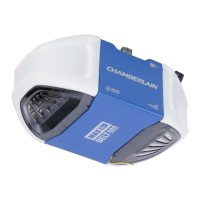
Related product manuals