Do you have a question about the Chamberlain B550C and is the answer not in the manual?
Explains safety symbols and signal words used throughout the manual for hazard identification.
Instructions on verifying door balance and condition before opener installation.
Details Wi-Fi connection requirements and signal strength check for smart features.
Lists all necessary tools required for the installation process.
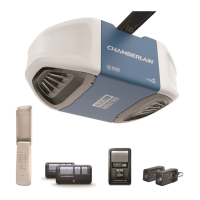
Lists all items included in the product packaging for verification.
Illustrates and lists all specific hardware components for assembly and installation.
Instructions for assembling the main rail and installing the trolley assembly.
Details on how to securely attach the assembled rail to the garage door opener motor unit.
Instructions for installing the idler pulley into the front rail section.
Steps for routing and installing the drive belt, connecting it to the trolley.
Procedure for setting the optimal belt tension by adjusting the spring trolley nut.
Guidance on attaching the sprocket cover for safety before operating the opener.
Crucial safety and procedural guidelines that must be followed before starting installation.
How to find and mark the correct header bracket mounting spot based on door type.
Instructions for securely mounting the header bracket to the wall or ceiling.
Connecting the assembled rail to the previously mounted header bracket.
How to safely place the opener unit on the door or ladder for mounting.
Securing the opener unit to the garage ceiling or structural supports.
Instructions for correctly installing the opener's light bulbs.
How to properly attach the emergency release rope and handle to the trolley.
Mounting the door bracket to the top section of the garage door.
Specific instructions for installing the door bracket on one-piece doors.
Attaching the door arm to the trolley for sectional doors.
Attaching the door arm to the trolley for one-piece doors.
Mounting the wall-mounted door control unit and wiring it.
Connecting the door control wiring to the main garage door opener unit.
Correct placement of essential safety warning labels on the wall and door.
Installing the safety reversing sensors (Protector System®).
Different mounting options for the Protector System® sensors.
Wiring the safety reversing sensors without pre-installed wiring.
Wiring the safety reversing sensors with pre-installed wiring.
Connecting the garage door opener to the electrical power source.
Ensuring the safety reversing sensors are properly aligned for correct operation.
Verifying the proper wiring of the door control unit.
Overview of the electronic controls for setting door travel limits and force.
Specific adjustment note for one-piece doors to prevent backward slant.
Identifies the buttons used for programming door travel limits and adjustments.
Detailed steps for setting the door's open (UP) and close (DOWN) travel limits.
Procedures for testing the safety reversal system using an obstruction.
Testing the functionality of the safety reversing sensors.
Requirements and steps for connecting the opener to the MyQ app and Wi-Fi.
Instructions for downloading, setting up, and connecting the MyQ app.
Explanation of the Wi-Fi LED indicators on the opener for status monitoring.
General safety guidelines and warnings for operating the garage door opener.
How to activate and use the opener with various controls like remotes and apps.
Steps for manually opening the garage door using the emergency release handle.
Description and functions of the motion detecting control panel.
Explanation and settings for the automatic door closing (Timer-to-Close) feature.
Description and functions of the multi-function control panel.
Warning about using the Timer-to-Close feature with one-piece doors.
Information on programming remote controls and keyless entry systems.
Steps to program remote controls via the door control panel.
Information regarding HomeLink compatibility and potential bridge requirements.
How to erase remote control, Wi-Fi, and MyQ account settings.
Recommended maintenance tasks categorized by frequency (monthly, yearly).
Monthly maintenance checks for door operation and safety system.
Annual maintenance tasks including lubrication of door parts.
Information and instructions for replacing the remote control battery.
Table listing diagnostic codes, common symptoms, and their solutions.
Troubleshooting common issues with remote controls, HomeLink, and Wi-Fi connectivity.
Details of the limited warranty terms, coverage, and exclusions.
How to contact Chamberlain for installation, service, or troubleshooting.
List of replacement parts for the garage door opener rail assembly.
List of replacement parts used during the installation process.
List of optional accessories available for the garage door opener.
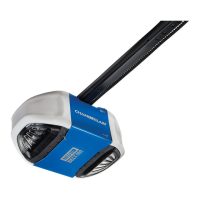
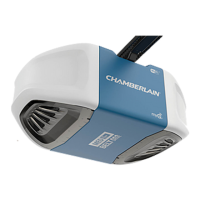
List of specific replacement parts for the Chamberlain B550C model.
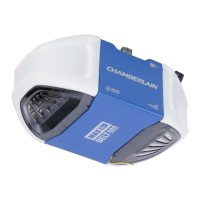
List of specific replacement parts for the Chamberlain B750C and B751C models.
| Type | Belt Drive |
|---|---|
| Horsepower | 1/2 HP |
| Battery Backup | No |
| Warranty | Lifetime motor warranty, 5 years on parts |
| Drive System | Belt Drive |
| Motor Power | 1/2 HP |
| Connectivity | Wi-Fi |
| Remote Controls Included | 1 |
| Security+ 2.0 Rolling Code Technology | Yes |
| Remote Control | Yes |
| Safety Features | Safety sensors |
| Smart Home Compatibility | Yes |
| Motor Type | DC |
| Drive Type | Belt |





 Loading...