EasyManua.ls Logo

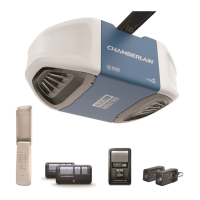
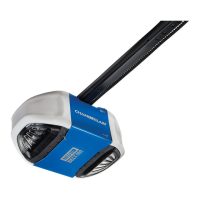
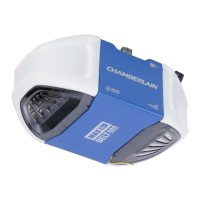
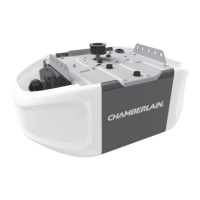
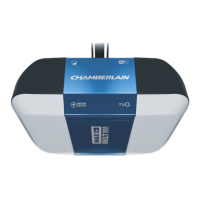
Chamberlain B751C User Manual

Chamberlain B751C
96 pages
To Next Page IconTo Next Page
Page #1 background imageLoading...
Page #1 background image
Smart Garage Opener
Contents
Preparation ...................................... 2-5
Assembly .......................................6-10
Installation ..................................11-28
Install the Door Control ............21-22
Install the Protector System® ....23-26
Connect power .........................27-28
Adjustments .................................29-31
MyQ® Smartphone Control .................32
Operation .....................................33-39
Using your Garage Door Opener .....34
To Open the Door Manually ...........34
Motion Detecting
Control Panel ...........................35-36
Multi-Function Control Panel .... 37-38
Remote Control .............................38
Homelink® ...................................38
To Erase the Memory .....................39
Maintenance .....................................40
Troubleshooting ........................... 41-42
Accessories ........................................ 43
Warranty ........................................... 44
Repair Parts ................................. 45-47
Owner’s Manual
B550C • B750C • B751C
Belt Drive Garage Door
Opener
FOR RESIDENTIAL USE ONLY
PRE-PROGRAMMED REMOTE CONTROL
INCLUDED
www.chamberlain.com
www.mychamberlain.com
Please read this manual and the enclosed safety materials carefully!
Fasten the manual near the garage door after installation.
The door WILL NOT CLOSE unless the Protector System
®
is connected
and properly aligned.
Periodic checks of the garage door opener are required to ensure
safe operation.
The model number label is located on the left side panel of your
garage door opener.
This garage door opener is compatible with MyQ® and
Security+b2.0® accessories.
DO NOT install on a one-piece door if using devices or features
providing unattended close. Unattended devices and features are
to be used ONLY with sectional doors.

Table of Contents

Question and Answer IconNeed help?

Do you have a question about the Chamberlain B751C and is the answer not in the manual?

Chamberlain B751C Specifications

General IconGeneral
BrandChamberlain
ModelB751C
CategoryGarage Door Opener
LanguageEnglish

Summary

Preparation and Safety Guidelines

Assembly Overview

STEP 1 Assemble Rail and Install Trolley

Guide on assembling the garage door opener rail and installing the trolley.

Assembly: Rail to Motor Unit Connection

STEP 2 Fasten Rail to Motor Unit

Instructions for securely attaching the rail assembly to the motor unit.

Assembly: Idler Pulley Installation

Assembly: Belt Installation and Tensioning

Installation Guide

IMPORTANT INSTALLATION INSTRUCTIONS

Critical safety warnings and instructions for reducing risk during installation.

Installation: Header Bracket Location Determination

STEP 1 Determine Header Bracket Location

Guidance on identifying the correct location for the header bracket installation.

Installation: Header Bracket Mounting

STEP 2 Install Header Bracket

Instructions for securely mounting the header bracket to the wall or ceiling.

Installation: Rail and Opener Positioning

Installation: Hanging the Garage Door Opener

Installation: Door Bracket Mounting

STEP 8 Install Door Bracket

Instructions for mounting the door bracket to the garage door.

Installation: Door Bracket Mounting (Continued)

STEP 8 Install Door Bracket (continued)

Further instructions for installing the door bracket on one-piece doors.

Installation: Door Arm to Trolley Connection

STEP 9 Connect Door Arm to Trolley

Guide on connecting the door arm to the trolley assembly.

Installation: Door Arm to Trolley Connection (Continued)

STEP 9 Connect Door Arm to Trolley (continued)

Further steps for connecting the door arm to the trolley for one-piece doors.

Installation: Door Control Panel Setup

Installation: Protector System® Setup

STEP 13 Install Protector System®

Instructions for installing the safety reversing sensors (Protector System).

Installation: Protector System® Setup (Continued)

STEP 13 Install Protector System® (continued)

Continued instructions for installing the safety reversing sensors.

Installation: Wiring Safety Reversing Sensors

Installation: Wiring Safety Reversing Sensors (Continued)

Installation: Connecting Power Supply

STEP 15 Connect Power

Instructions for connecting the garage door opener to a power source.

Installation: Sensor Alignment and Door Control Verification

STEP 16 Align Safety Reversing Sensors

Steps for correctly aligning the safety reversing sensors for proper operation.

Adjustments and Programming

Adjustments: Programming Door Travel Limits

STEP 1 Program the Travel

Procedure for programming the open and close travel limits for the garage door.

Adjustments: Safety System Testing Procedures

STEP 2 Test Safety Reversal System

Instructions for testing the safety reversal system's functionality.

STEP 3 Test Protector System®

Procedure for testing the Protector System® sensors.

MyQ® Smartphone Control Setup

Opener Operation

Critical Safety Instructions

Essential safety guidelines for operating the garage door opener safely.

Operation: Using the Garage Door Opener

Troubleshooting Guide

Troubleshooting: Diagnostic Chart

Troubleshooting guide that correlates diagnostic codes with symptoms and solutions.

Troubleshooting: Common Issues and Solutions

Product Warranty Information

Repair Parts Identification Guide

Repair Parts: Model B550C Components

Repair Parts: Models B750C & B751C Components

Related product manuals