To prevent possible SERIOUS INJURY or DEATH from electrocution:
• Be sure power is not connected BEFORE installing the receiver.
To prevent possible SERIOUS INJURY or DEATH from a moving
gate or garage door:
• ALWAYS keep remote controls out of reach of children. NEVER
permit children to operate, or play with remote control transmitters.
• Activate gate or door ONLY when it can be seen clearly, is properly
adjusted, and there are no obstructions to door travel.
• ALWAYS keep gate or garage door in sight until completely closed.
NEVER permit anyone to cross path of moving gate or door.
Universal Radio Control
OWNERS MANUAL
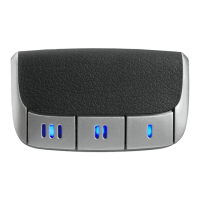
Model 535LM Security✚ Receiver Only
Model 535-2LM Security✚
(With 2 Remote Controls)
NOTICE TO U. S. CONSUMERS:
Some states prohibit the service or repair of garage door openers which
cannot be made to comply with the safety standards contained in UL 325
(1988 revision). In order to comply with both the letter and the spirit of
these laws, this universal radio control should not be used with any
LiftMaster
®
, Chamberlain
®
, or Sears Craftsman
®
garage door opener
manufactured prior to April 1, 1982.To find out if your Chamberlain-made
garage door opener was manufactured prior to or after April 1, 1982,
please call 1-800-528-9131 before installing this universal radio control.
MOUNTING RECEIVER
• Unplug the opener before proceeding.
• Fully extend antenna wire below bottom of case as shown.
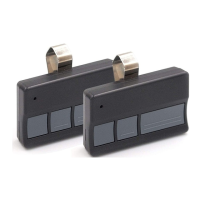
• The receiver can be mounted directly on the door opener with
the clips provided. Figure 1.
OR
• Attached to a ceiling/inside wall of the garage with connecting
bell wire (not provided). Fasten the receiver to the ceiling or
inside garage wall with dry wall screws provided. Figure 2.
NOTE:Transformer Model 85 is required if your residential
garage door opener is a LiftMaster, Chamberlain or Sears.
INSTALLATION USING CLIPS
Loosen the three terminal screws on the receiver (labeled 1, 2
and 3). Figure1. Insert one end of a mounting clip under each
terminal. Do not retighten at this time.
Loosen the three terminal screws on the opener used for push
button controls and radio power.
Leaving the push button bell wire in place, insert the other ends
of the mounting clips under the opener terminal screws.
NOTE: If the number sequence of opener terminals doesn't
match the receiver, turn the receiver around (so back is facing
out) and complete the connection.
Retighten the terminal screws on opener and receiver.
Reconnect power to the opener. The receiver push bar should
light. If it does not, use Transformer Model 85.
INSTALLATION USING BELL WIRE
Attach one end of 3-strand bell wire (not provided) to receiver
terminals 1, 2 and 3. Connect the other end to the three opener
terminals used for push button controls and radio power. Use
insulated staples to secure bell wire between receiver and
opener. Figure 2.
Reconnect power to the opener. The receiver push bar should
light. If it does not, use Transformer Model 85.
INSTALLATION WITH TRANSFORMER MODEL 85
With the transformer, use a 2-wire connection only. Attach wire
to receiver terminals 1 and 2 and to the opener terminals used
for push button control. Plug the transformer into receiver and
120 Volt outlet. Figure 3.