www.chamsys.co.uk QuickQ User Manual
Page 16 of 43
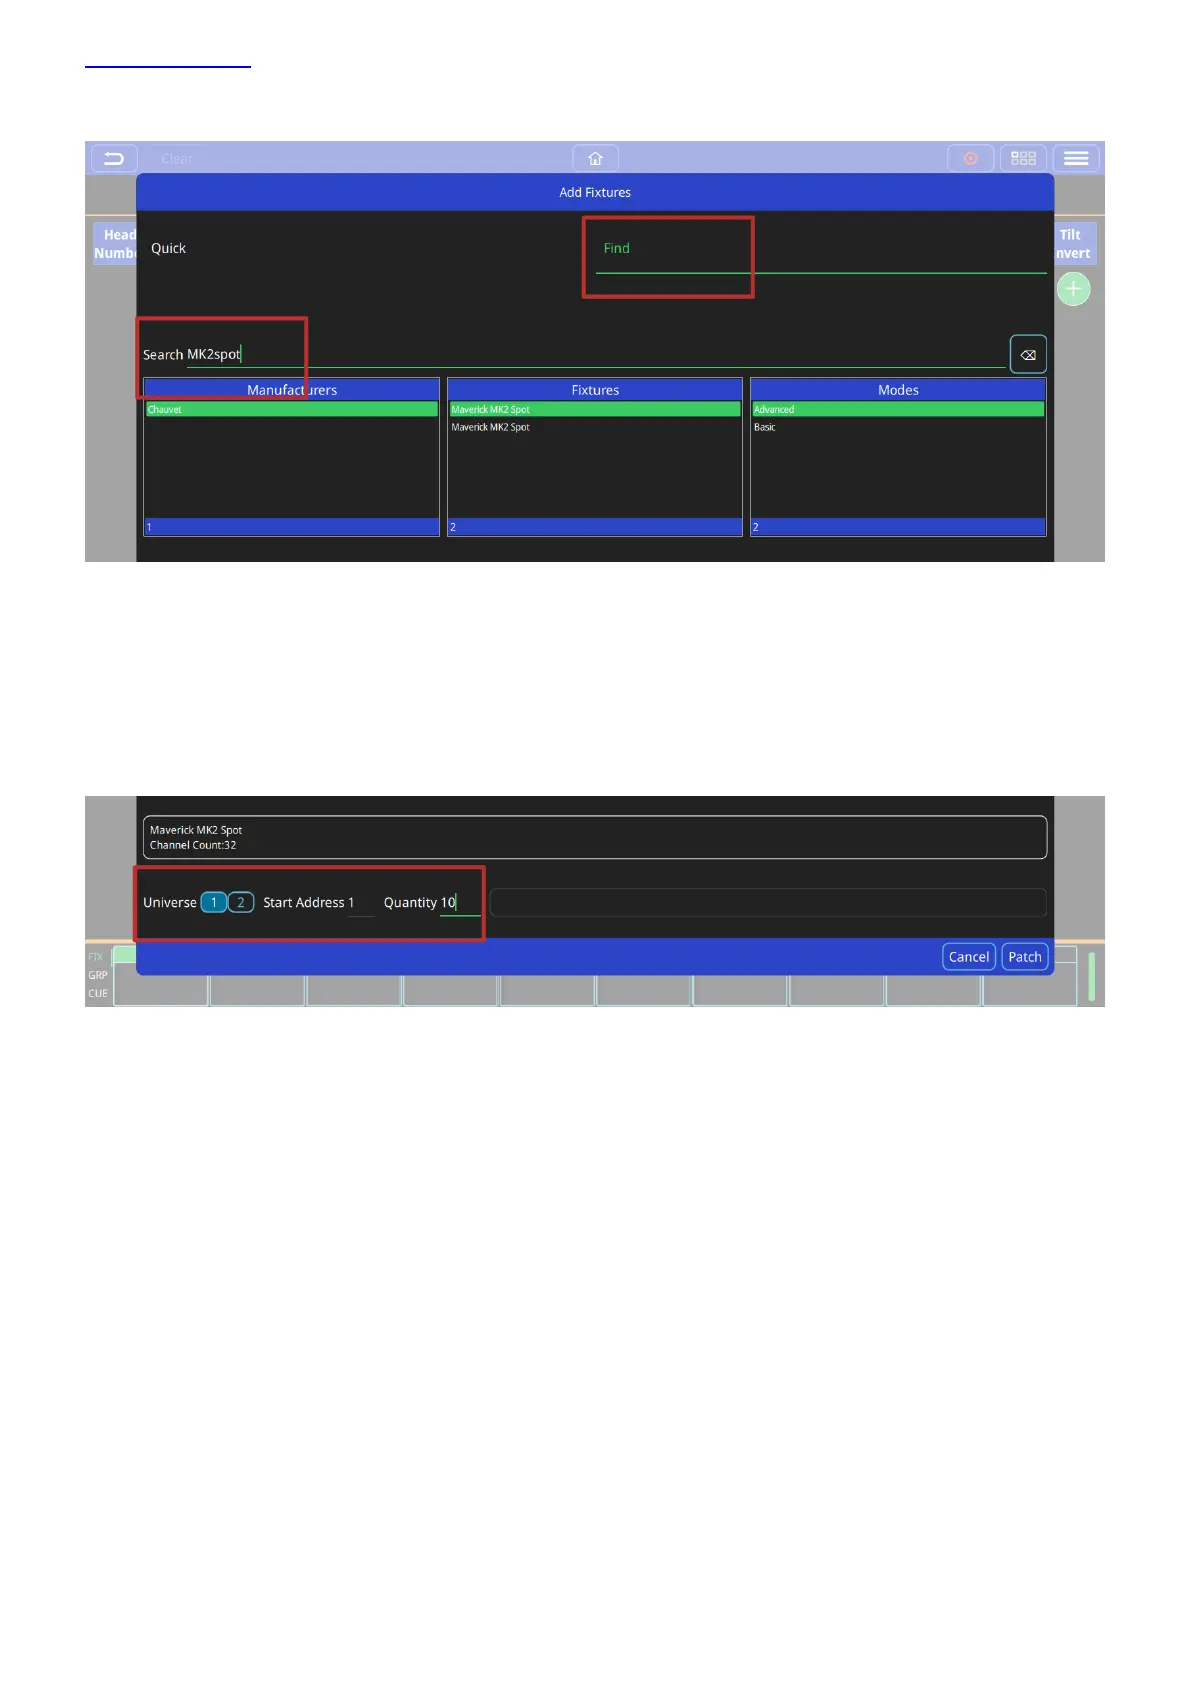
Once selected, enter the universe that the fixture(s) will be patched onto. Next enter the DMX start address of the
first fixture.
Finally enter the Quantity of this type of fixture to be patched and press the ‘Patch’ button on the lower right of
the window.
Naming Fixtures
The Patch window features a name column; the default for this field is the fixture name from the QuickQ fixture
library. This name is used on the Home screen and can custom set per fixture.
It is recommended that you name the dimmer or the head based on its location (e.g. front wash / back truss SL).
Single fixtures can be renamed simply by pressing and holding on the fixture name to open the Rename fixture
dialog
To rename multiple fixtures use the Action menu, select the fixture(s), then select the rename option from the
action menu bar at top of window.
 Loading...