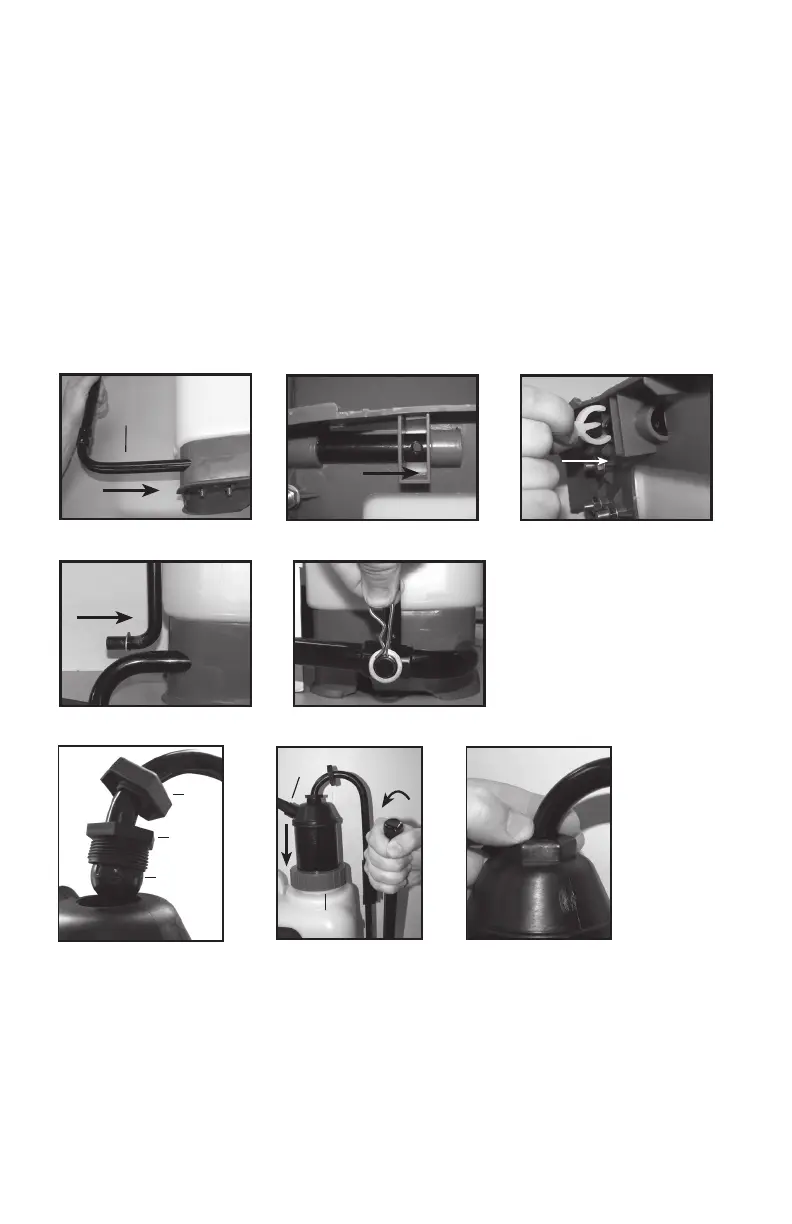
The sprayer includes all hardware necessary for installing the pump handle. Install the pump handle
into the base (A). Center the hole in the handle between the cut-out on the bottom of the tank base
(B). Push the “C” clip over the pump handle while aligning the nub on the clip with the hole in the
handle (C). Slide washer over pump linkage (short end) (D). Slide pump arm linkage (short end)
through pump handle at the bottom of the tank (D & E). Slide a second washer over the linkage and
insert the cotter pin through the hole in linkage (E). Position ball over top of pump (F). The pump
assembly can be rotated to orient the pump outlet into desired position (G). Rotate handle down until
ball is seated in top of pump (F and G). Tighten pump retainer nut (F). Do not over tighten. Press
boot over retainer nut (H). Insure pump locking nut is tight (G).
INSTALLING THE PUMP HANDLE
3E
SPRAYER COMPONENTS & USE INFORMATION, Continued
A
Pump
Handle
“C” Clip
D E
Pump Arm
Linkage
A B C
G
Pump
outlet
Pump
Locking Nut
F
Boot
Retainer
Nut
Ball
H
 Loading...