Installation
Ventilation
Your Chapter Preface Preamplifier has been designed to fit into a good quality
equipment rack or amplifier stand. In most installations locating the pre amp near
the source components is best. By doing this you minimise the length of any
unbalanced interconnect cable that you may be using.
Where permitting, locate the power amplifier near the loudspeakers and use a long-
er pair of balanced interconnects to your Preface unit.
The advantage to this strategy lies in the fact that the interconnects carry low
current signals that are easily transmitted over distances with greater accuracy
than the high current signals required by loudspeakers.
Your Preface Pre-Amplifier will drive the most demanding of cable runs and amplifier
loads with ease.
The back of your Preface Pre amplifier has been laid out to keep every
connection accessible. We recommend that you leave some clearance behind the
unit to fit cables without having to bend them excessively.
In order to conform with CE regulations your pre-amp is fitted with a rocker
style power switch on the rear of the unit as well as a ‘standby’ switch on the top
plate. This rear mounted rocker switch disconnects power from the power supply,
resulting in effective disconnection of the amplifier from the AC mains.
Please allow your pre-amplifier to have at least five centimetres between the top
cover and the next shelf up on an equipment rack.
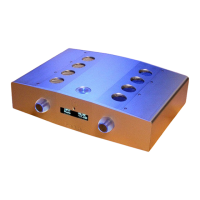
The circular vents on top of the pre-amp must not be obstructed, as this would
reduce the free flow of air through the unit.
7