signal is clean and strong. If it fails for more
than 48 hours, the Antenna Icon disappears.
The clock will still function as a quartz clock,
until it gets refreshed again. In most cases you
will find the clock properly synchronized when
you wake up the next morning.
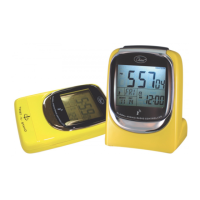
Radiating
Beacon
Symbol
(Fig.6 Example of a synchronized clock)
The clock is a radio device and like a cellular
phone or a radio, if you travel to areas not
served by one of the 4 transmitters and at
certain times of the day, especially during day
time, strong radio noise interference makes
synchronization impossible . Under these
conditions, the clock can be set to a manual
setting, as described in Section #6 below and
the clock will work accurately, just as any
quartz clock.
P.8
Once it is manually set, the clock will attempt to
synchronize regularly for 3 days. If all attempts
fail, the receiver is put into sleep mode to
conserve power. The clock will function as a
quartz clock until it is forced to attempt
synchronization again. ( See Section 5 ) ( In
order to allow adjustment of setting, the OFF -
SET time must be at 00.)
Slide the Bottom Switch to Time Set .
Press DST/HR/DAY (Upper Middle Button )
until the correct hour is set.
Press HOME/MIN/YR (Upper Right Button)
until the correct minute is set.
Press 12/24H/MONTH (Upper Left Button)
for AM/PM or 24 hour clock read-out
preference.
P.9
Slide the Bottom Switch to CALENDAR.
Press HOME/MIN/YR (Upper Right Button )
until the correct year is set.
Press 12/24H/MONTH (Upper Left Button)
until the correct month is set.
Press DST/HR/DAY ( Upper Middle Button )
until the correct day is set.
To Set Time
To Set Calendar
6. Manual Setting
Slide the Bottom Switch to ZONE / DST
position.
Press DST ( Upper Middle Button ) to
indicate if the clock is in DST time.
Final Important Step: When done, slide Bottom
Switch back to the LOCK position, for the clock
to operate and to be able to pick up signals
when in range again.
Slide the Alarm Button ( Middle Switch ) to
AL. SET position.
Press the DST / HR / DAY ( Upper Middle
Button) to set the Alarm hour.
Press the HOME / MIN/YEAR ( Upper Right
Button) to set the Alarm minute.
Slide the Alarm Button ( Middle Switch ) to
ON Position.
P.10
This function does not apply to all countries or
states in the USA. However, for those for
which it applies, follow these instructions to set
this clock to Daylight Savings/Standard Time.
For a five minute snooze , press the
Light / Snooze button on top of the clock.
Slide the Alarm Button ( Middle Switch ) to
OFF to permanently turn off the Alarm.
7. Alarm Setting
To turn off Alarm,
To Set DST (Daylight Savings Time)
SNOOZE - When the alarm sounds, to get a
little extra sleep and to stop the sound
temporarily, without permanently turning off
the alarm, push the LIGHT/SNOOZE Button
on top. The SNOOZE function allows extra
5 minutes of sleep, before the alarm sounds
off again. This can be repeated 4 times, at 5
minute intervals, before the Alarm function
is turned off.
LIGHT / SNOOZE
BUTTON
Note: Back light operates only when the clock
base is twisted to a standing position. This is
a safety feature to prevent from accidentally
depressing the switch and draining the battery
power when traveling.
P.1 1
(Fig.7)
8. Back Light and Snooze Functions
LIGHT - To see the time in the dark, push the
LIGHT/SNOOZE button on top to light up the
dial.