6
radio or television reception, which can be determined by turning
the equipment o and on, the user is encouraged to try to correct
the interference by one or more of the following measures:
1. Reorient or relocate the receiving antenna.
2. Increase the separation between the equipment and receiver.
3. Connect the equipment to an outlet on a circuit dierent from
that to which the receiver is connected.
4. Consult the dealer or an experienced radio/TV technician for
help.
To satisfy RF exposure requirements, a separation distance of 20
cm or more should be maintained between the antenna of this
device and persons during device operation. To ensure compliance,
operations at closer than this distance is not recommended..
ISED REGULATORY COMPLIANCE
This device contains licence-exempt transmitter(s)/receiver(s) that
comply with Innovation, Science and Economic Development Can-
ada’s licence-exempt RSS(s). Operation is subject to the following
two conditions:
This device may not cause interference.
This device must accept any interference, including interference
that may cause undesired operation of the device.
L’émetteur/récepteur exempt de licence contenu dans le présent
appareil est conforme aux CNR d’Innovation, Sciences et Dével-
oppement économique Canada applicables aux appareils radio
exempts de licence. L’exploitation est autorisée aux deux conditions
suivantes :
1. L’appareil ne doit pas produire de brouillage;
2. L’appareil doit accepter tout brouillage radioélectrique subi,
même si le brouillage est susceptible d’en compromettre le
fonctionnement.
This equipment complies with IC RSS-102 radiation exposure limits
set forth for an uncontrolled environment. This equipment should
be installed and operated with minimum distance 20cm between
the radiator and your body.
Cet équipement est conforme aux limites d’exposition aux radia-
tions IC CNR-102 établies pour un environnement non contrôlé. Cet
équipement doit être installé et utilisé avec une distance minimale
de 20cm entre le radiateur et votre corps.
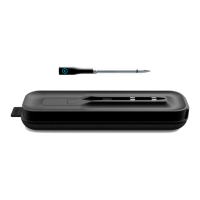
BEFORE FIRST USE
For best results, follow these steps before using your Smart Ther-
mometer for the first time. Note that the Smart Thermometer Hub
and Probe must be paired with the free CHEF iQ App in order to
work.
1. Remove all packaging materials and check to ensure that all
parts are accounted for.
2. Carefully wipe the probe down with a damp cloth to remove
any packing debris.
3. Charge the hub and the probe. Plug the smaller end of the
USB cord (included) into the charging port on the hub. Plug
the other end into a USB charger, such as a wall charger (not
included). If using a wall charger, be sure it’s plugged into an
electric socket. The ON button will light up. If the button is red
or blinking red, it means the hub’s charge is very low. During
charging, the button will blink green; it will turn solid green
when the hub is fully charged. The hub requires about 3 hours
to fully charge and will sustain its charge for at least 20 hours
of active use. When turned o, the hub will keep its charge for
up to 1 year.
4. Press the probe into the nest on the hub to charge it. Be sure
it’s securely nestled. The probe requires about 45 minutes to
fully charge and will sustain its charge for at least 40 hours of
active use. (However, after just 15 minutes of charging, you
can use the probe and it will work for several hours.)
5. While the hub and probe are charging, download the Chef
IQ App from the App Store or Google Play (if you don’t
already have it).
6. Pair your hub and probe as directed on the app to set up and
activate your new thermometer.
COOKING WITH THE SMART THERMOMETER
The Smart Thermometer makes cooking food to the perfect
doneness easy. Using the free CHEF iQ App, you can either set the
thermometer manually to the desired temperature or follow one
 Loading...