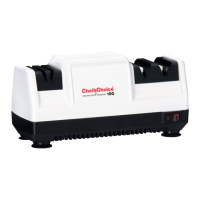
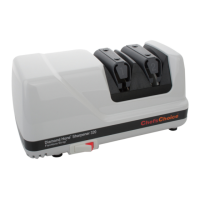
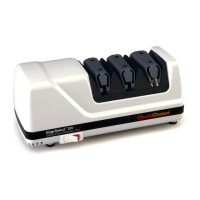
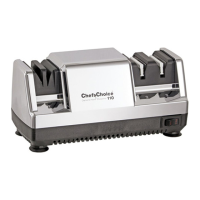
The Chef'sChoice® Professional Diamond Hone® Knife Sharpener Model 325, also known as Sharp-n-Hone®, is a two-stage electric knife sharpener designed to create and maintain exceptionally sharp, durable edges on a variety of knives. This device is engineered and assembled in the U.S.A. by EdgeCraft Corporation, a world leader in cutting edge technology. It is suitable for sharpening both straight-edge and serrated knives, including kitchen knives, pocket knives, and most sports knives.
Function Description
The Model 325 utilizes a unique two-stage sharpening system to achieve optimal results.
The combination of these two stages allows the Model 325 to create a multi-bevel edge that is demonstrably sharper and stays sharp longer than edges produced by conventional or hollow-ground methods. The device is capable of sharpening the entire cutting edge, from tip to bolster, ensuring highly precise edges.
Usage Features
The Chef'sChoice® Model 325 is designed for ease of use and optimal sharpening results, with specific procedures for different knife types and desired edge characteristics.
-
General Operation:
- Always operate the sharpener from the front side.
- Hold the blade horizontally and level, sliding it down between the plastic spring and the guide plane until it contacts the sharpening or stropping disk.
- Pull the knife toward you at a uniform rate (approximately 5 seconds for an 8-inch blade; less for shorter, more for longer).
- Maintain consistent blade movement; do not stop mid-stroke.
- Apply just enough downward pressure to ensure uniform contact with the abrasive disks; excessive pressure is unnecessary.
- Always alternate pulls between the left and right slots of each stage used to ensure symmetrical edge facets.
- Clean knives thoroughly before sharpening to prevent accumulation of food or grease on the disks.
-
Sharpening Straight-Edge Blades (First Time/Very Dull):
- Stage 1: Insert the blade into the left slot, pulling it toward you while moving it downward to engage the diamond disk. Sharpen the entire blade length, lifting the handle slightly for curved tips to keep the edge parallel to the table. Repeat with one full-length pull in the right slot. Generally, one or two pairs of pulls (alternating left and right) are sufficient.
- Burr Detection: Before moving to Stage 2, confirm the presence of a burr along one side of the edge by carefully sliding a forefinger across (not along) the edge. If no burr is detected, make additional pulls in Stage 1 until a distinct burr is formed.
- Stage 2: Once a burr is established, make one or two pairs of alternating pulls in Stage 2 to achieve a razor-sharp edge. Additional pulls in Stage 2 can further refine the edge for gourmet preparations.
-
Resharpening Straight-Edge Blades:
- For routine resharpening, primarily use Stage 2 (alternating left and right slots).
- If the knife does not quickly resharpen in Stage 2, return to Stage 1 for one or two pairs of alternating pulls to re-establish a burr, then finish in Stage 2 with one to two pairs of pulls.
-
Optimizing the Knife Edge:
- Gourmet Food Preparation: For the finest, smoothest cuts on fruits and vegetables, make three or more pairs of pulls in Stage 2 after initial sharpening in Stage 1. This refines the second facet for an exceptionally smooth edge.
- Game, Fish, and Fibrous Materials: To create an edge with more "bite" for fibrous materials, sharpen in Stage 1 until a burr is developed, then make only one alternating pair of pulls in Stage 2. This leaves sharpened microflutes that assist in cutting.
-
Sharpening Serrated Blades:
- Only use Stage 2 for sharpening serrated blades.
- Make generally five to ten pairs of alternating pulls in Stage 2 to sharpen the teeth and develop microblades along their edges. More pulls may be needed for very dull knives.
- If a serrated knife is severely damaged, a single fast pull (2-3 seconds for an 8-inch blade) in each of the right and left slots in Stage 1 can be performed before proceeding to Stage 2, but excessive use of Stage 1 should be avoided.
-
Important Considerations:
- The device is not intended for sharpening "parrot beak" knives, scissors, ax blades, or any blade that does not fit freely in the slots.
- Never use honing oils, water, or any other lubricant with the sharpener.
- Knives sharpened on the Model 325 will be extremely sharp; handle with extreme care.
Maintenance Features
The Chef'sChoice® Model 325 requires minimal maintenance to ensure its longevity and optimal performance.
- No Lubrication Required: All moving parts, motor, bearings, and sharpening surfaces are designed to operate without lubrication.
- Cleaning Exterior: The exterior of the sharpener can be cleaned by carefully wiping it with a damp cloth. Do not use detergents or abrasives.
- Cleaning/Dressing Stropping/Polishing Disks (Stage 2):
- The Model 325 includes a built-in accessory for manually cleaning and reshaping the Stage 2 stropping disks.
- This feature should only be used if the Stage 2 disks appear to be sharpening poorly or if it takes too many pulls to achieve a razor-sharp edge, indicating glazing from grease, food, or sharpening debris.
- To use, turn the sharpener ON, then press the small lever located in a recess on the rear of the sharpener (as shown in Figure 10) to the right or left and hold for 3 seconds. Then press the lever in the opposite direction and hold for 3 seconds.
- This action cleans and reshapes the active surface of one disk at a time.
- Use this tool infrequently, perhaps about once a year or less, as excessive use removes abrasive material from the disks, leading to premature wear.
- Metal Dust Removal:
- Approximately once a year, or as needed, accumulated metal dust inside the sharpener should be removed.
- Locate and remove the small rectangular clean-out cover on the underside of the sharpener (Figure 11).
- Metal particles will adhere to a magnet attached to the inside of this cover.
- Rub or brush off the accumulated filings from the magnet with a paper towel or toothbrush.
- If larger amounts of dust are present or if the Stage 2 disk has been cleaned, shake out any remaining dust through the bottom opening.
- Replace the cover securely with its magnet after cleaning.
By following these usage and maintenance guidelines, users can ensure that their Chef'sChoice® Professional Diamond Hone® Knife Sharpener Model 325 continues to deliver superior sharpening performance for years.