5
Installing the Food Grinder Attachment to the Stand Mixer
Note: Clean all grinder parts before first use (see section on “Cleaning and Maintenance”).
1. Always make sure stand mixer speed control is “off” and
the stand mixer is not plugged in during installation or
detachment of the grinder attachment.
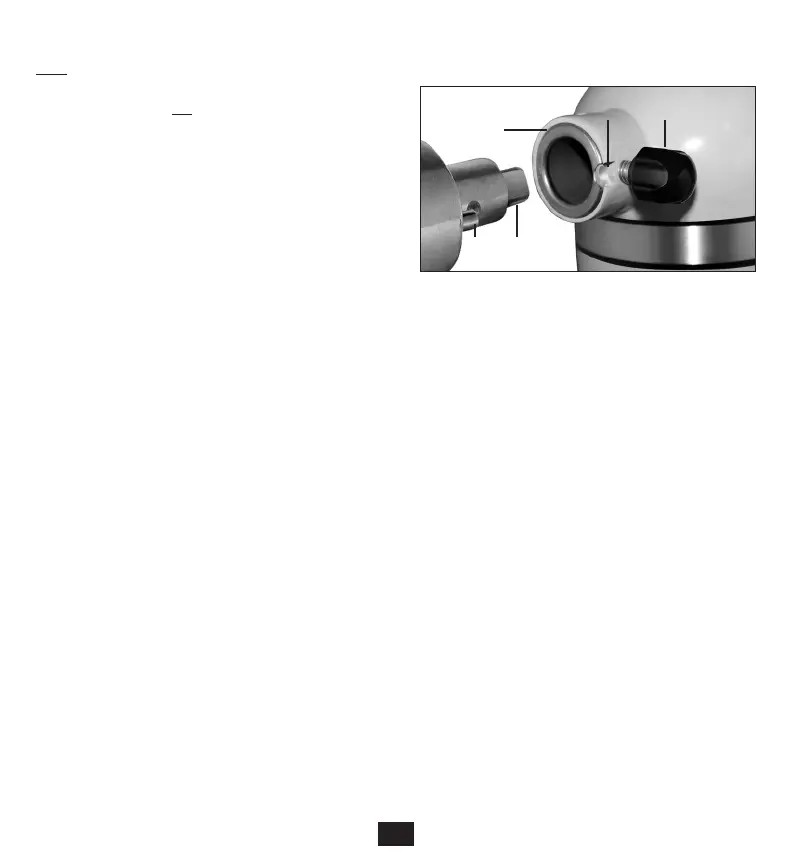
2. Loosen the locking knob (A in Figure 2), by turning it coun-
terclockwise.
3. If present, remove the attachment hub cover or flip up
the hub cover.
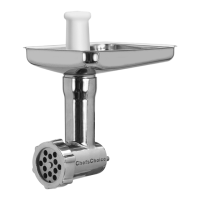
4. Insert the assembled grinder attachment (items 1 to 5 in
Figure 1) into the attachment hub (B in Figure 2) of the
stand mixer. Make sure the locking knob (A) screw is fully
retracted and does not interfere with the insertion. Slightly
twist the grinder attachment back and forth to ensure that
the grinder shaft (C in Figure 2) seats
properly into the square hub sockets of the stand mixer hub. When the grinder attachment is properly positioned,
the pin (D) on its housing will fit into the notch on the stand mixer rim (E). Tighten the locking knob snugly until the
grinder attachment is properly secured in the motor housing. Do not over tighten the locking knob.
5. Place the hopper (6 in Figure 1) on top of the feed/grinder tube (5 in Figure 1).
6. Insert the food pusher (7 in Figure 1) into the hopper opening.
Disassembling and Re-assembling the Grinder Attachment (see Figure 1)
1. Make sure stand mixer is turned off and unplugged.
2. Remove the food pusher (7) and lift off the food hopper (6).
3. Remove the grinder assembly from the stand mixer by first loosening the locking knob (A in Figure 2) and then,
with a slight back and forth twisting motion, pull out the grinder assembly.
4. While firmly holding the grinder assembly, loosen and remove the locking ring. (Tip: it may be easier to loosen the
locking ring while grinder attachment is still locked in the stand mixer.)
5. Carefully remove the grinding plate (2). (Caution! The holes have sharp edges.) Observe that the grinding plate has
a half circle notch that aligns with a similarly shaped key in the feed/grinding tube.
6. Next, carefully remove the cutting blade (3). (Caution! The blade has very sharp edges.) Observe that the flat sides of
the cutting blades face and are adjacent to the grinding plate. It is extremely important that when re-assembling
the grinder head, the cutting blade be properly positioned. Failing to do so may damage the unit.
7. Now, pull out the auger (4).
8. To assemble the grinder head, follow the above steps in reverse. When attaching the locking ring (1),
do not over tighten.
Figure 2. Installing the food grinder attachment to
the stand mixer.
CD
B
AE