REV. C PN J63143 - 6 -
(44mm) of clearance around the venting on both the front and the rear of the
pump. Locate the pump so there is direct access to the power cord plug.
The pump is rated for indoor use only. For applications that are subject to
splashing, make sure the pump is mounted horizontally level with splash guard in
place. Vertical mountings require the purchase of optional hood (J63004).
Select a location that does not subject the timers LCD to direct sunlight.
2) Verify the electrical requirements for the pump as listed on the name plate
and connect to an appropriate electrical source in compliance with local codes for
the specific application.
3) Relieve the system pressure and drain the piping run where the injection
fitting is to be installed. See Figure 2 for reference. The injection fitting must
not be installed in a dead end pipe or a deeply recessed tee. It should be
installed so as to place the tip at the center of the fluid stream as indicated
in Figure 2. The injection fitting is supplied with .25-in NPT threads. If necessary
drill a .44-in (11mm) diameter hole and using care not to tap to deeply, tap for
.25-in NPT.
4) Apply Pipe tape to the injection fitting threads and install into piping system.
Do not remove the plastic sleeve on the tip of the fitting; it is a functional
part – see Figure 4.
CAUTION: Inspect the piping system and eliminate piping cross-connections to
prevent feeding chemical to areas not needing treatment.
To install tubing remove the compression fitting‟s coupling nut and slide onto
tubing. Place tubing onto fitting and hand tighten the coupling nut. NOTE:
Immerse tubing in hot water to soften prior to pushing on to fitting. Hand-tighten
only, do not use wrenches.
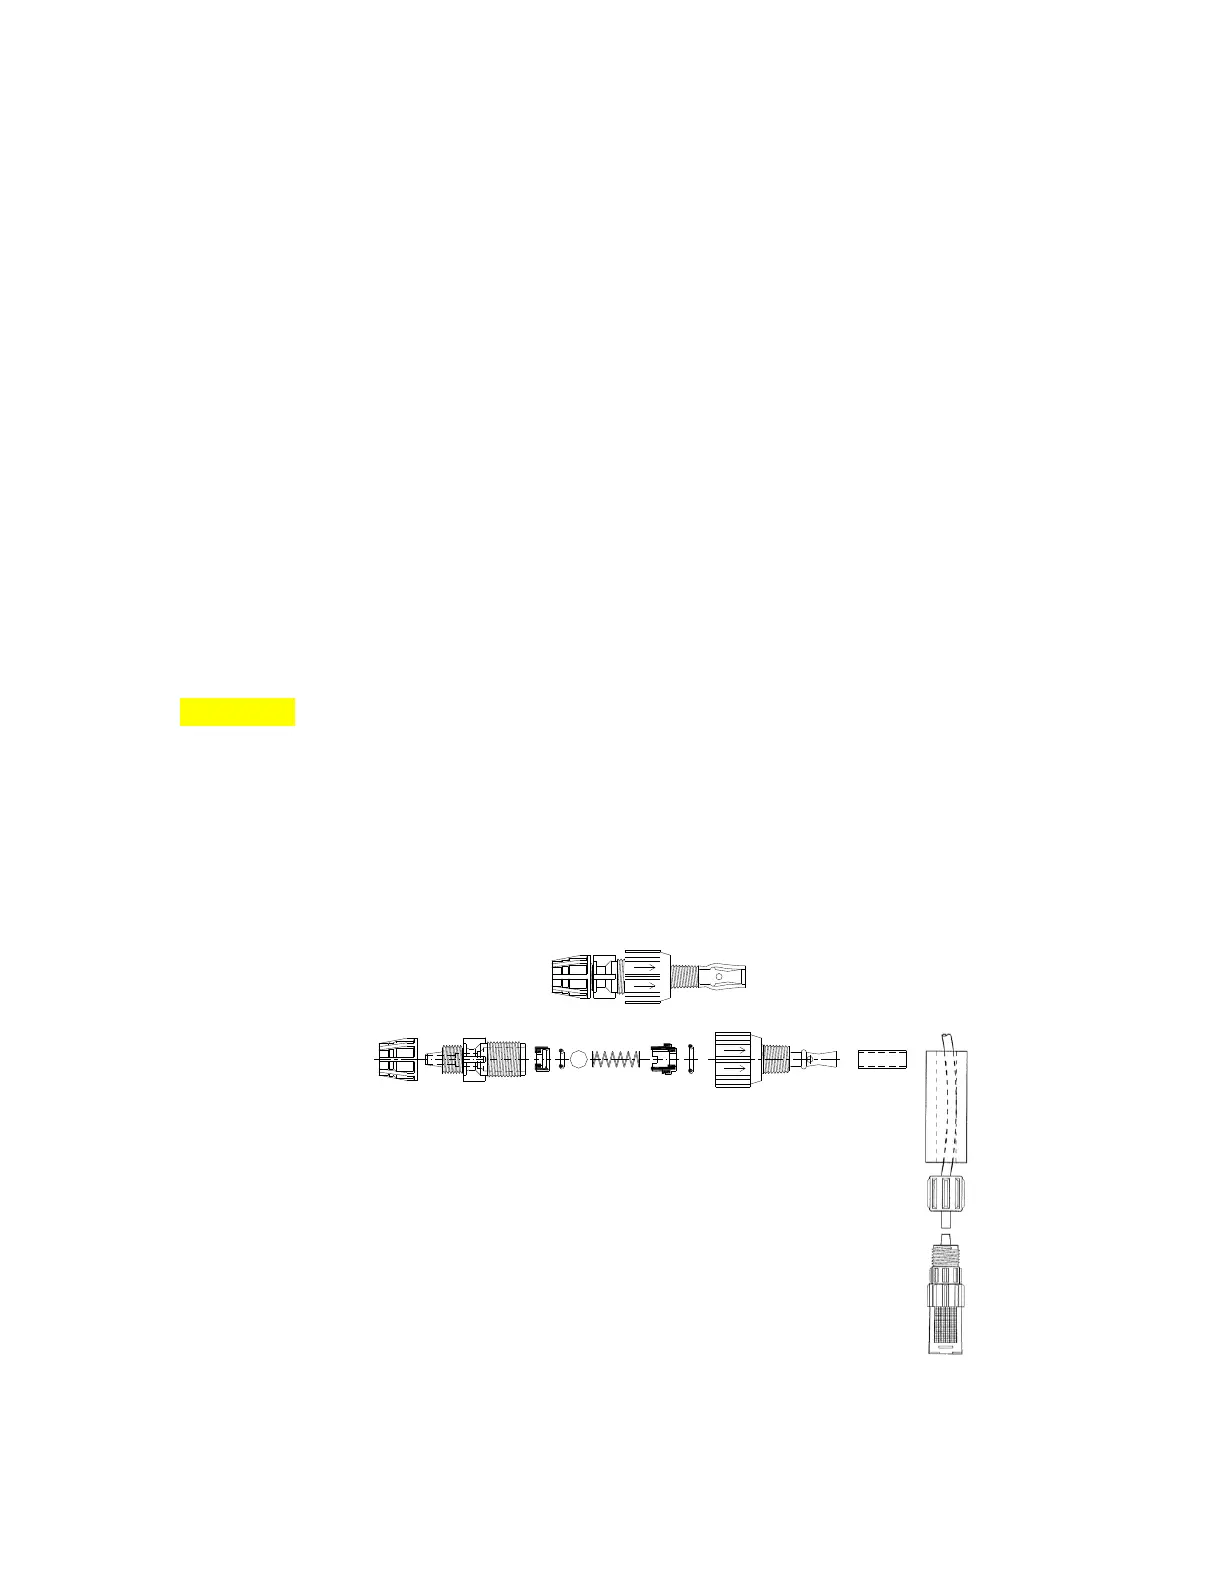
Figure 4: Injector valve
5) Referring to Figure 5 slide ceramic strainer weight on
suction tubing first then remove the coupling nut from the
strainer and slide onto tubing next. Push the end of the
tubing onto the strainer and hand tighten the coupling nut.
Hand-tighten only, do not use wrenches. Note: Immerse
tubing in hot water to soften prior to pushing on fitting.
Figure 5: Ceramic-
Weighted Strainer
 Loading...