42
STORING OF OTHER REMOTE CONTROLS
The procedure remains the same in all 3 cases. Only the order in which the remote controls
are used changes. Please refer to the following scheme in order to nd the procedure
which meets your requirements:
**Remote control of the Skipper series (not LCD) or Giro series
LEGEND:
Tn/Cn: already stored remote control /channel (not LCD) LCDx: Device to be stored on a LCD remote control
Tx/Cx: remote control/channel to be stored (not LCD) LCDn: Device already stored on a LCD remote control
Before using the keys in the given sequence:
- Make sure that the motor or receiver is powered.
- On Skipper Senso go to the “System Status” screen.
- On the Multi-channel remote controls (Skipper series or Giro series) position yourself
on the desired channel.
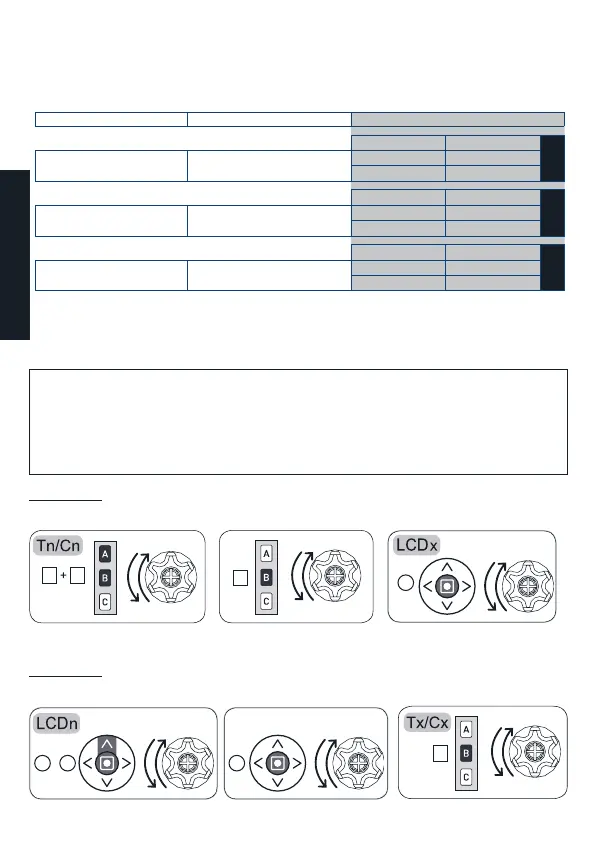
Procedure 4
To add an LCD remote control to a device created with another Cherubini
remote control:
Procedure 5
To add another Cherubini remote control to a device created with an LCD
remote control:
A B
2sec
B
B
Already stored remote control
Already stored LCD remote control
LCD remote control to be stored
Remote control to be stored
B
B
+
A
B
2sec
ENGLISH
To add:
To another device created using:
Procedure:
Tn/Cn LCDx
4
LCD
remote control
LCD
remote control
LCD
remote control
(another) LCD
Another Cherubini
remote control*
Skipper/Giro LCD
remote control
LCD remote control
LCD remote control LCD remote control
A+B; B
A+B; B
LCDn Tx/Cx
5
Another Cherubini
remote control*
Skipper/Giro
B (2 sec)
A+B; B B (2 sec)
B (2 sec)
LCDn LCDx
6
remote control