6.
Adjust the blade tension knob clockwise until it is just right enough so no blade slippage occurs.
Do not tighten excessively.
7.
Place 2-3 drops of oil on the blade.
8.
Replace the blade guard.
ADJUSTING THE BLADE TRACKING
This adjusting has been completed and power-tested at the factory. The need for adjusting should
rarely occur when the saw is used properly. If the tracking goes out of adjusting is listed below:
Step 1: Turn simultaneously with adjusting set screw to
make the blade track against the shoulder of the pulley.
To increase blade tension
To relieve blade tension
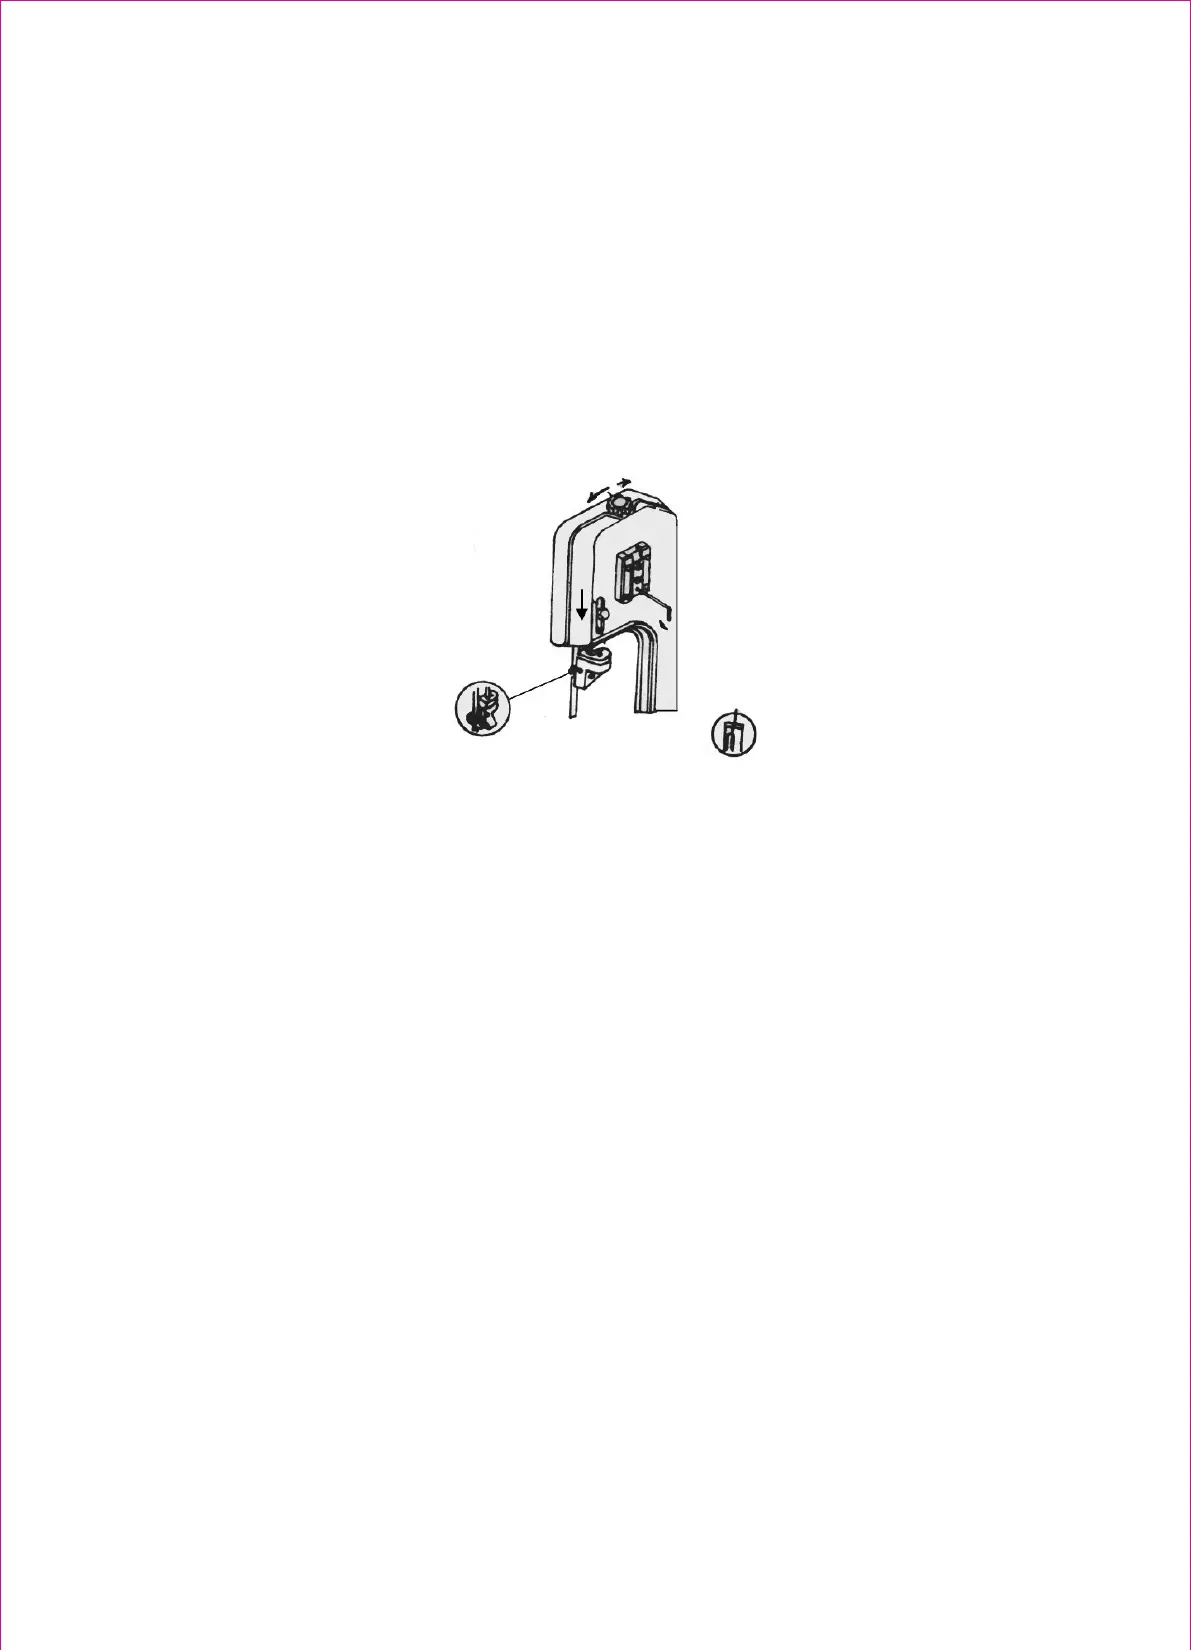
Step 5: Adjust the blade
adjustable seat according to the
material size.
The arrow indicates the moving direction
Step 6: Adjust guide assembly to
where the blade just touches the
back-up bearing.
Step 2: Loosen this hex.
/ Head screw-before turning
/ the adjusting set screw.
----
Step 4:
Tighten after adjusting
Step 3: Turn simultaneously with
blade tension knob to make
blade track against shoulder of
pulley
Figure (3)
HORIZONTAL CUTTING OPERATION
Before operating, please read instruction manual and examine every part including speed, Blade
selection, guide assemble position, etc. Operation is as follows:
WORK SET UP
1.
Raise the saw head to the vertical position.
2.
Open the vise to accept the piece to be cut by rotating the wheel at the end of base (counter
clockwise).
3.
Place the work piece on the saw bed. If the price is long, support the end.
4.
Clamp the work piece securely in the vise by rotating the hand wheel clockwise.
CUTTING
Close switch, letting the head down slowly onto the work, Do not drop or force. Let the weight of the
saw head provide the cutting force. The saw automatically shuts off at end of the cut.
Method of adjusting blade:
A.
Loosen the screw #11.
B.
Adjust the blade adjustable seat #64 to make the blade vertical to bed.
C.
Place the square on the bed to check if the blade is vertical, if not, repeat the process A to C.
D.
Tighten the screw #11.
5