60
61
STAGE 1 & 2
REAR-FACING INSTALLATION
STAGE 1 & 2
REAR-FACING INSTALLATION
9
8
7
6
5
4
3
2
1
Place Child Restraint rear-facing on selected vehicle seat. Make sure it is
not blocking the vehicle belt buckle. Push the Child Restraint back until
it touches the vehicle seat back and make sure the base stays flat on the
vehicle seat. Do not exceed the rear-facing maximum base overhang of 3
inches over the front edge of the vehicle seat.
4
3
REAR-FACING SETUP REAR-FACING SETUP
3
4
• LATCH installation continued on page 62.
• Lap-Shoulder Belt installation continued on page 68.
• Lap Belt Only installation continued on page 72.
Installation Options:
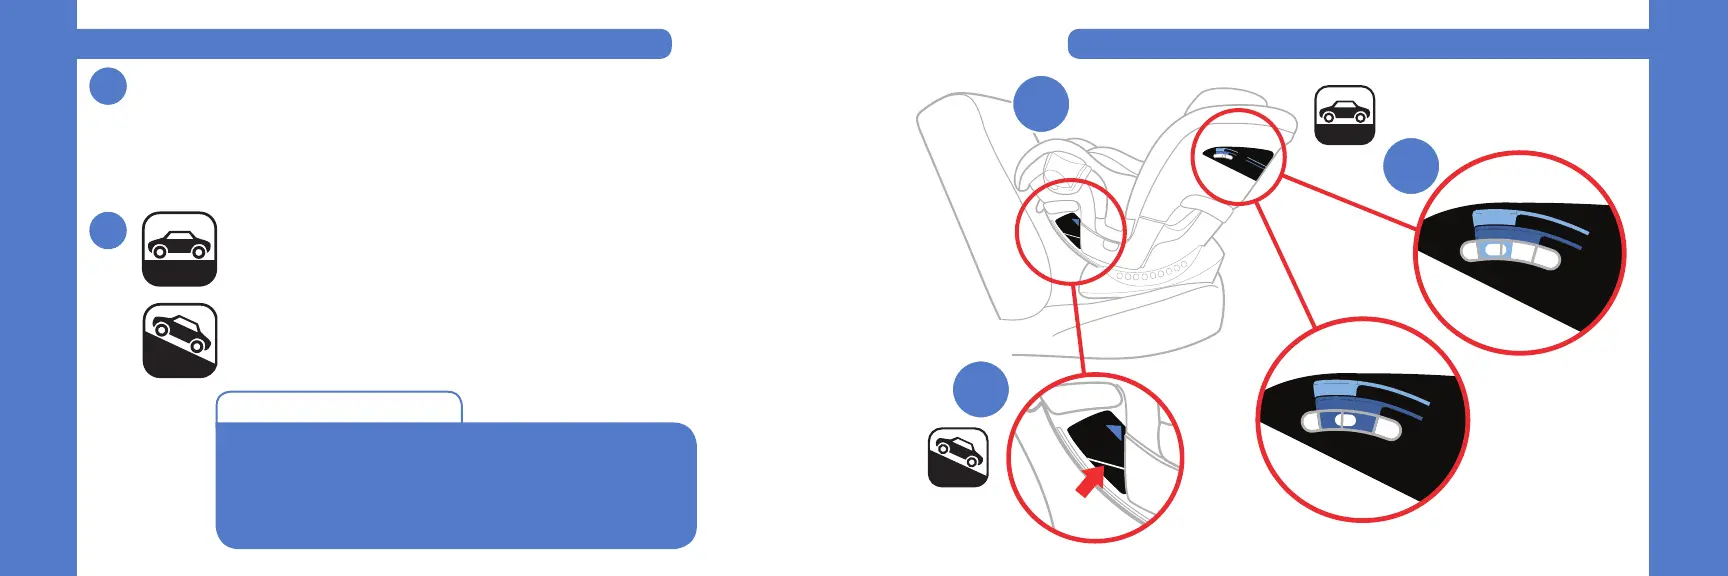
Installation on a Level Surface: Locate the Bubble Level Indicator
label and re-adjust the seat recline to any position that the Bubble
falls between the lines for Stage 1 & Stage 2 installation.
Installation on a Slope: Locate the Level Line on the blue label
near the rear-facing belt path. Adjust the seat recline so that the
Level Line is level with the ground.
L E V E L
SLO PE
4
Stage 2
Stage 1







 To Next Page