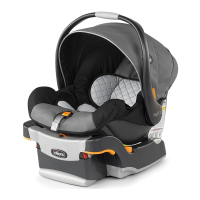
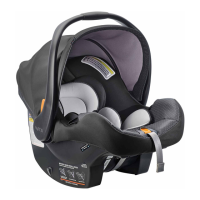
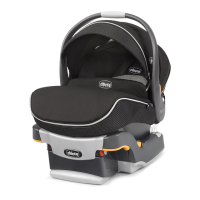
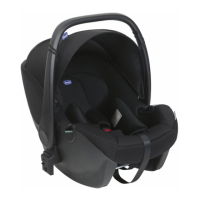
Do you have a question about the Chicco KEYFIT and is the answer not in the manual?
Ensure the infant restraint system is installed rear-facing.
Position in a safe location and verify infant meets weight/height requirements.
Secure infant properly in carrier and system securely in vehicle.
Check that the recline angle of the infant restraint system is correct.
Complete and mail the registration card for safety recalls.
Contact customer service for help with installation or use.
Understand all instructions and warnings in the user guide before use.
Ensure the infant meets the weight and height criteria for the infant restraint system.
Snugly adjust the harness around the infant, ensuring no slack.
Do not use clothing or blankets that interfere with harness fastening.
Always check the buckle is latched and never leave the infant unattended.
Never place the restraint in a position with a frontal airbag.
Always install the infant restraint system rear-facing for optimal safety.
Install in a rear vehicle seat when possible for increased child safety.
Always secure the restraint using UAS or a vehicle belt.
Before each use, verify the infant restraint system is tightly secured in the vehicle seat.
Ensure the carrier is securely attached to the base each time it is used.
Never travel with the infant restraint system unsecured in a vehicle.
Never leave an infant unattended in the carrier.
Avoid soft surfaces for the carrier and ensure harness straps are used.
Prevent falls near edges and ensure handle is locked before lifting.
Do not place carrier in shopping carts; cover from sunlight.
Do not use if harness, straps, or parts are cut, frayed, broken, or missing.
Never modify or use non-manufacturer accessories with the system.
Do not use if over 6 years old or involved in a crash, even without visible damage.
Components for adjusting and verifying base recline angle.
Parts for connecting and securing the UAS to the vehicle.
Mechanisms for attaching carrier and compartments for storage.
Mechanism to lock the vehicle's shoulder belt for secure installation.
Located at the rear of the base, used for storing the user guide.
Adjusting the base recline angle using buttons and indicator.
Steps to detach the UAS from the vehicle anchor bars.
How to properly store the UAS connectors and pull strap when not in use.
Using the shoulder belt lockoff to secure the base with the vehicle's seat belt.
Handle used to detach the carrier from the base.
Components of the infant harness system.
Openings in the carrier for routing harness straps.
Tabs used to attach the head support.
Handle for carrying the carrier, with buttons to adjust or lock it.
Sun canopy for the carrier and its attachment point.
Components for securing the infant within the carrier.
Items for improving infant fit and comfort.
How to fasten and release the harness buckle.
How to use the chest clip for proper infant positioning.
Adjusting the harness tightness for a snug fit.
Description of the three locked positions for the carrier handle.
Ensure handle is locked before lifting and never hang items from it.
How to grab and rotate the canopy bow to adjust its position.
Steps to detach the canopy fabric from the carrier frame.
Provides additional support and secure harness fit for smaller infants.
Steps to correctly install the newborn insert into the carrier.
Provides additional support for a young infant's head.
Steps to attach the head support using fastener tabs.
Aligning and pushing the carrier firmly into the base until it clicks.
Using the release handle to detach the carrier from the base.
Infants should ride rear-facing until 1 year old and 20 lbs.
Weight, height, and head position criteria for using the system.
Specific weight limits for using the newborn insert.
Steps to re-route harness straps to the correct shoulder slots.
Loosen harness, release buckle, place infant in seated position.
Pull harness straps over shoulders and around waist, ensuring correct slot height.
Insert buckle tongues, snap chest clip, and tighten harness.
Verify harness snugness, chest clip position, and strap flatness.
Avoid bulky clothing; place blankets over secured infant.
Utilize newborn insert and head support for better fit and comfort.
Verify harness straps are at or below infant's shoulders.
Ensure chest clip is centered at infant's chest, level with armpits.
Confirm harness is snug, with no pinchable fold.
Lists motorized, door-mounted, and non-locking ELR lap belts as unsafe.
Children are safer in rear seating positions than front seats.
Install only in forward-facing vehicle seats, never rear or side facing.
Never install in a seat with a frontal air bag due to risk of injury.
Position base, adjust angle using buttons and indicator.
Route vehicle belt, tighten belt, and secure shoulder belt under lockoff.
Ensure lap belt is locked and stored properly if used alone.
Verify belt tightness, base stability, bubble, and attach carrier.
Steps to detach UAS connectors from storage pockets.
Place base, adjust angle, and attach UAS connectors to anchor bars.
Pull UAS belts tight and store the pull strap.
Check UAS belt tightness, base stability, bubble, and attach carrier.
Steps to loosen UAS, detach connectors, and remove the base.
Properly storing UAS connectors and pull strap.
Positioning carrier, routing belt under guides, tightening, and checking installation.
Positioning carrier, routing, tightening aircraft belt, and checking.
Cannot use with base in aircraft; contact airline prior to travel.
Instructions for detaching the seat pad from the carrier.
Instructions for reattaching the seat pad correctly.
Sponge clean plastics and harness with mild soap and water.
Sponge clean or rinse buckle and UAS hardware in warm water.
Contact information for ordering replacement parts.
| Weight Capacity | 4-30 lbs |
|---|---|
| Height Capacity | Up to 30 inches |
| Base Included | Yes |
| Harness Type | 5-point harness |
| Type | Infant Car Seat |
| Stroller Compatibility | Compatible with Chicco strollers |
| Installation Type | LATCH or seat belt |
| Infant Insert | Yes |
| Weight of Car Seat | 9.6 lbs |
