EasyManua.ls Logo

Chicco KeyFit 35 - User Manual

Chicco KeyFit 35
3 pages
Print Icon
To Next Page IconTo Next Page
Loading...
WARNING: Avoid serious injury or death to your child. Never
use your KeyFit 35 Child Restraint without the softgoods in place.
You must read and understand the Softgood Removal instructions
and the instructions in the User Guide. If you do not understand
these instructions, DO NOT attempt to remove the softgoods,
STOP and call Chicco at 1-877-424-4226.
INSTRUCTIONS: KeyFit 35 Softgood Removal
IMPORTANT: Please also refer to the instructions that came with your product.
Rotate the Carry Handle up into the carry position. To remove the Canopy, unhook the Elastic Straps on both sides,
below the Carry Handle hub. Undo both Toggles on the back of the Child Restraint. On one side of the Canopy, press the
button on the Canopy Mount and pull out the bow. Repeat for the other side of the Canopy and remove. Then rotate the
Carry Handle back into stationary position.
Refer to User Guide if needed.
1
Press the Harness Adjuster Button and loosen the
Harness Straps. Undo the buckle and chest clips.
2
Remove the optional Head Rest Insert and Newborn
Positioner.
Refer to User Guide if needed.
4
Remove the Crotch Strap Pad by pushing the fabric Tab
through the slot on the BACK of the Harness Buckle. Then
pull Tab out of the FRONT and remove Crotch Strap Pad.
IMPORTANT! If Crotch Strap Pad prevents harness from properly
fitting small Infant, it should be removed.
3
1
SS0030E_01
PMS 2747 and PMS 186
Remove both Shoulder Pads.
Undo the hook and loop
sections located on the outside seam of the Shoulder Pad.
5
Question and Answer IconNeed help?

Do you have a question about the Chicco KeyFit 35 and is the answer not in the manual?

Summary

KeyFit 35 Softgood Removal Instructions

Safety Precautions

Warning to use softgoods and read instructions carefully.

Canopy Removal Procedure

Step-by-step guide to detach the canopy from the carrier.

Harness and Pad Removal Procedures

Steps for loosening harness, removing crotch pad, headrest, and shoulder pads.

Head Rest and Harness Strap Removal

Head Rest Fabric Removal

Instructions for removing headrest fabric by pulling down and untucking bottom pocket.

Seat Back Fabric Removal

Guide for removing seat back fabric around the harness adjuster strap cover.

Re-attaching Softgoods

Head Rest Fabric Re-attachment

Steps to re-attach headrest fabric by sliding bottom edge into backplate pocket.

Seat Pad and Harness Re-attachment

Steps for placing seat pad and feeding harness straps through fabric.

Final Assembly and Cleaning

Carrier and Harness Re-assembly

Attaching harness straps to splitter plate and ensuring correct orientation.

Canopy and Handle Re-attachment

Re-attaching canopy bow to mounts and elastic straps below handle hub.

Cleaning Instructions

Guidance on spot-cleaning or machine washing fabrics, and drying instructions.

Overview

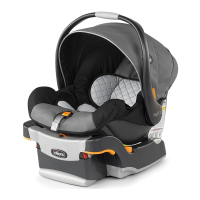
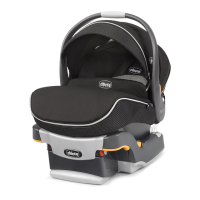
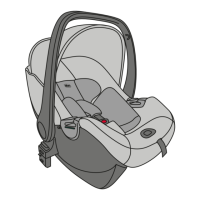
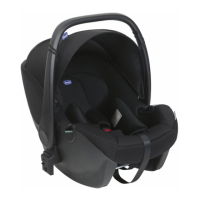
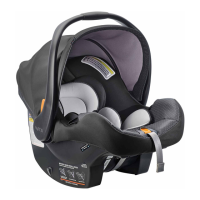
The Chicco KeyFit 35 Child Restraint is a safety device designed to protect infants during travel. It features a softgood system that provides comfort and support for the child, and these softgoods can be removed for cleaning or adjustment. The device is equipped with a carry handle for easy portability and a canopy to shield the infant.

Function Description:

The primary function of the KeyFit 35 Child Restraint is to secure an infant safely in a vehicle. It incorporates a harness system, including shoulder straps, a crotch strap, and a buckle, to hold the child snugly in place. The headrest and newborn positioner are designed to provide additional support and a proper fit for smaller infants. The device also includes a canopy to protect the child from sun or other elements. The softgoods are integral to the child's comfort and safety, ensuring that the child is properly cushioned and positioned within the restraint.

Usage Features:

Softgood Removal and Re-attachment:

The manual provides detailed instructions for removing and re-attaching the softgoods, which is essential for cleaning or adjusting the fit for the child.

  • Initial Setup for Removal:
    • Rotate the carry handle to the carry position.
    • Unhook the elastic straps below the carry handle hub.
    • Undo both toggles on the back of the child restraint.
    • Press the button on the canopy mount and pull out the bow on each side to remove the canopy.
    • Rotate the carry handle back to the stationary position.
  • Harness and Pad Removal:
    • Press the harness adjuster button and loosen the harness straps.
    • Undo the buckle and chest clips.
    • Remove the crotch strap pad by pushing the fabric tab through the slot on the back of the harness buckle, then pulling it out from the front. This pad is important for proper fit, and if it prevents a small infant from fitting correctly, it should be removed.
    • Remove the optional head rest insert and newborn positioner.
    • Remove both shoulder pads by undoing the hook and loop sections on the outside seam.
  • Head Rest Fabric Removal:
    • Flip the carrier over and adjust the head rest to the lowest position using the height adjuster plate.
    • Remove both shoulder harness straps from the splitter plate.
    • Flip the carrier upright and pull the shoulder harness straps to the front.
    • Adjust the headrest to the highest position.
    • Pull down and untuck the bottom fabric pocket from the headrest back plate.
    • Guide the headrest fabric from each side of the headrest frame and remove it.
  • Main Seat Pad Removal:
    • Place the carrier on its side and unhook the elastic straps located just below the handle's rotating hinge.
    • Flip out the plastic tabs located below the seat belt guide. Repeat for the other side.
    • At the top and side of the carrier, flip the plastic tabs out from under the lip of the carrier.
    • Pull the fabric from the top and sides of the carrier.
    • Pull forward on the seat back fabric and guide the head rest through the opening on the seat back.
    • Pinch the seat pad fabric at the corner of the harness adjuster strap cover.
    • Pull forward on the seat pad edge to remove the fabric from around the harness adjuster strap cover. The plastic harness adjuster strap cover is not removable.
    • Remove the seat pad from the carrier. The manual explicitly warns against using the child restraint without the seat pad.
  • Re-attaching the Softgoods:
    • Head Rest Fabric Re-attachment:
      • Adjust the head rest to the highest position.
      • Slide the bottom edge of the backplate into the pocket on the back of the headrest pad.
      • Carefully pull both head rest side pockets around and over the headrest frame.
      • Adjust the head rest to the lowest position and place the seat pad onto the carrier shell.
      • Slide the fabric opening around the head rest frame.
    • Main Seat Pad Re-attachment:
      • Thread the crotch strap and harness straps through the correct openings.
      • Insert the seat belt guides through the side openings on the fabric.
      • Slide the fabric over both seat belt guides.
      • Feed the harness straps, chest clip sections, and crotch buckle through the fabric openings.
      • Fit the fabric opening around the edges of the adjuster strap cover.
      • Pull the bottom edge of the fabric down and around the bottom of the carrier frame, working your way to the top.
      • On the top of the carrier, flip the plastic tab and tuck it under the edge of the carrier frame.
      • Place the carrier on its side and fold the side plastic tab under the edge of the carrier shell. Locate and attach the elastic strap to the hook, then tuck the material with the elastic strap under the bottom of the handle. Repeat for the other side.
      • Make sure the head rest is in the lowest position.
      • Buckle the crotch strap buckles and chest clip.
      • Lay the harness straps over the seat back to ensure they are not twisted and are oriented correctly.
      • Thread harness strap ends into the openings on the height adjuster plate.
    • Harness and Pad Re-attachment:
      • Flip the carrier over and pull the harness straps through the openings.
      • Attach both harness straps to the splitter plate, ensuring they are above the height adjuster plate and not twisted.
      • Flip the carrier to the front and undo the buckle and chest clip to attach the optional newborn positioner and head rest insert.
      • Attach the crotch strap pad by pushing the fabric tab through the slot on the front of the harness buckle, then pulling it out from the back. This pad should be removed if it prevents a small infant from fitting properly.
      • Buckle the crotch strap and chest clips.
      • Pull on the harness adjuster strap to tighten the harness and check that the straps are working correctly.
      • Attach both shoulder pads by securing the hook and loop sections on the outside harness edge.
    • Canopy Re-attachment:
      • Rotate the carry handle up into the carry position.
      • Insert one side of the canopy bow into the canopy mount until it clicks, then repeat for the other side.
      • Pull on the bow on each side to check for secure attachment.
      • Re-attach the elastic straps below the canopy handle hub on both sides.
      • Pull both toggles through loops on the back of the canopy.
      • Rotate the carry handle back into the stationary position.

Safety Warnings:

The manual emphasizes several critical safety warnings:

  • Never use the KeyFit 35 Child Restraint without the softgoods in place.
  • Users must read and understand all instructions. If instructions are not understood, do not attempt softgood removal and contact Chicco customer service.
  • Never use the child restraint without the seat pad.
  • Ensure harness straps are not twisted and are securely attached to the splitter plate.
  • The crotch strap pad should be removed if it prevents the harness from properly fitting a small infant.

Maintenance Features:

Cleaning Instructions:

  • Fabrics can be spot-cleaned with mild soap and water.
  • Alternatively, fabrics can be machine washed in cold water on a delicate cycle using mild detergent.
  • When washing, attach hook and loop parts together.
  • Hang to dry.
  • DO NOT BLEACH.
  • For additional care and maintenance, users should consult their product manual.
  • For assistance with removing or replacing softgoods, Chicco Customer Service can be contacted at the provided phone number.

The Chicco KeyFit 35 Child Restraint is designed with both safety and practicality in mind, offering a comprehensive system for securing infants while allowing for necessary cleaning and adjustments to maintain hygiene and a proper fit over time.

Chicco KeyFit 35 Specifications

General IconGeneral
Weight Capacity4-35 lbs
Height CapacityUp to 32 inches
BaseIncluded
Recline Positions5
Harness Type5-point
Shell MaterialEPS energy-absorbing foam
LATCH CompatibleYes
Rear-FacingYes
Side Impact ProtectionYes
Removable CoverYes
CompatibilityCompatible with Chicco strollers
Installation TypeLATCH, vehicle seat belt
Infant InsertYes
Car Seat Weight10 lbs (carrier only)

Related product manuals