Do you have a question about the Chicco Lullaby SE and is the answer not in the manual?
Read all instructions before use, ensure child supervision, check assembly and parts for safety.
Avoid suffocation by ensuring no gaps between padding and sides, and not using soft bedding.
Prevent strangulation by avoiding cords, netting, and window blind cords near the child.
Keep product away from heat sources, place infants on back for sleep, and do not overcrowd.
Remove unit from bag, unfasten straps, and stand the folded unit upright.
Pull up the center floor hub to the level of the top rails before proceeding.
Lift each top rail until it locks securely into place.
Push down the center floor hub until the feet rest on the floor, ensuring a flat bottom.
Place the mattress pad with the padded side up and fold straps under the floor.
Locate strap holes and thread the hook and loop straps/D-rings through the playard floor.
Turn playard on side, pull straps through frame, and secure them tightly with D-rings and hook/loop.
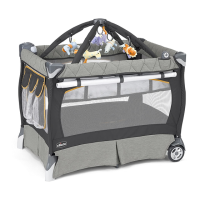
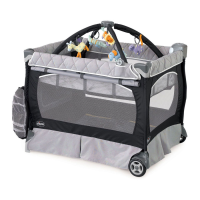
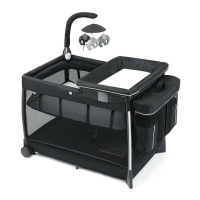
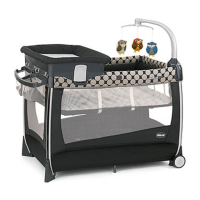
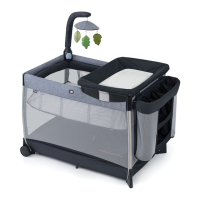
Lay bassinet over playard with snaps down, and push all twelve bassinet clips securely onto top rails.
Slide metal bars into tubing sleeves inside the bassinet and connect the bars together.
Fasten the four end snaps and pull eight toggles through loops on the bassinet sides.
Place the mattress in the bottom of the bassinet, ensuring all straps are folded under it.
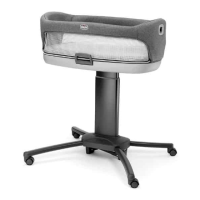
Always keep child within arm's reach; stop using table when child reaches 25 lbs (11.4 kg).
Never leave child unattended; remove table when child is in playard; do not use if damaged.
Pull back the fabric sleeve on the changing table to reveal the metal tube inside it.
Attach metal end pieces to poles, ensuring the metal spring button passes completely through the holes.
| Type | Playard |
|---|---|
| Mattress Included | Yes |
| Bassinet Included | Yes |
| Changing Table Included | Yes |
| Mobile Included | Yes |
| Music | Yes |
| Vibration | Yes |
| Canopy | Yes |
| Storage Pockets | Yes |
| Wheels | Yes |
| Foldable | Yes |
| Fabric | Polyester |
| Remote Control | No |
| Weight Limit | 30 pounds |
| Material | Fabric |
| Power Source | Battery |