Installation Instructions TIL1X2AA / TIL1X3AA / TIL1X4AA / TILVABAA
11
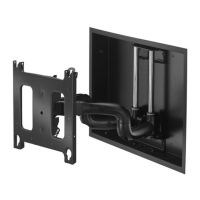
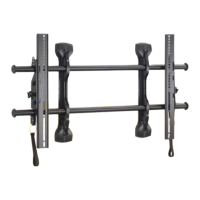
Adjustments
Depth Adjust
The depth of each wall mount section is controlled by the
leveling feet.
1. Using a level on the front of the housings in various places,
loosen or tighten the leveling feet adjust bolt (using a 1"
socket and T-handle driver) to assist in leveling the LED
housings across the various wall mounts until plumb. (See
Figure 18)
CAUTION: Over-torquing may cause damage. Do NOT
use a drill to make the depth adjustment.
Figure 18
Fastener Installation Methods
IMPORTANT ! : See Table 1 for appropriate hardware
and pilot hole sizes for various wall types.
IMPORTANT ! : The expanse of the LED wall will most
likely mean that attachment of the wall mounts will not all
be in studs. The attachment method will most likely vary
throughout the installation, and more than one of the
various methods outlined here will most likely be used.
Wood Stud
1. Use one 5/16" x 2-1/2" hex flange head lag bolt (F) and one
5/16" washer (J) through product and into pilot hole. (See
Figure 19)
2. Repeat for remaining pilot holes.
Figure 19
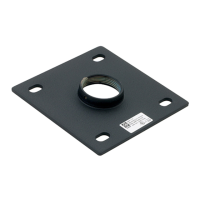
Concrete or Concrete Block
1. Install one UX10X60R anchor (G) into each pilot hole using
a hammer, making sure that the anchor is flush with the wall.
(See Figure 20)
2. Use one 5/16" x 2-1/2" hex flange head lag bolt (F) and one
5/16" washer (J) through product into each anchor in wall.
(See Figure 20)
3. Repeat for remaining pilot holes.
Figure 20
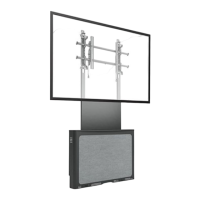
Leveling feet
locations
1
[LED housings not shown]