OXCM1U Installation Instructions
6
INSTALLATION
IMPORTANT ! : The following procedure assumes that:
• Two UL Listed ODAC Series Floor/Ceiling
Columns (not included) has been properly
installed following instructions provided with plate
and pipe.
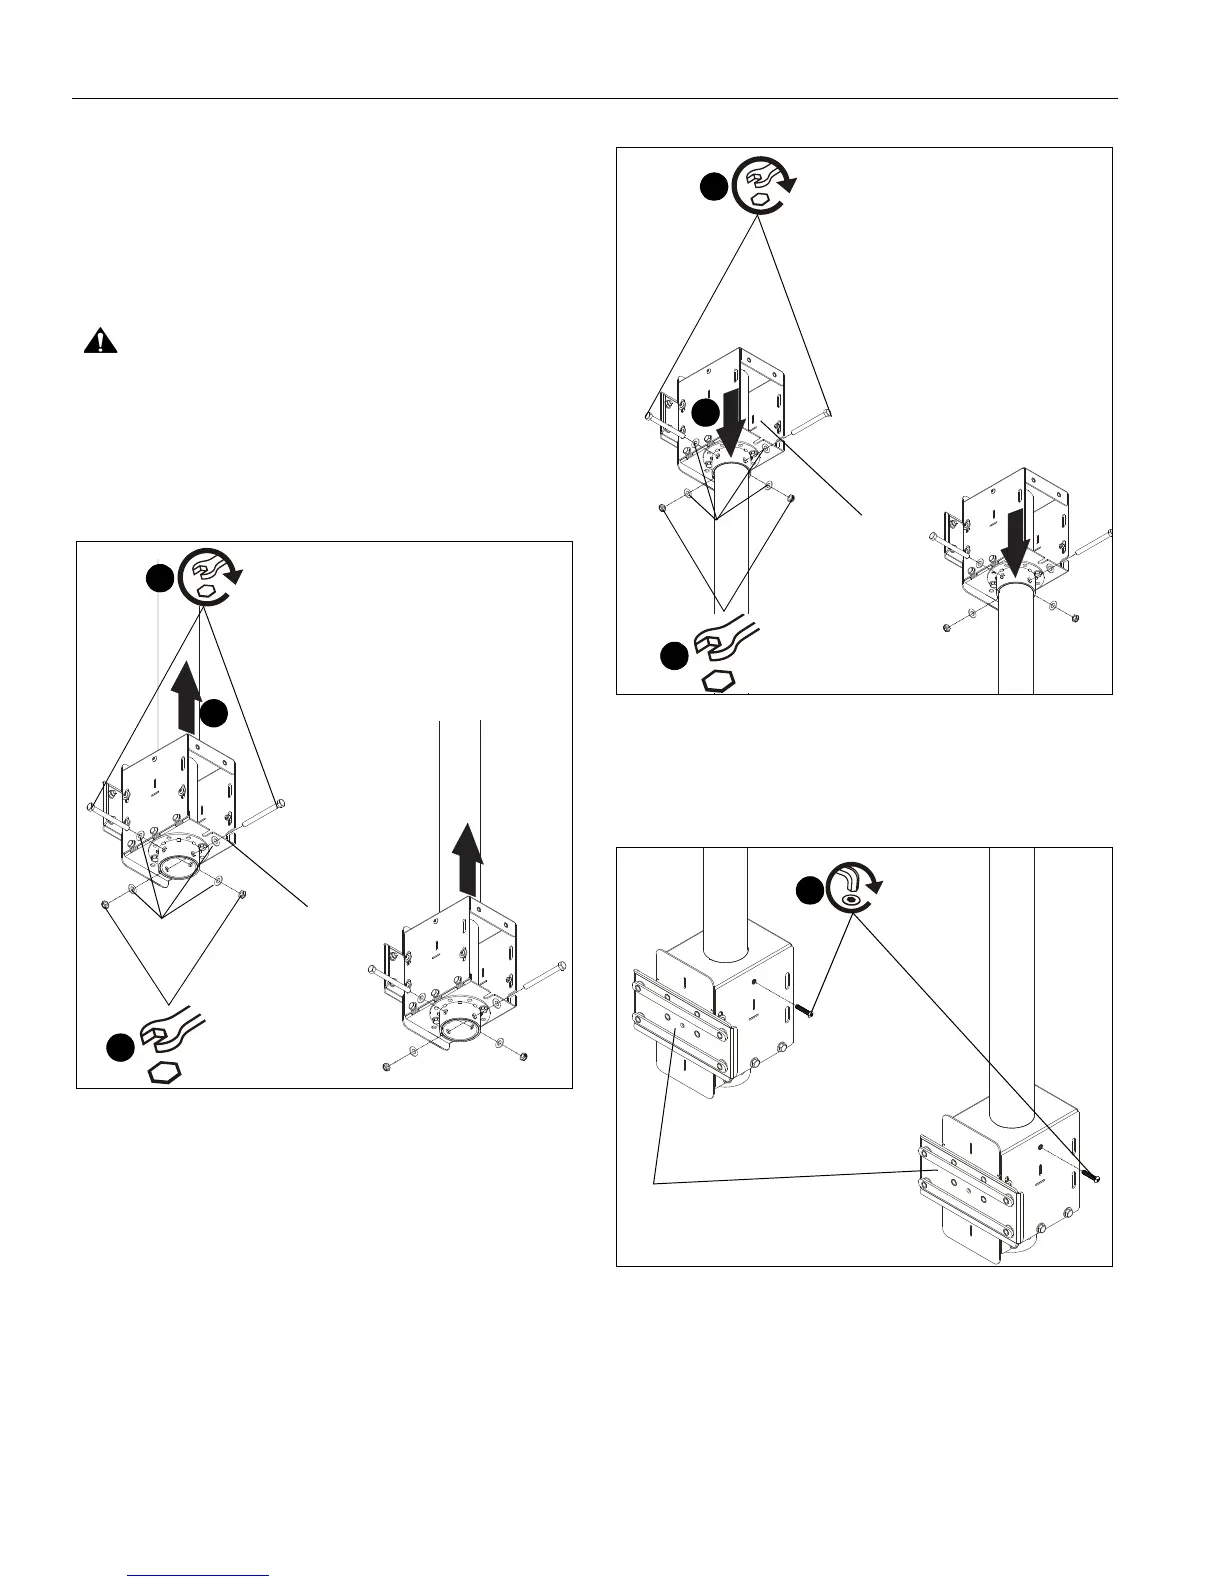
Attaching Mount to ODAC Series Column
CAUTION: WATCH FOR PINCH POINTS! Do not place
fingers between movable parts.
1. Slide mount assemblies (H) onto ODAC Series Floor/
Ceiling Columns. (See Figure 1) or (See Figure 2)
2. Use two 3/8-16 x 4" hex head tapping bolts (U), four 3/8"
washers (W) and two 3/8-16 hex nuts (V) to secure each
mount assembly (H) to each column. (See Figure 1) or (See
Figure 2)
Figure 1
Figure 2
3. Install 1/4-20 x 1 1/4" button head cap screws (X) into each
mount assembly (H) to prevent column from rattling. (See
Figure 3)
Figure 3
1
2
(U) x 2
(W) x 4
(V) x 2
2
(H)
(to ceiling)
1
2
(U) x 2
(W) x 4
(V) x 2
2
(H)
(to floor)
(X) x 2
3
(H) x 2
 Loading...