Installation Instructions OXCM1U
7
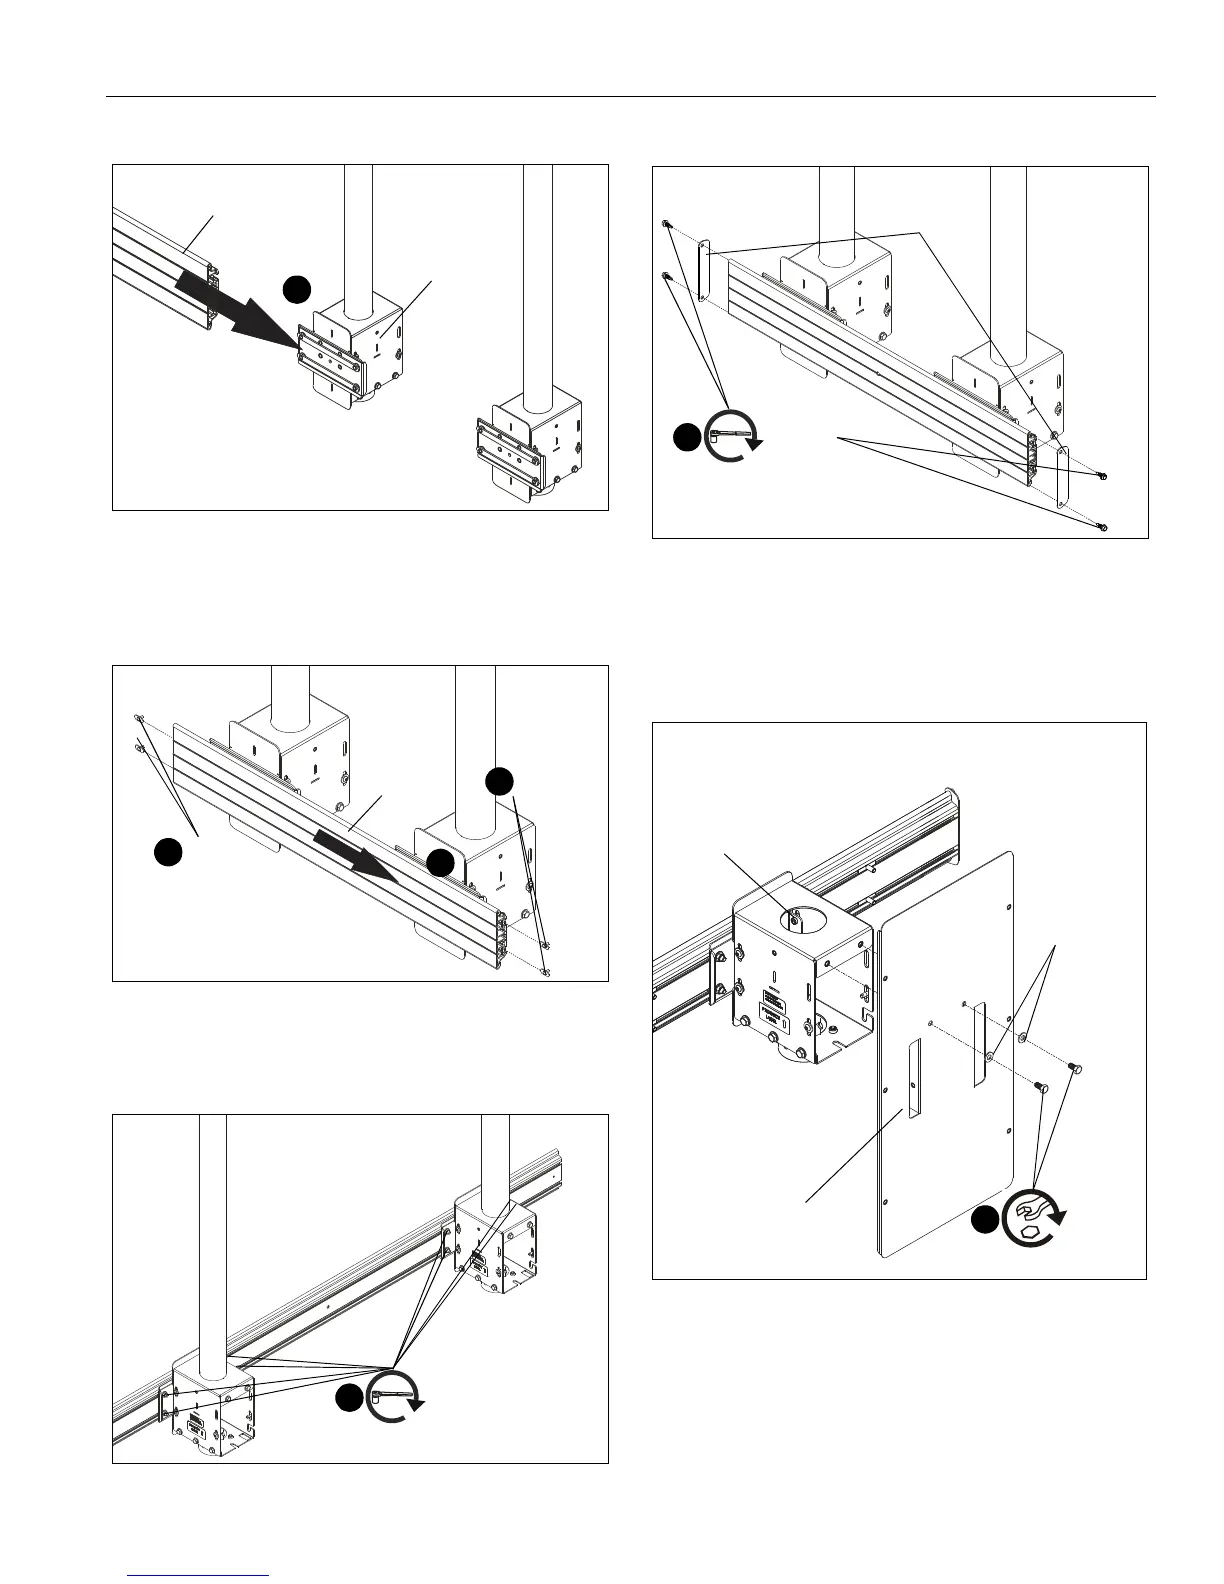
4. Slide X-large rail (JJ) onto one of two assemblies (H)
attached to column. (See Figure 4)
Figure 4
5. Slide X-large rail (JJ) onto second assembly (J) attached to
column. (See Figure 5)
6. Slide two wind shield connectors (HH) into back grooves on
X-large rail (JJ) on both sides. (See Figure 5)
Figure 5
7. Tighten four bolts on back of each assembly to secure
extrusion in place.
Figure 6
8. Use four 1/4-14 x 3/4" hex flange bolts (AA) to secure two
side covers (GG) to ends of X-large rail (JJ). (See Figure 7)
Figure 7
Attach Wind Shield to Mount
1. Use two 5/16 x 5/8" hex head bolts (Y) and two 5/16"
washers (CC) to secure center wind shield (K) to back of
each mount assembly (H). (See Figure 8)
Figure 8
(JJ)
(H)
4
(HH) x 2
(HH) x 2
5
6
6
(JJ)
7
x 4 (per assembly)
(AA) x 4
(GG) x 2
8
(CC) x 2
(Y) x 2
1
(K)
(H)