Installation
6
Unpacking
1. Remove the washer from its packing.
2. Make sure that the washer has not been
damaged during the transportation process. If it
has been damaged, contact the retailer and do
not proceed any further with the installation
process.
Remove the transport bolts
CAUTION
DAMAGE TO THE APPLIANCE OR INJURY POSSIBLE
The machine is secured for transport with
transport bolts. Transport bolts that are not
removed can damage the drum during operation
of the machine, the washer will vibrate, and it
will be much noisier during spin cycles if the
transport bolts are not removed before use. Be
sure to remove all 4 transport bolts completely
before first use. Keep the transport bolts. If a
pedestal was purchased with the washer, it must
be installed first, prior to removing the transport
bolts. Please consult the pedestal installation
instructions.
In order to prevent transport damage during later
transport, be sure to re-install the bolts before
transport.
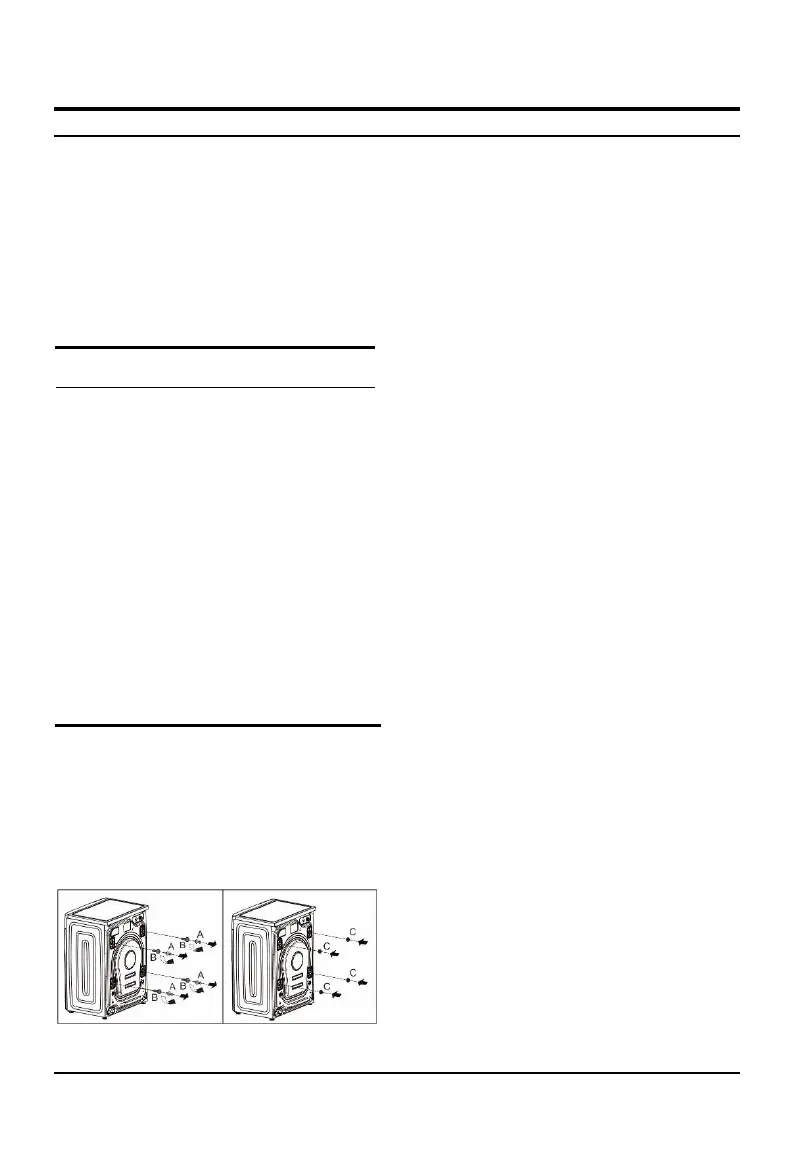
1. Undo the four transport bolts A and remove
them.
2. Remove the four spacers B. They will fall to the
floor when you tip the machine.
3. Insert the four cover caps C which will be found
in accessory bag.
Keep all the parts in safe place: you will need them
again if the washing machine needs to be moved to
another location.
Packaging materials should not be used as toys for
children.
Leveling the washer
Importance of leveling the washer
Your new washer uses high spin speeds to remove
water at the end of the wash cycle. It is important
that your washer is level and that all four washer
feet press with equal pressure against the floor. This
will help assure the quietest, most vibration-free
use of your washer.
Follow these steps:
1. Install the washer on a level and solid surfaces.
Preferably in a corner of a room.
2. If the floor is uneven (or out of level ) adjust the
washer feet as required to level the washer. Do
not place anything under the washer feet to help
level the washer.
3. Extend the washer feet no more than is
necessary. The more the feet are extended, the
more vibration the washer will experience. Start
with the washer feet turned all the way in and
adjust each foot as necessary.
4. Use a bubble level to check the top of the washer
to make sure it is level side to side and front to
rear.
5. Press down on each corner of the washer top to
make sure the washer doesn’t “wobble”. There
should be no “give” or movement. All four
washer feet should press equally against the floor.
This is just as important as the washer being level
to prevent vibration.
6. When the washer is level and does not wobble,
lock the washer feet in place by tightening the
locknuts against the washer bottom. Be sure to
do this without changing the height of the foot
(hold the foot while tightening the locknut)



 To Next Page