This document provides installation instructions and usage information for a GPS Dual Dash Cam, specifically the CHORTAU B-T25 model.
Function Description:
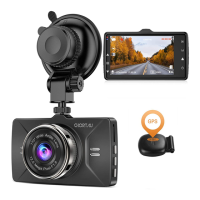
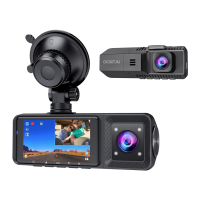
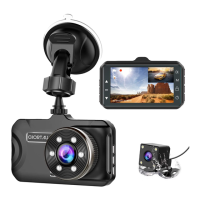
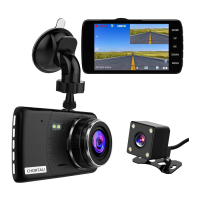
The CHORTAU B-T25 is a dual dash cam system designed to record both front and rear views of a vehicle, with integrated GPS functionality to track the vehicle's path. It supports continuous recording and can display the recorded video with GPS data, including vehicle location on a map and speed. The system offers a reverse function, allowing the display screen to switch to a full-screen rear view when the car is in reverse, provided the car does not have a built-in reverse system monitor. If the car already has a reverse system monitor, the dash cam will record the rear view while driving and display a picture-in-picture view of both front and rear cameras.
Important Technical Specifications:
- Front Camera: 170° Wide Angle Lens, 12.0 Mega Pixel, F1.8 aperture.
- Video Resolution: 1080FHD (as indicated on the display).
- GPS Module: Designed to be placed close to the windshield top for better signal reception.
- Storage: Requires a 32GB, Class 10 micro SD card.
- Power: The dash cam requires continuous power supply.
- Display: The dash cam features a display screen for viewing recordings and settings.
- GPS Data: Records GPS path, speed (KM/H), and can display vehicle location on Google Maps.
- Player Software: GXPlayer is recommended for viewing video with GPS path data. VLC media player can be used for normal video viewing.
Usage Features:
- Installation:
- Front Camera: Connects to the car charger, with the cable hidden into the interior panel. The GPS module should be stuck near the windshield top.
- Rear Camera: Can be installed either inside or outside the car, typically above the license plate. The rear camera cable can be routed in two ways (illustrated in the manual).
- Reverse Function (Situation 1 - No built-in reverse system): The red wire of the rear cam cable must be connected to the car's reversing lamp positive terminal. When reversing, the dash cam display switches to full-screen rear view.
- Reverse Function (Situation 2 - Built-in reverse system): The red wire of the rear cam cable does not need to be connected. The dash cam will record rear view and display a picture-in-picture view of front and rear cameras while driving forward or in reverse.
- Initial Setup:
- Insert a 32GB, Class 10 micro SD card (poke it deeply until it clicks).
- Charge the dash cam for 2-3 hours.
- Power on the camera and format the SD card.
- Select the local time zone in settings (e.g., UTC + 8:00 for East US, UTC - 5:00 for West US, UTC + 7:00 for Middle US).
- GPS Connectivity: GPS connects automatically within a few minutes after the dash cam starts. The GPS sign on the display changes color to indicate status: red (disconnected), yellow (connecting), green (connected).
- Viewing Video:
- On Dash Cam: Stop recording, then press the M button to enter playback mode. Use up/down buttons to select front video. Long press the down button to enter rear cam playback. MOV files are front camera videos, AVI files are rear camera videos. A lock icon indicates a locked video.
- On Computer (with GPS data):
- Insert the SD card into a card reader and connect to a computer.
- Locate the "DCIM" folder (contains recorded videos: "Fold 1" for front, "Fold 2" for rear).
- Install GXPlayer (by clicking "gpsplayer" file on the SD card).
- Open GXPlayer and navigate to the video files on the SD card.
- GXPlayer displays the video, vehicle location on Google Map, speed, and GPS path. Users can switch to satellite mode.
- Settings within GXPlayer allow changing language, speed unit, or maps.
- Settings: Click the middle button of the screen to enter the video setting page. Click twice to enter the system setting page.
- Parking Mode: Long pressing the down button can turn on/off parking mode.
Maintenance Features:
- SD Card Management:
- Format the SD card monthly to extend its lifespan and prevent "card full" errors, especially if G-sensor and parking mode are enabled (which can create many locked files).
- If the camera says "please insert a C6 card," ensure a high-speed, good-quality card is used, or turn off the camera before inserting the card.
- Troubleshooting:
- Camera not turning on:
- Check for continuous power supply.
- Connect power supply and click the reset button.
- Ensure the SD card is not defective; try removing or replacing it.
- Dash cam keeps on and off: Ensure the power cord cigar lighter car charger is tightly connected and providing continuous power. If the issue persists, the charger might be defective and needs replacement.
- Rear cam not working:
- Check all wire connections for tightness.
- If the rear cam or wire is defective, contact support for a replacement.
- Time setting not saving: Select your local time zone during initial setup. The camera will automatically switch to the local time zone each time the car starts.
Warranty & Support:
- Warranty: CHORTAU B-T25 Dual dash cam comes with a full 1-year warranty.
- Support: For questions, send order ID to support@chortau.cc for a response within 24 hours.
- Feedback: Constructive feedback and suggestions are appreciated at support@chortau.cc.