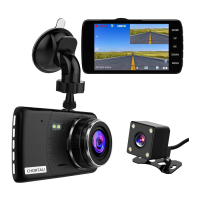
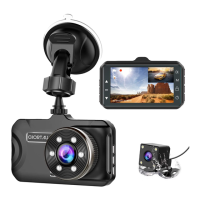
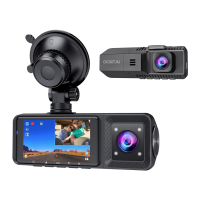
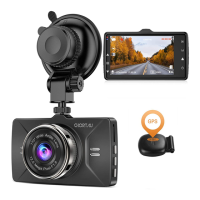
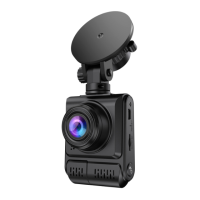
The CHORTAU Full HD 1080P 4 Inch Dual Lens Dash Cam, Model B-T002, is designed for use in motor vehicles to record video. It features a dual-lens system, allowing for both front and rear camera recording.
Important Notice and Setup:
Before using the camera, it is crucial to insert and format a high-speed Micro SD card (Class 10 or above, 16GB or 32GB recommended) within the camera's menu. The camera is intended for motor vehicle use only and should not be installed in a location that obstructs the driver's view or interferes with airbag deployment. The camera's lens must be kept clean and unobstructed. It should not be left in direct sunlight for extended periods or in temperatures exceeding 170°F (75°C).
Interface and Basic Key Functions:
The dash cam features several buttons and connectors for operation:
- Reset: Used to reset the device.
- LED Light: An indicator light.
- Speaker: For audio output.
- Lens: The primary camera lens.
- Mode Button: In standby, short press to switch between recording, photo, and playback modes. During recording, press once to lock the current video.
- Power Indicator: A red light indicates external power, while a blue light indicates recording.
- Up Button: In video recording mode, short press to switch between front and rear camera preview. In the setting menu, short press to select options and adjust values.
- Ok Button: Long press to power on/off the camera. In video recording mode, short press to start/stop recording. In photo mode, short press to take a photo. In playback, short press to start/stop video playback. In the setting menu, short press to confirm selection.
- Down Button: In video recording mode, short press to turn on/off audio recording. In the setting menu, short press to select options and adjust values.
- Menu Button: In standby, short press to access the setting menu under all modes. In the setting menu, short press to switch between mode settings and system general settings.
- Micro SD Card Slot: For inserting the memory card.
- Mount Connector: For attaching the camera to its mount.
- Mini USB Power Port: For connecting the power supply.
- Rear View Camera Connector: For connecting the rear camera.
Installation Guide:
- Before installation, verify the camera's normal function and ensure a high-speed Micro SD card (Class 10 or above) is used and formatted in the camera menu.
- Power off the camera and connect the suction cup mount to the camera using the screw mount.
- Apply the suction cup mount to the windshield, pressing down the clip. The ideal installation position is near the center and top of the windshield.
- Adjust the camera's angle to achieve the maximum recording range and fasten all screws.
- Connect the power to the camera and the cigarette lighter, hiding the cable in the interior trim board.
- Install the rear camera above the number plate with the screw pad upward, connecting its red power cable to the reverse lamp.
- Route the rear camera cable to the front of the car and connect it to the main device.
- Start the engine and perform a test run.
Function Introduction:
- Auto Recording Feature: When the car engine starts, the camera automatically powers on and begins recording. The red power indicator lights up, and the blue indicator blinks. When the engine stops, the camera automatically saves the recorded files and powers off. Files are saved on the Micro SD card.
- Standby Mode: Press the "OK" button during recording to enter standby mode, indicating no ongoing operation.
- Attention: Videos recorded by the front camera are named with an "A" at the end, and rear camera videos with a "B". If cyclic recording is turned off, the camera will stop recording when storage is full.
- Operating Modes: The camera has three operating modes: Recording mode, Photo mode, and Playback mode. Repeatedly press the MODE button to switch between these modes. In any of these modes, press the MENU button once to enter the current mode's settings, and press it again to enter the system settings. System settings are consistent across all modes.
A. Recording Mode:
When the camera is turned on, recording starts automatically.
- Recording Status: A red indicator signifies active recording.
- Video Lock: Locks the current video file to prevent overwriting.
- Parking Monitor: Monitors the vehicle when parked.
- Date/Time: Displays the current date and time.
- Video Sound: Indicates audio recording status.
- WDR (Wide Dynamic Range): Enhances image quality in varying light conditions.
- Mini SD Card: Indicates the presence of a memory card.
- Charging Icon: Shows charging status.
- Motion Detection: Activates recording when motion is detected.
- Resolution: Displays the current video resolution.
- Cyclic Record: Indicates if loop recording is active.
- Recording Time: Shows the duration of the current recording.
In standby mode, press "MENU" once for recording mode settings, and twice for system settings.
- Resolution: Adjust video resolution (1080FHD 1920x1080, 1080P 1440x1080, 720P 1280x720, WVGA 848x480, VGA 640x480).
- Cyclic Recording / Loop Recording: This function ensures continuous recording even when the memory is full by overwriting the oldest unlocked clips. It records in seamless 1/2/3/5/10 minute clips. Locked videos are not overwritten. For normal users, 3 or 5-minute clips are recommended, as 10-minute clips require higher storage speed and capacity.
- WDR: Combines high and low light to produce a proper exposure image, preventing over or underexposure. Recommended for better video quality.
- Exposure: Adjustable value (+2 to -2) to change image brightness.
- Motion Detection: When on, the camera records only when movement is detected and stops when still. Not recommended for continuous recording in emergencies.
- Audio: Switch to turn audio recording on/off in videos.
- Date Stamp: Turn date and time stamp on/off in videos.
- Gravity Sensing / G-Sensor Lock: Triggers during collision to lock the current video clip as evidence, preventing deletion in loop recording. Sensitivity can be adjusted (Low/Medium/High).
- Parking Monitor: Protects the car after parking. When activated, if the camera detects a shock after the car is off and the camera powers down, it will automatically turn on, record a 30-second video, and then shut down. Sensor sensitivity is adjustable (Low/Medium/High).
- Rear Camera Mirroring: Flips the rear camera image for specific installation needs.
B. Photo Mode:
In standby mode, short press the MODE button to switch to Photo mode. Press the "OK" button to take a picture.
- Photo Mode Interface: Displays photo mode icon, remaining storage, resolution, and charging icon.
In standby mode, press "MENU" once for photo mode settings, and twice for system settings.
- Capture Mode: OFF / 2S timer / 5S timer / 10S timer.
- Resolution: Set photo resolution (18M 5000x3750, 12M 4032x3024, 10M 3648x2736, 8M 3264x2448, 5M 2592x1944).
- Sequence: Continuous shooting switch (on/off for three continuous shots).
- Quality: Optional image quality (Fine, Normal, Economy).
- Sharpness: Strong, Normal, Soft.
- White Balance: AUTO / Daylight / Cloudy / Tungsten / Fluorescent.
- Color: Normal / B&W / Sepia.
- ISO: Auto/100/200/400.
- Exposure: Adjustable value (+2 to -2) to change image brightness.
- Anti-Shaking: OFF / ON.
- Quick Review: OFF / 2 Seconds / 5 Seconds.
- Date Stamp: OFF, Date, Date/Time.
C. Playback Mode:
Allows playback of recorded videos or viewing photos.
- Stop video recording and press the "MODE" button twice to enter Playback Mode.
- Use "UP" and "DOWN" buttons to scroll through recorded files/photos. Press "OK" to view a recorded video.
In standby mode, press "MENU" once for playback mode settings, and twice for system settings.
- Delete: Delete Current / Delete all.
- Protect: Lock One / Unlock One / Lock All / Unlock All.
- Slide Show: 2 Seconds / 5 Seconds / 8 Seconds.
D. System Settings:
In standby mode, press "MENU" button twice to access the System Setting Menu in any mode.
- Date/Time: Set the current date and time.
- Auto Power Off: Set the camera to power off without action (off / 3 / 5 / 10 minutes).
- Beep Sound: Turn ON / OFF button sound notifications.
- Language: Set camera system language (English, French, Spanish, Portuguese, German, Italian, Chinese, Russian, Japanese, Korean).
- Frequency: Light frequency setting (50Hz / 60Hz).
- Screen Saver: To ensure safe driving and avoid distraction from the camera's light, set the screen saver to shut off the display after 1 / 3 / 5 minutes. Press any key to turn it back on.
- Light Set: Turn ON / OFF the front LED light.
- Format: Format the memory card. Highly recommended before recording.
- Default Setting: Reset the camera to factory default settings if it malfunctions.
- Version: Displays the firmware version.
Common Problems and Solutions:
- Dash cam stops recording automatically:
- Check if the memory is full.
- Check the loop recording function.
- Ensure the Micro SD card is high-speed (Class 10 or above).
- Check for too many locked videos; adjust G-sensor sensitivity if necessary.
- Video played on computer is not fluent or jammed:
- Format the Micro SD card in the camera.
- Try different player software.
- Camera lasts a very short time or won't turn on without external power:
- The built-in battery is small and not designed for standalone operation; keep it connected to an external power supply.