Operation
4-27
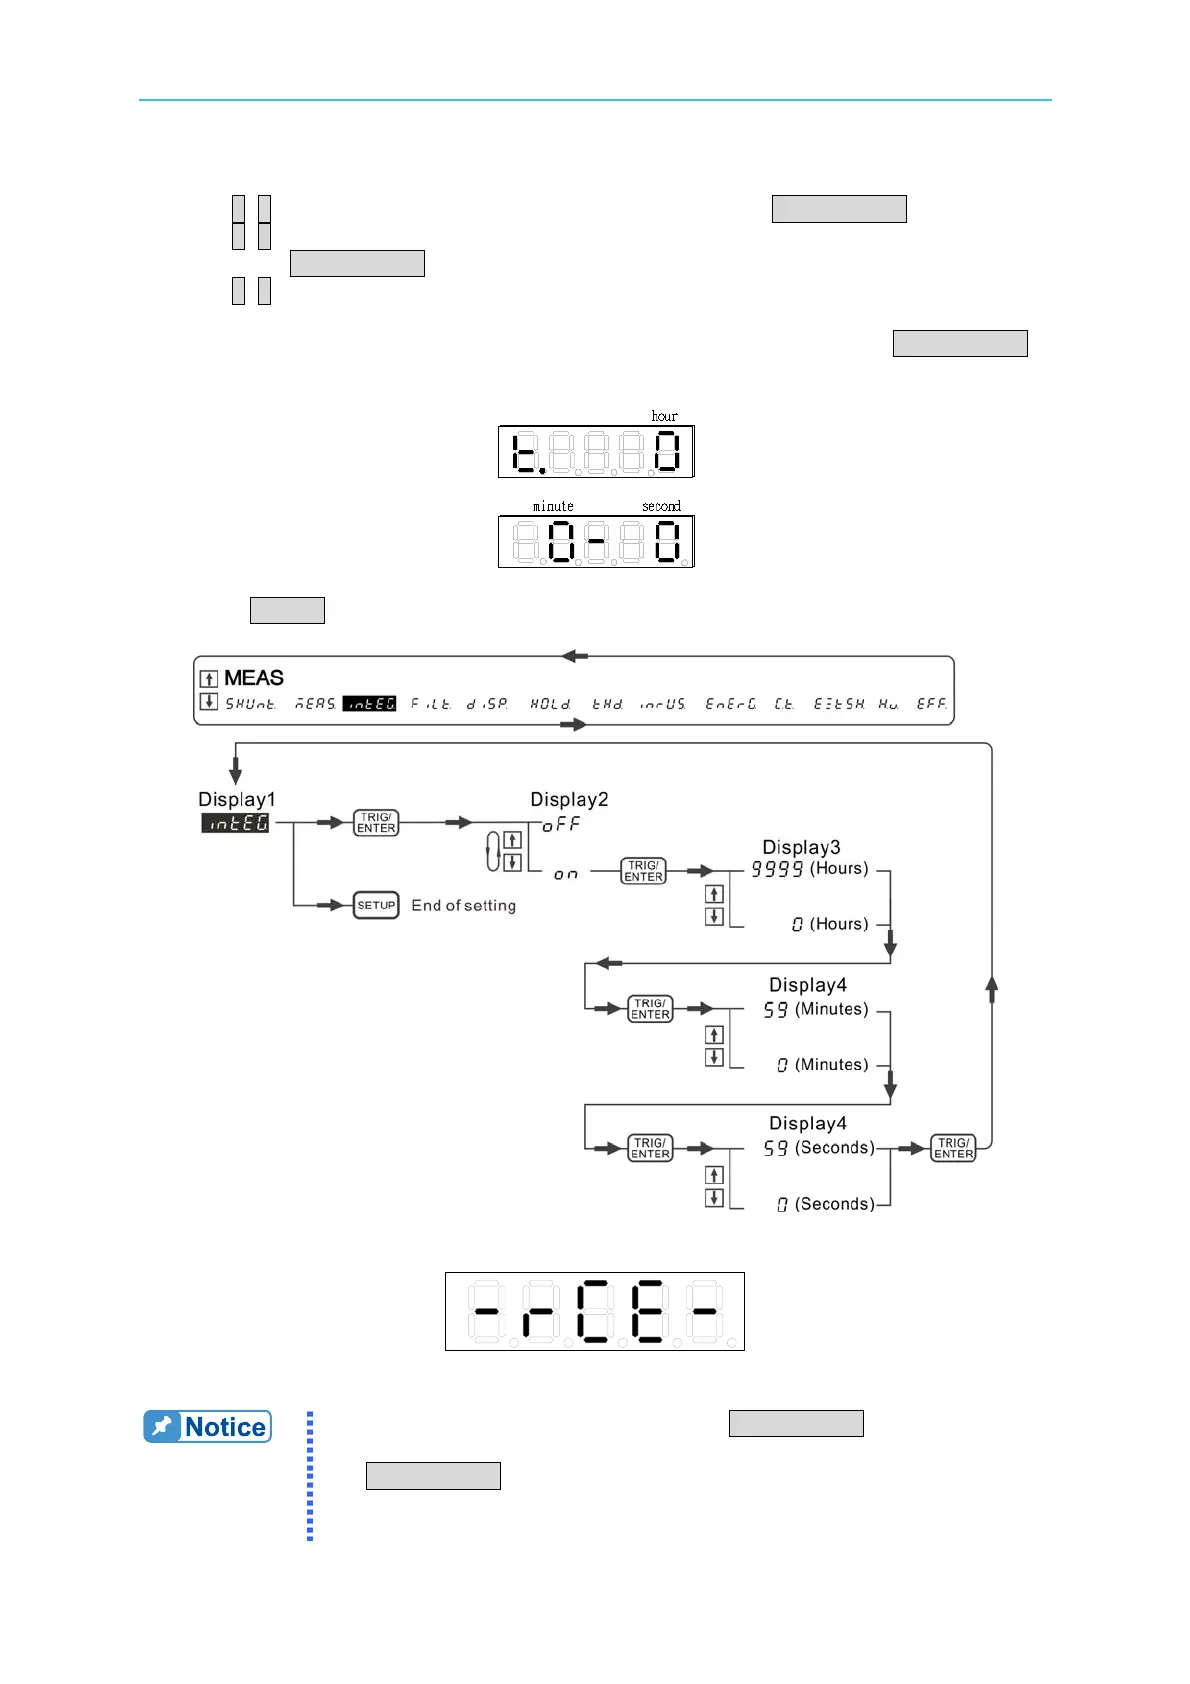
2. Use ↑, ↓ to select intEG in the 1
st
display window and press TRIG/ENTER to confirm it.
3. Use ↑, ↓ to select ON or OFF in the 2
nd
display window to enable or disable integration
and press TRIG/ENTER to confirm the selection.
4. Use ↑, ↓ to set the integration time in the 3
rd
and 4
th
display windows. The 3
rd
display
window sets hour in the range of 0~9999, while the 4
th
display window sets minute and
second in the range of 0~59. When the time adjustment is done, press TRIG/ENTER
to confirm it.
5. Press SETUP to return to the main menu.
Figure 4-40 Process for Setting Integration
Figure 4-41 Range Change Error Message
1. When error message appears, press TRIG/ENTER to clear it. The
power meter will conduct the next integration measurement. If
TRIG/ENTER is not pressed, the power meter will wait until the
integration time is met to clear the error message and carry on the
next integration measurement.