3
Installing the High-Density Electrical Interface Assemblies on the Cisco ONS 15310-MA
78-17418-01
High-Density EIA Installation
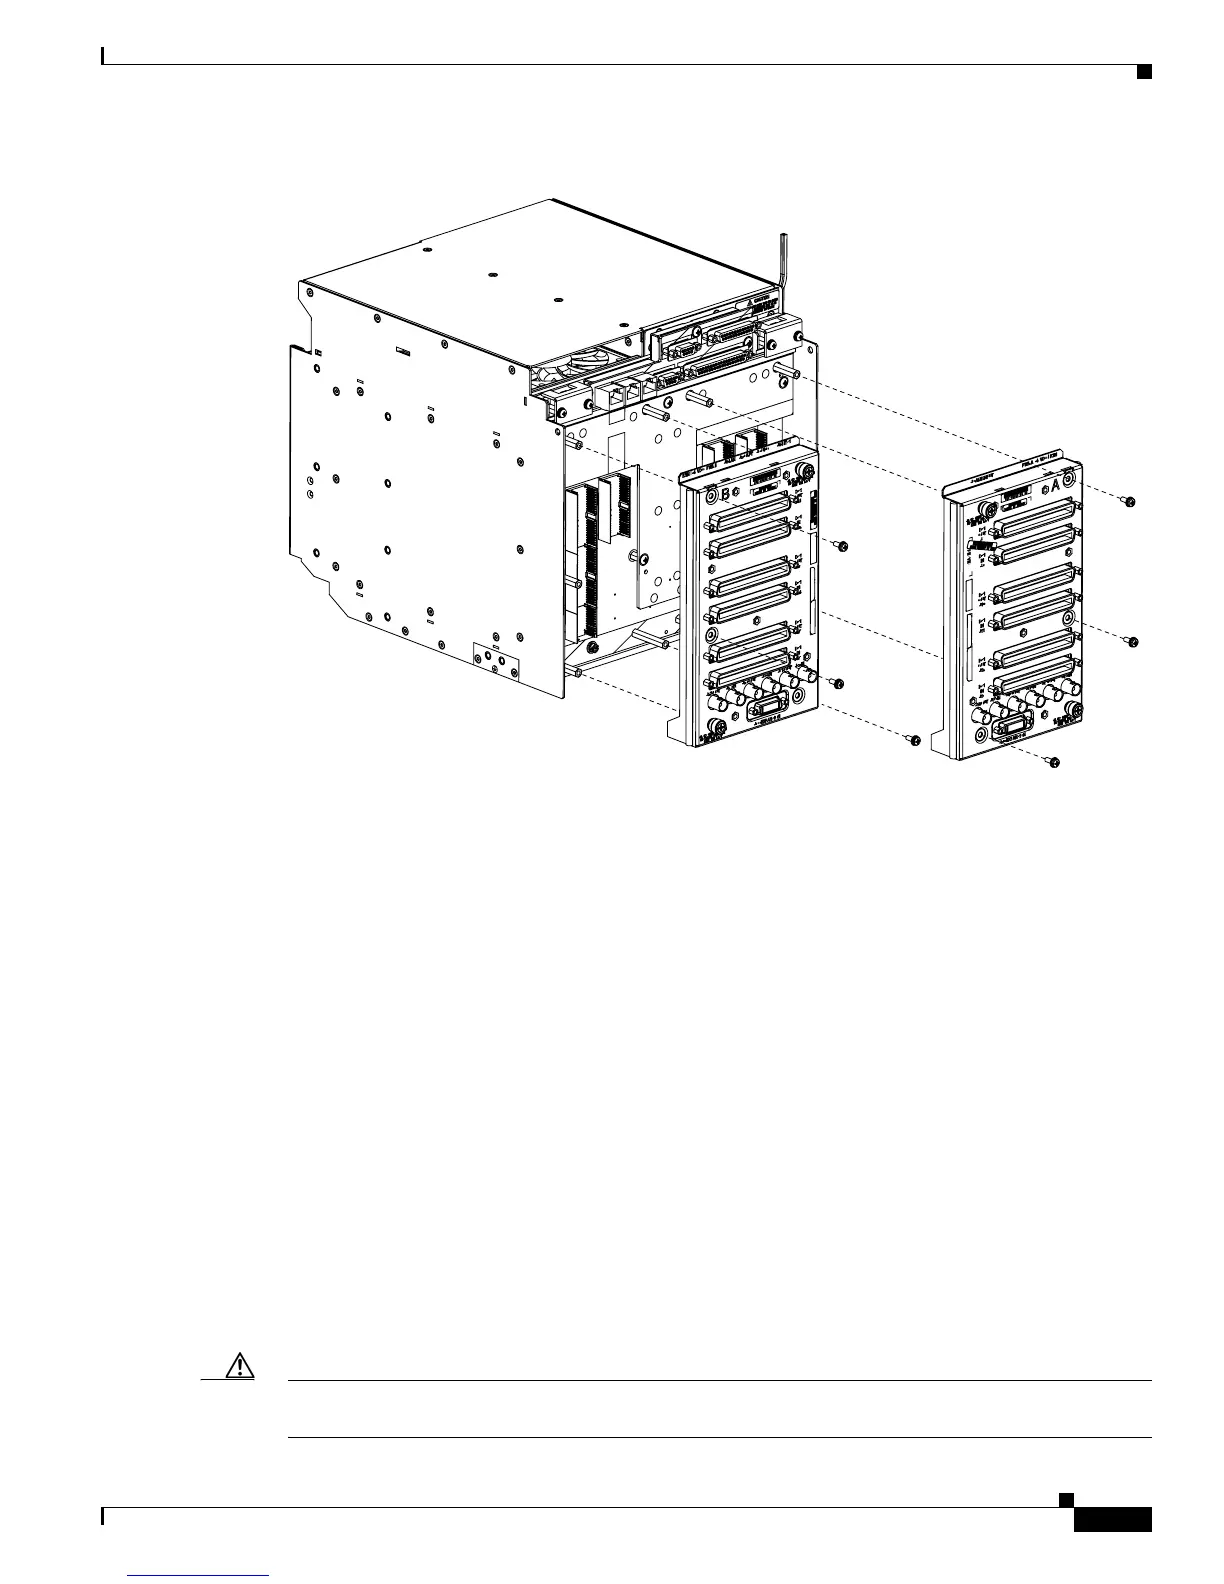
Figure 2 High-Density EIA Installation
High-Density EIA Installation
To install the EIA on the rear of the shelf assembly, you must first remove the standard sheet metal
covers. The EIAs use the same screw holes as the standard sheet metal covers, but they use three holes
for panhead screws and two holes for jack screws.
When installed with the standard door and cabling on the backplane, the ONS 15310-MA shelf measures
approximately 13.7 inches deep when fully populated with backplane cables.
Install the High-Density EIAs
The following parts are needed to install the high-density EIAs.
• #2 Phillips screwdriver
• High-density EIA(s)
• 6-32 x 5/16-inch pan head screws (3, included with EIA)
Caution Always use the supplied ESD wristband when working with a powered ONS 15310-MA. Plug the
wristband cable into either of the ESD jacks, on the far left and right faceplates in the shelf.
151575
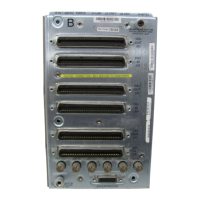
EIA installed
on the B Side
EIA installed
on the A Side