Cisco 4000 Series Rack-Mount and Wall-Mount Installation 11
Mounting the Chassis in a Standard Rack
Installing Chassis into a Standard Rack
Take the following steps to install the chassis into a standard rack:
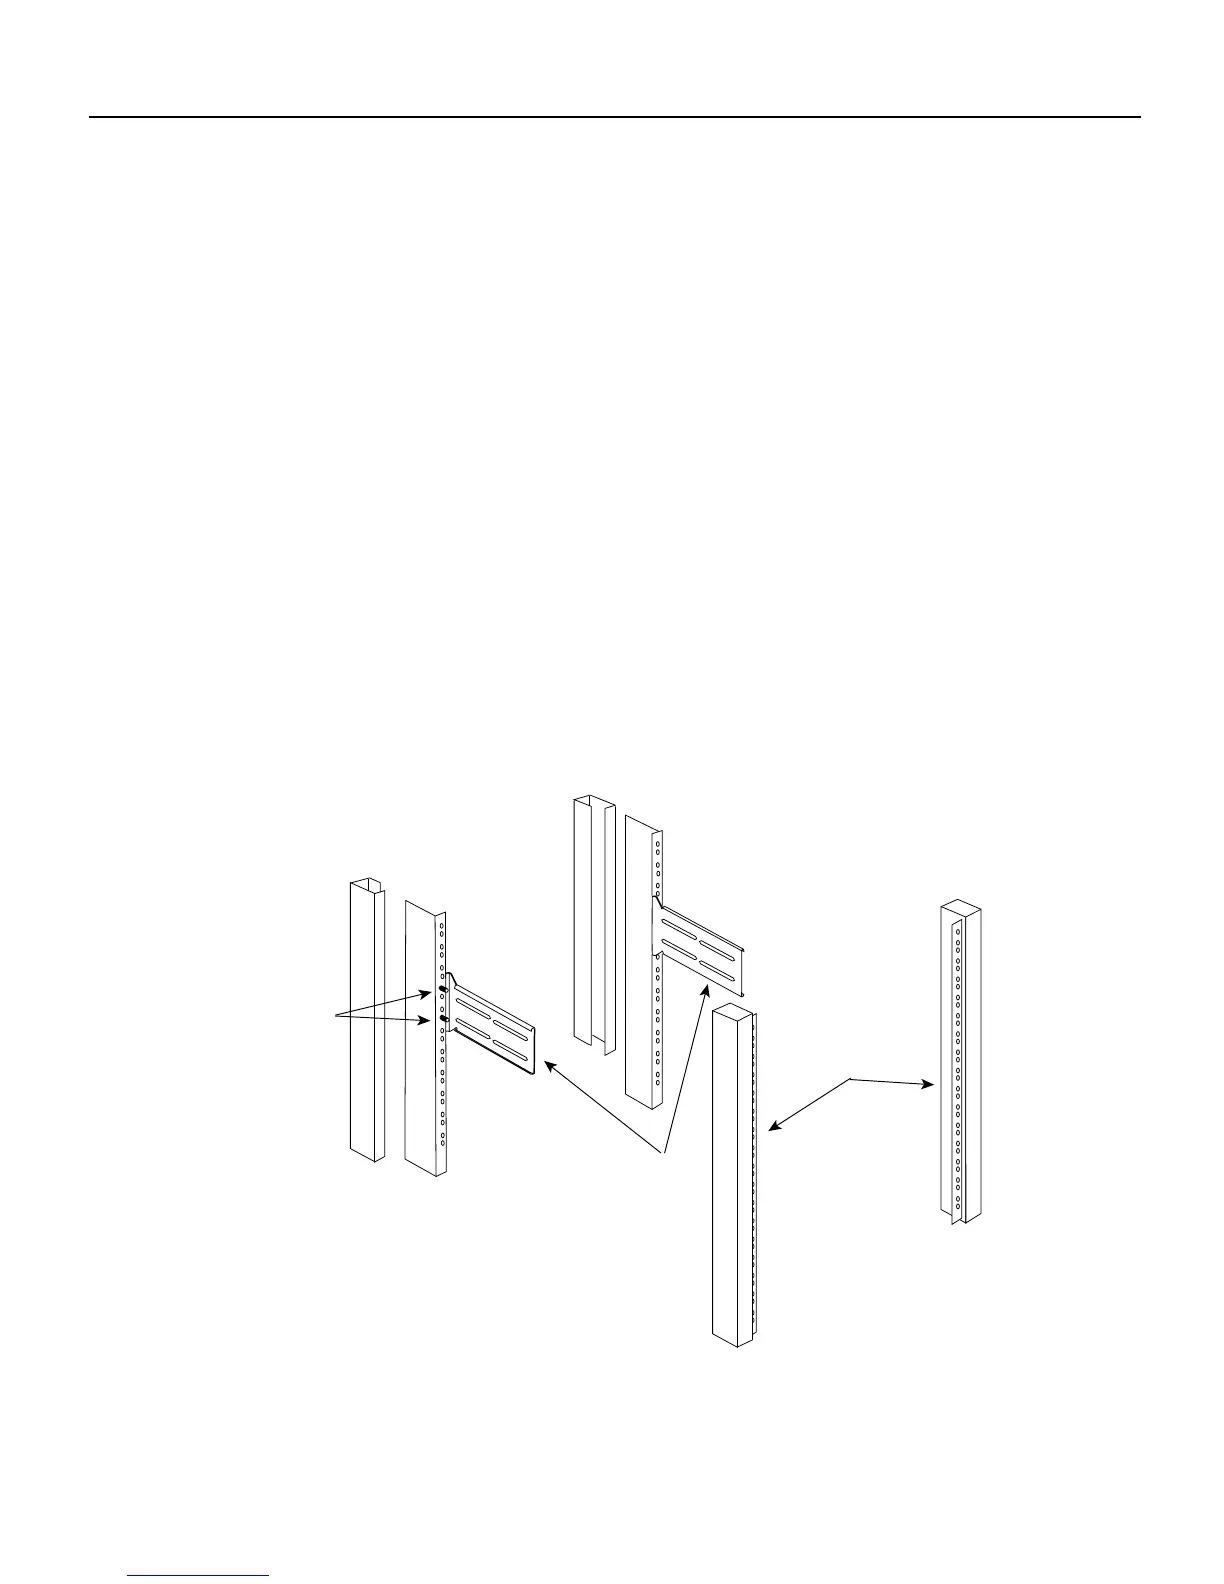
Step 1 On the rear of the rack, insert two 10-32 machine screws through the slots of the extenders
and thread them into the rack-mount threaded holes (see Figure 11).
Step 2 While supporting the chassis shell, slide the rack-mount brackets into the installed rear
extenders. The standard rack-mount bracket, extender, and screws fit together as shown in
Figure 12.
Step 3 Mount the front of the chassis shell in the rack using two 10-32 machine screws on each
side of the front brackets.
Step 4 In the rear of the chassis shell, insert two M3 machine screws on both sides to fasten the
brackets and bracket extenders together.
Step 5 Replace the front panel by snapping it into the front of the chassis shell.
Step 6 Reinsert the component tray into the shell.
Step 7 Push on the back of the tray while at the same time pressing on the chassis release screw
(shown in Figure 2 and Figure 3) with the thumb of your right hand.
Step 8 Retighten the chassis release screw.
This completes the standard rack-mount procedure.
Figure 11 Rear Bracket Extenders in a Standard 19-inch Rack
H1295a
Bracket
extenders
Equipment rack
Front of the
equipment rack
10-32
machine
screws
 Loading...