4-31
Cisco ASA 5585-X Adaptive Security Appliance Hardware Installation Guide
OL-22567-02
Chapter 4 Maintenance and Upgrade Procedures
Installing and Removing a Slide-mounted Chassis
Package Contents
The slide rail kit package contains the following items:
• Left and right slide rails
• Six #10-32 screws
• Two #10-32 cage nuts
Installing the Chassis in the Rack
To install the chassis in the rack using the slide rail kit, follow these steps:
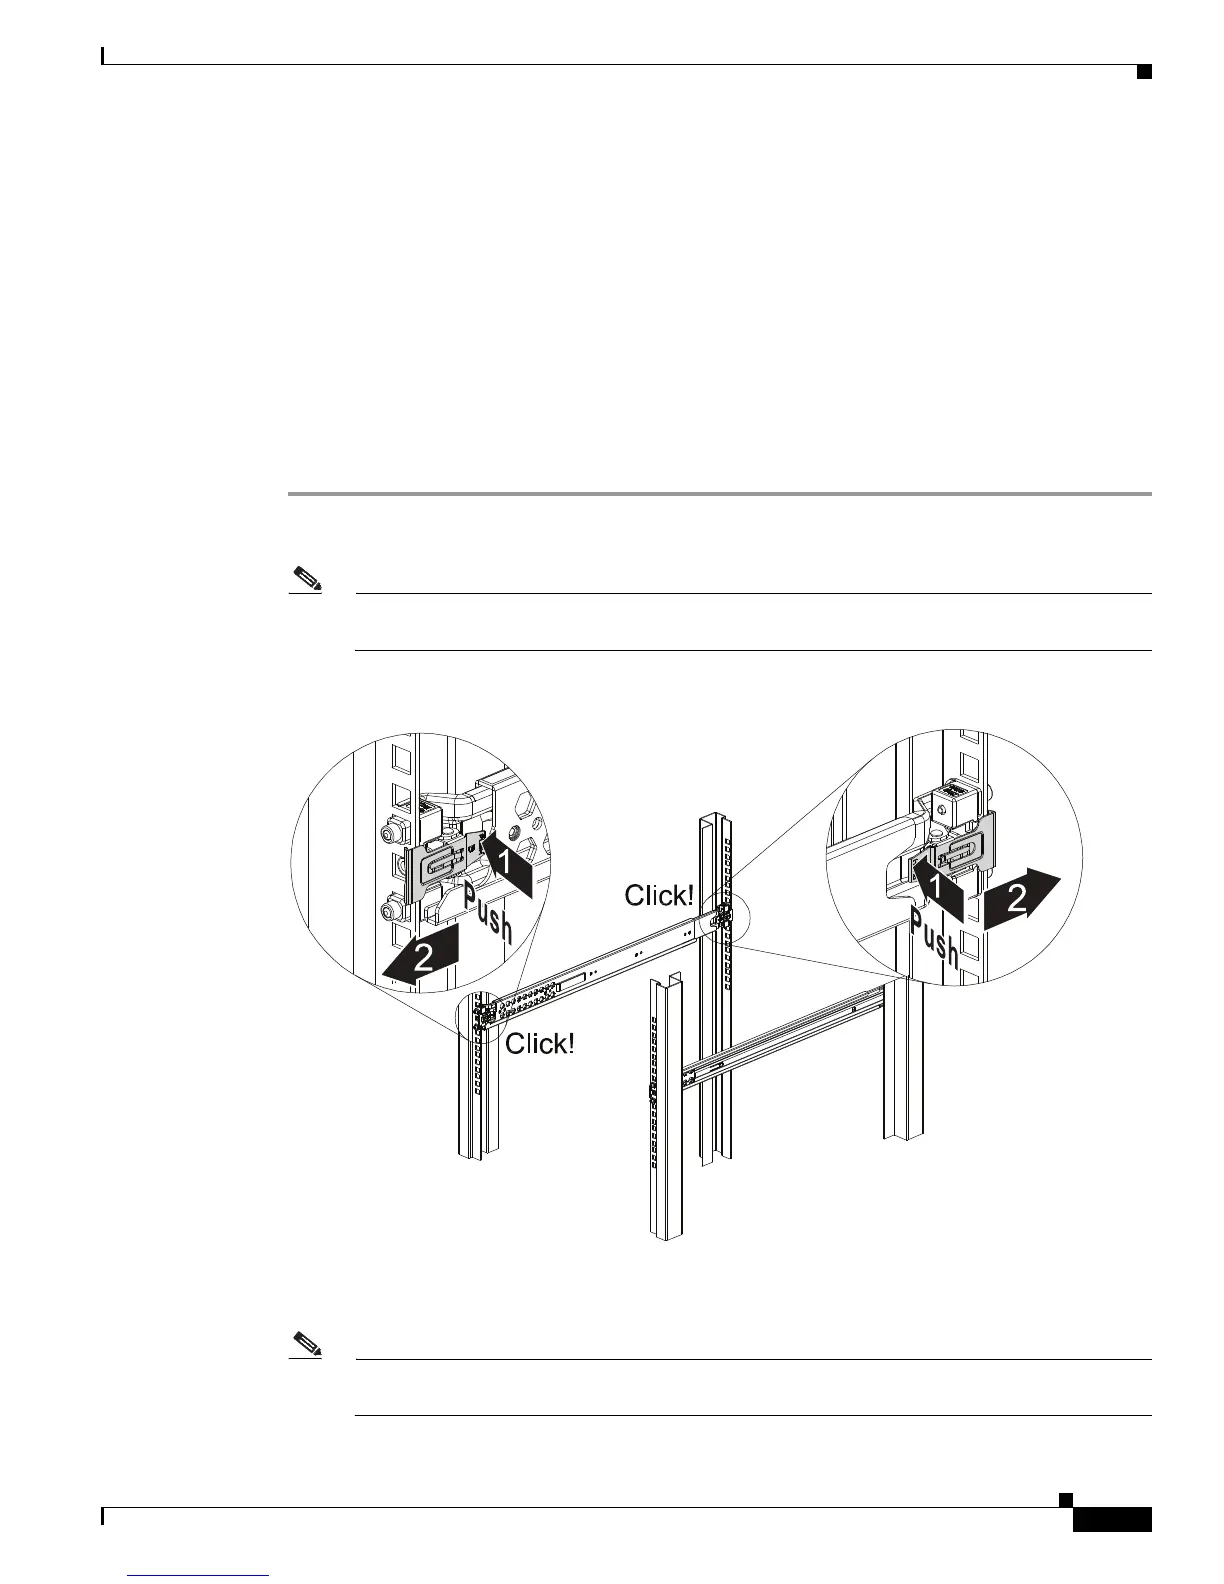
Step 1 Press the latch on the end of the slide rail and push forward to engage the pins in the rack until the clip
clicks and locks around the rack post (Figure 4-26).
Note The slide rails are labeled ‘left’ and ‘right.’ Install the left slide rail on the left side of the rack
and the right slide rail on the right side of the rack.
Figure 4-26 Press and Push to Install the Slide Rail
For square hole posts, square studs must be attached fully inside the square hole on the rack rail. For
threaded hole posts, the round stud must fully enter inside the threaded hole rack rail (Figure 4-27).
Note After installing the square or round studs into the rack post, verify that the locking clip is fully
seated and secure against the rack rail.

 Loading...


