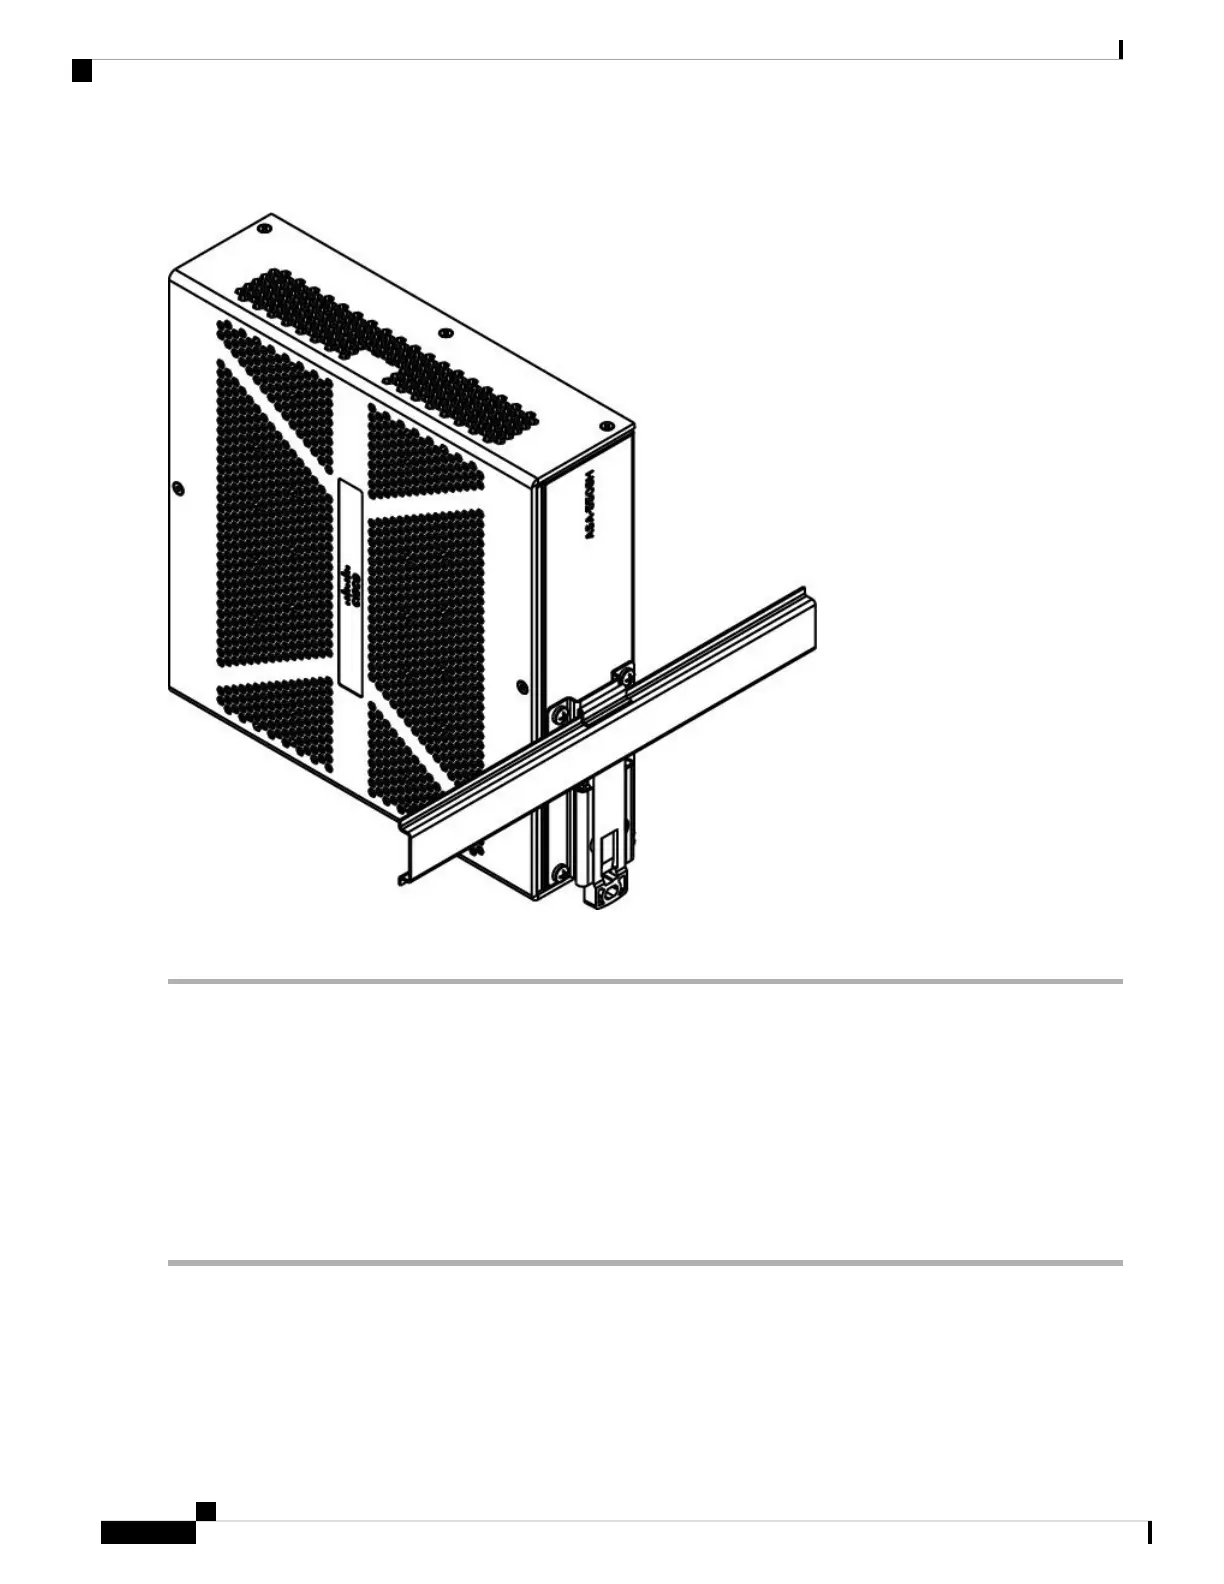
Figure 5: ASA 5506H-X Installed with the DIN Rail
The chassis is now installed in the DIN rail.
What to do next
See Connect Cables, Turn on Power, and Verify Connectivity, on page 6 to finish setting up your ASA.
Connect Cables, Turn on Power, and Verify Connectivity
After positioning or mounting the ASA, follow these steps to connect cables, turn on power, and verify
connectivity:
Step 1 Connect the network cables:
a) Management interface – Using this Management 1/1 Gigabit Ethernet port, you can connect a management computer
directly with an Ethernet cable, or you can connect the computer and the ASA to the same management network. Be
sure the PC is configured to obtain an IP address using DHCP.
Mount and Connect
6
Mount and Connect
Connect Cables, Turn on Power, and Verify Connectivity
 Loading...