7
7
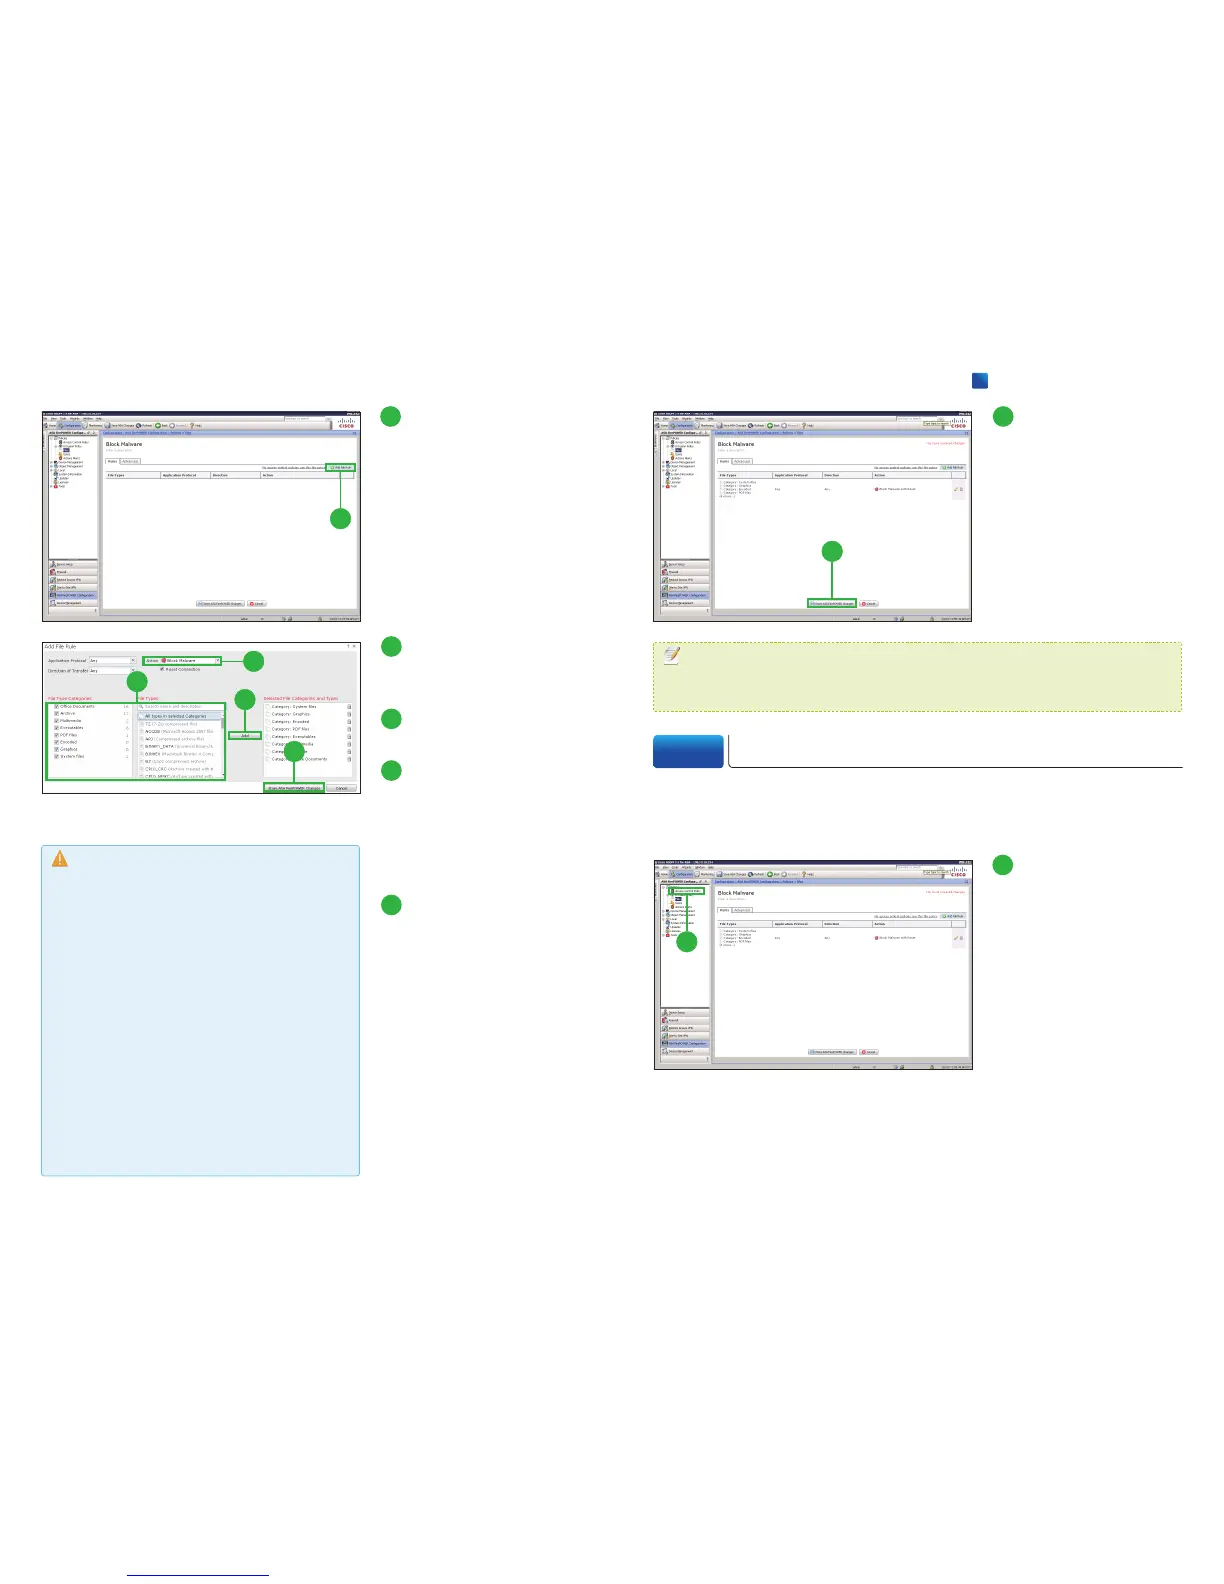
Click [Add File Rule].
The [Add File Rule] pop-up win-
dow appears.
8
10
11
9
8
Click [Block Malware]
from the [Action] drop-
down list.
9
Select one or more [File
Types].
10
Click [Add].
You can select one or more [File
Type Categories] and search for
a file type by its name or de-
scription.
11
Click [Store ASA Fire-
POWER Changes].
12
Click [Store ASA Fire-
POWER Changes].
The [Apply Access Control Poli-
cy] pop-up window appears.
12
Caution
At step
❽
, the rule actions [Malware Cloud Lookup].and
[Block Malware] require the NGIPS License or the AMP
License. If you don
ʼ
t have these licenses, select the rule
actions [Detect Files].or [Block Files].
●
Detect Files rules allow you to log the detection of
specific file types while still allowing their transmis
-
sion.
●
Block File rules allow you to block specific file types.
●
Malware Cloud Lookup rules allow you to log the
malware disposition of files traversing your network
based on a cloud lookup, while still allowing their
transmission.
●
Block Malware rules allow you to calculate the SHA-
256 hash value of specific file types, then use a cloud
lookup process to first determine if files traversing
your network contain malware, then block files that
represent threats.
MEMO
You can set separate rules within a file policy to take different actions for different file types,
application protocols, or directions of transfer. If you want to do so, repeat the steps
❼
to
⓫
.
By editing the [Default Allow All Traffic] policy that the system provides by default,
configure access control rules to exert granular control over network traffic logging
and handling (visualization).
2-2 Configuring Access Control Policy: Visualization
1
1
Click [Access Control
Policy].