25
Cisco Catalyst 9130AX Series Access Points
d. M ake sure DHCP is enabled on the network. The access point must receive its IP address through DHCP.
Note An 802.11ax Cisco AP will be assigned an IP address from the DH CP server only if a default router
(gateway) is configured on the DHCP server (enabling the AP to receive its gateway IP address) and the
gateway ARP is resolved.
e. CAPWAP UDP ports must not be blocked in the network.
f. The access point must be able to find the IP address of the controller. This can be accomplished using DH CP,
DN S, or IP subnet broadcast. This guide describes the DH CP method to convey the controller IP address. For
other methods, refer to the product documentation. See also the “Configuring DHCP O ption 43” section on
page 32
for more information.
Note The access point requires a gigabit Ethernet (GbE) link to prevent the Ethernet port from becoming a
bottleneck for traffic because wireless traffic speeds exceed transmit speeds of a 10/100 Ethernet port.
Step 2 For C9130AXI, proceed to
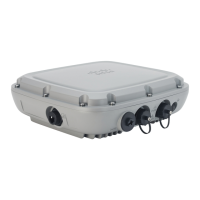
Step 3. For C9130AXE, connect the antennas to the AP before powering the AP
up. Enabling the AP radios without connecting the antennas can result in damage to the AP.
Step 3 Apply power to the access point. See Grounding the Access Point, page 27.
a. As the access point attempts to connect to the controller, the LED cycles through a green, red, and off
sequence, which can take up to 5 minutes.
Note If the access point remains in this mode for more than five minutes, the access point is unable to find the
Master Cisco Wireless Controller. Check the connection between the access point and the Cisco Wireless
Controller and be sure that they are on the same subnet.
b. If the access point shuts down, check the power source.
c. After the access point finds the Cisco Wireless Controller, it attempts to download the new operating system
code if the access point code version differs from the Cisco Wireless Controller code version. While this is
happening, the Status LED blinks blue.
d. If the operating system download is successful, the access point reboots.
Step 4 Configure the access point if required. Use the controller CLI, controller GUI, or Cisco Prime Infrastructure
to customize the access-point-specific 802.11ax network settings.
Step 5 If the pre-installation configuration is successful, the Status LED is green indicating normal operation.
Disconnect the access point and mount it at the location at which you intend to deploy it on the wireless
network.
Step 6 If your AP does not indicate normal operation, turn it off and repeat the pre-installation configuration.
Note When you are installing a Layer 3 access point on a different subnet than the Cisco Wireless
Controller, be sure that a DHCP server is reachable from the subnet on which you will be installing
the access point, and that the subnet has a route back to the Cisco Wireless Controller. Also be sure
that the route back to the Cisco Wireless Controller has destination UDP ports 5246 and 5247 open
for CAPWAP communications. Ensure that the route back to the primary, secondary, and tertiary
controller allows IP packet fragments. Finally, be sure that if address translation is used, that the
access point and the Cisco Wireless Controller have a static 1-to-1 NAT to an outside address. (Port
Address Translation is not supported.)
 Loading...


