Step 3
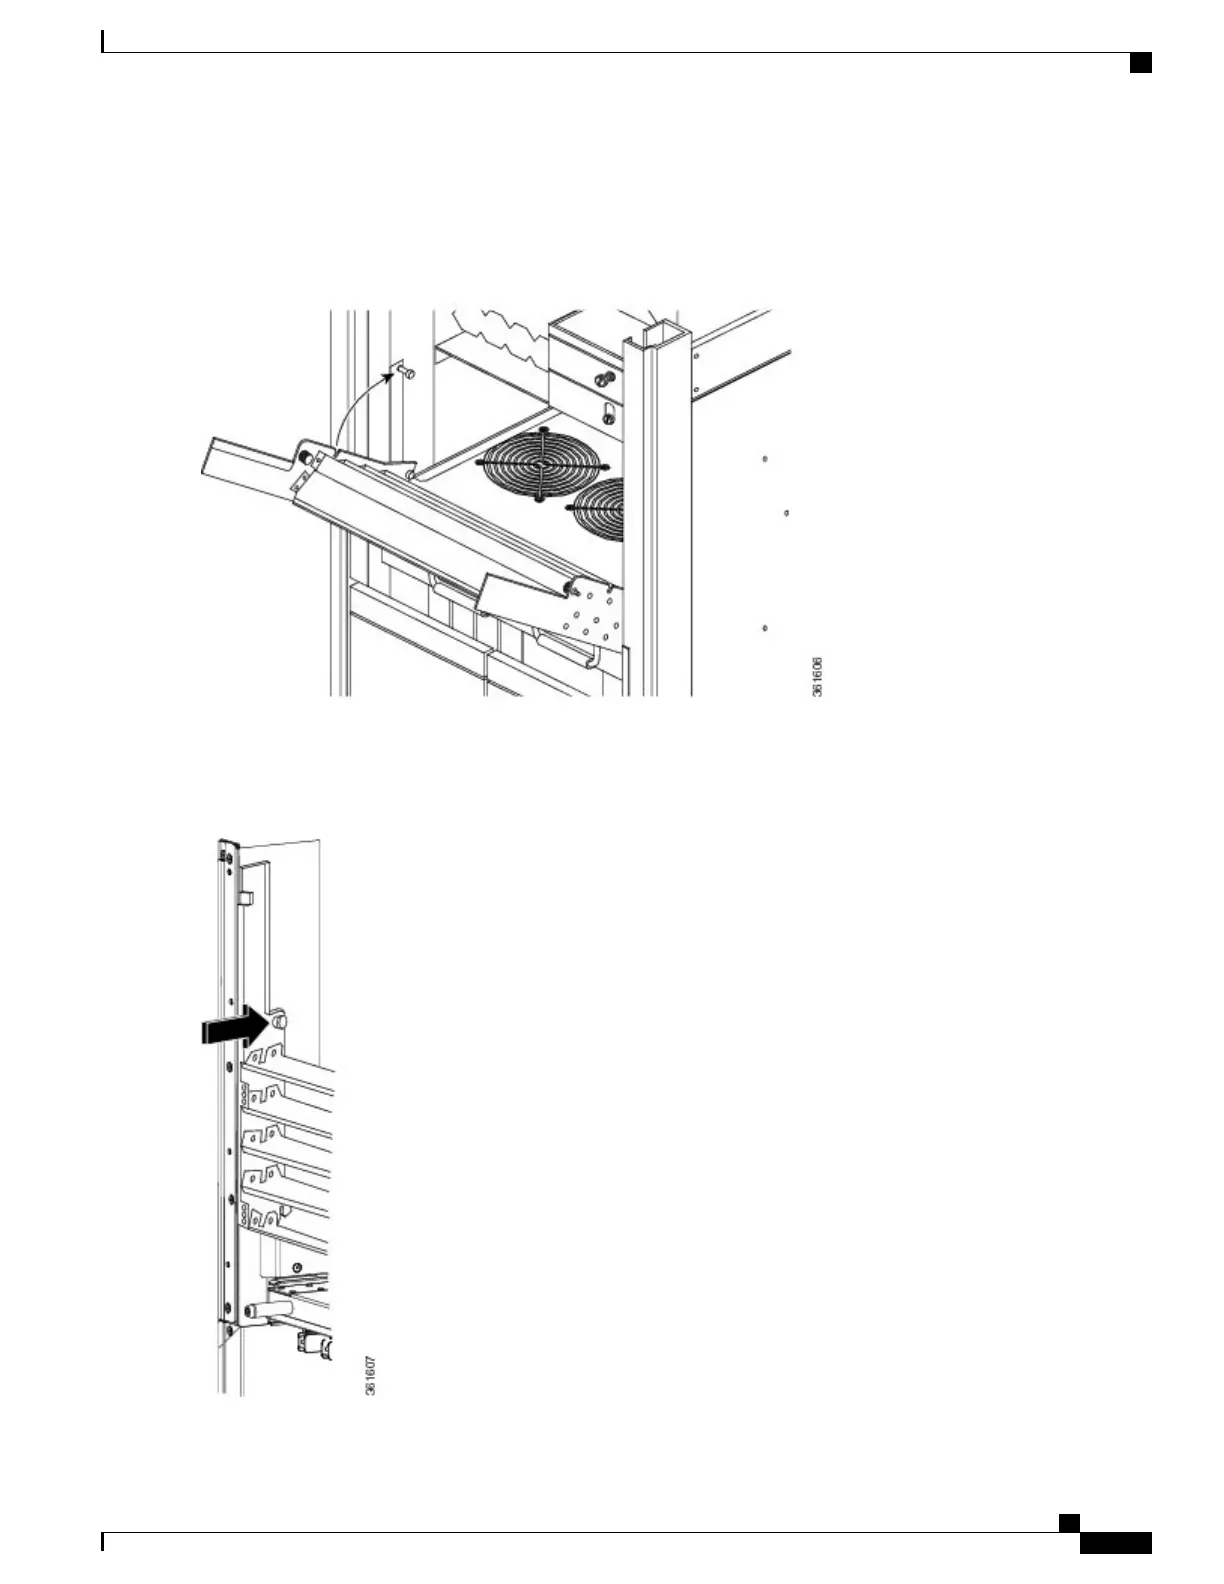
Rotate the air deflector forward until it is seated on the upper standoff.
Figure 26: Rotating the Air Deflector Forward
Step 4
Tighten the captive screw on both sides.
Figure 27: The Captive Screw
Cisco CRS Routers 16-Slot Line Card Chassis Enhanced Router Installation Guide
39
Installing Power Components
Installing the Exhaust Air Deflector
 Loading...


