36
Getting Started Guide for Cisco Digital Media Players
78-19212-02
Configure Settings
Configure Video Output
Before You Begin
• Connect your DMP to its presentation system.
• Log in to DMPDM.
Procedure
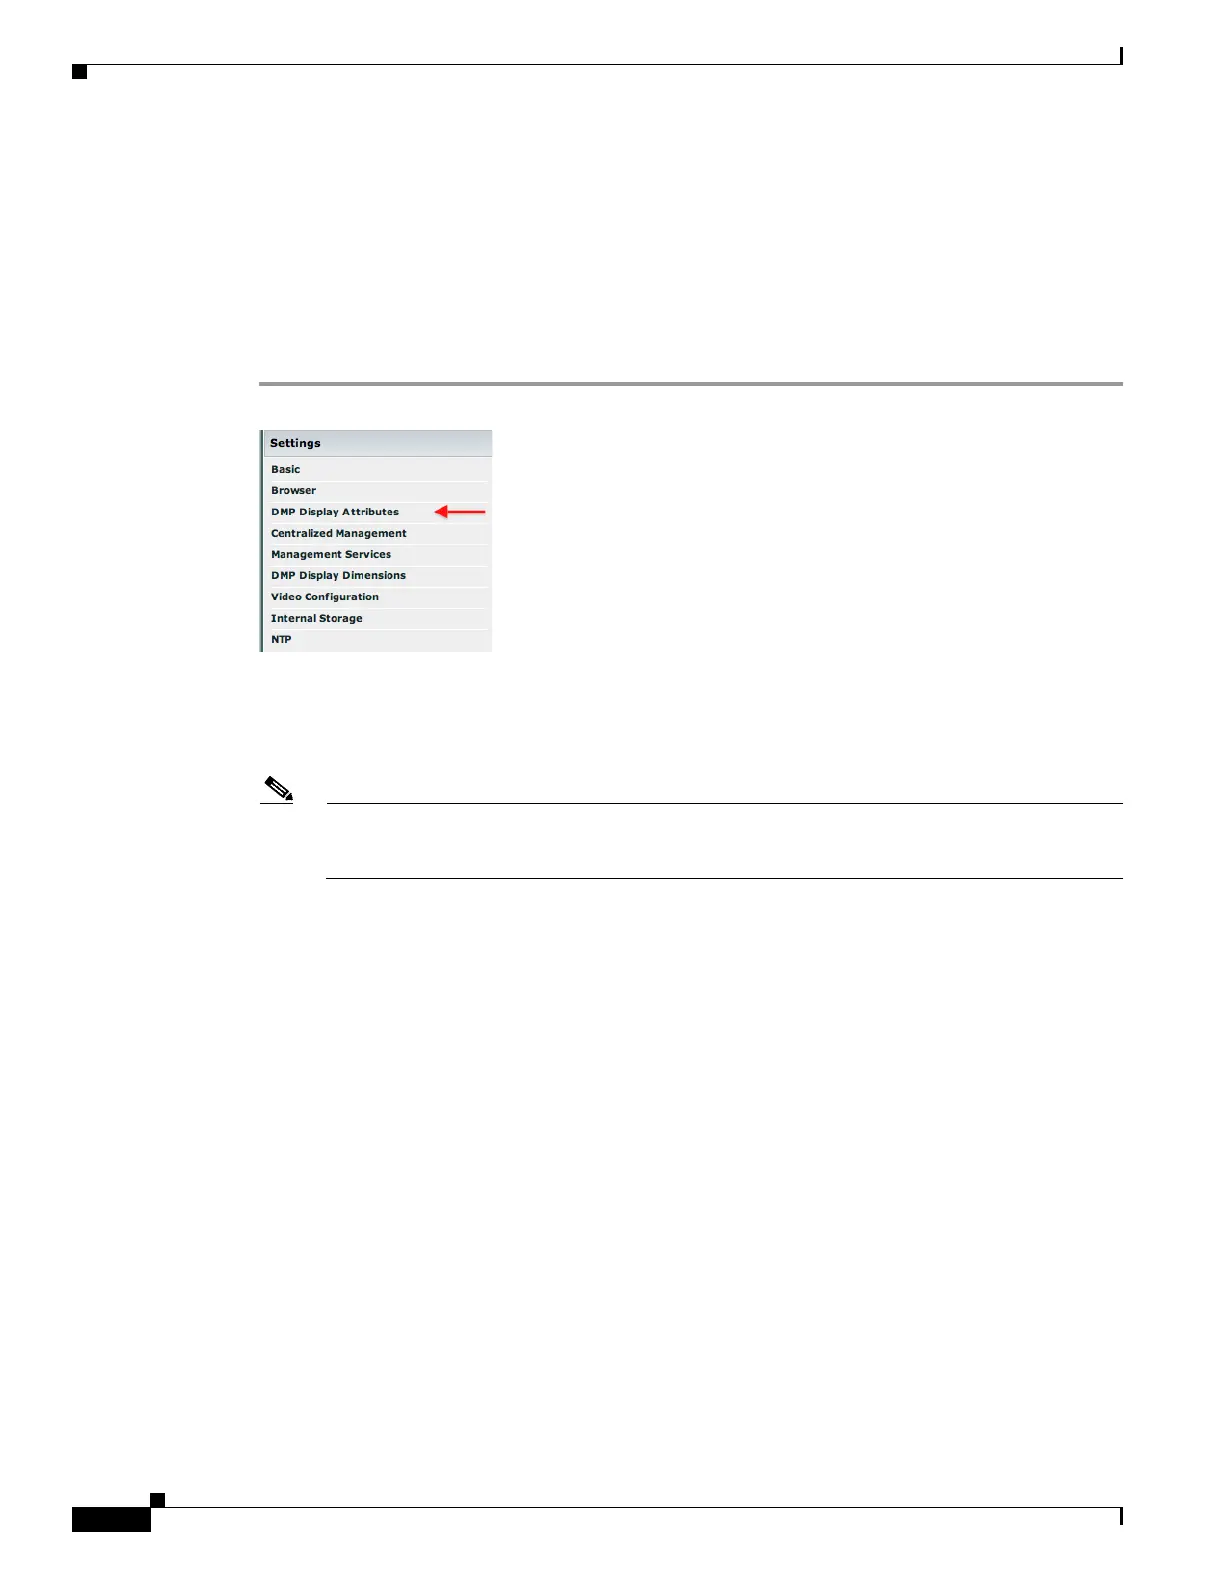
Step 1 Click DMP Display Attributes in the Settings list.
The display autodetection feature is enabled by default. However, it fails unless you use either:
• An HDMI signal cable.
• An HDMI signal cable in combination with an HDMI-to-DVI adapter.
Note Are you satisfied with the choices and entries that the autodetection feature made for you? If so, you are done
with this section and you can go now to the “Protect Your DMP from Unauthorized Management” section on page 44.
Otherwise, if you are not satisfied—or if your display does not support HDMI connections —do the following.
a. Choose Disable from the DMP Display Autodetection (requires HDMI) list.
b. Choose a standard from the Display Standard list that applies in your country. For example, even
though our factory default selection is NTSC_M, your country might use PAL instead.
c. Choose your connector and signal type from the Interface (DMP display output) list. For example,
you might use SVIDEO.
If you do not know which options to choose, see the manufacturer documentation for your
presentation system.
Step 2 Choose from the Color Space list the absolute color space that your presentation system uses.
Step 3 Did you choose RGB as the color space? If so, choose an option from the Color Component Order list
to define the order in which to store red, green, and blue data.
The color component order is sometimes called the left-to-right additive color model.
Step 4 Move any or all of the sliders as needed to compensate for presentation system deficiencies in video
(brightness, contrast, or saturation) or audio (channel volume).
Step 5 Click Apply to confirm your choices and to implement them until you change them or until you restart
your DMP.
Step 6 Click Show IP— in the DMP Mode area— to test whether your choices are suitable ones for your
presentation system.