4
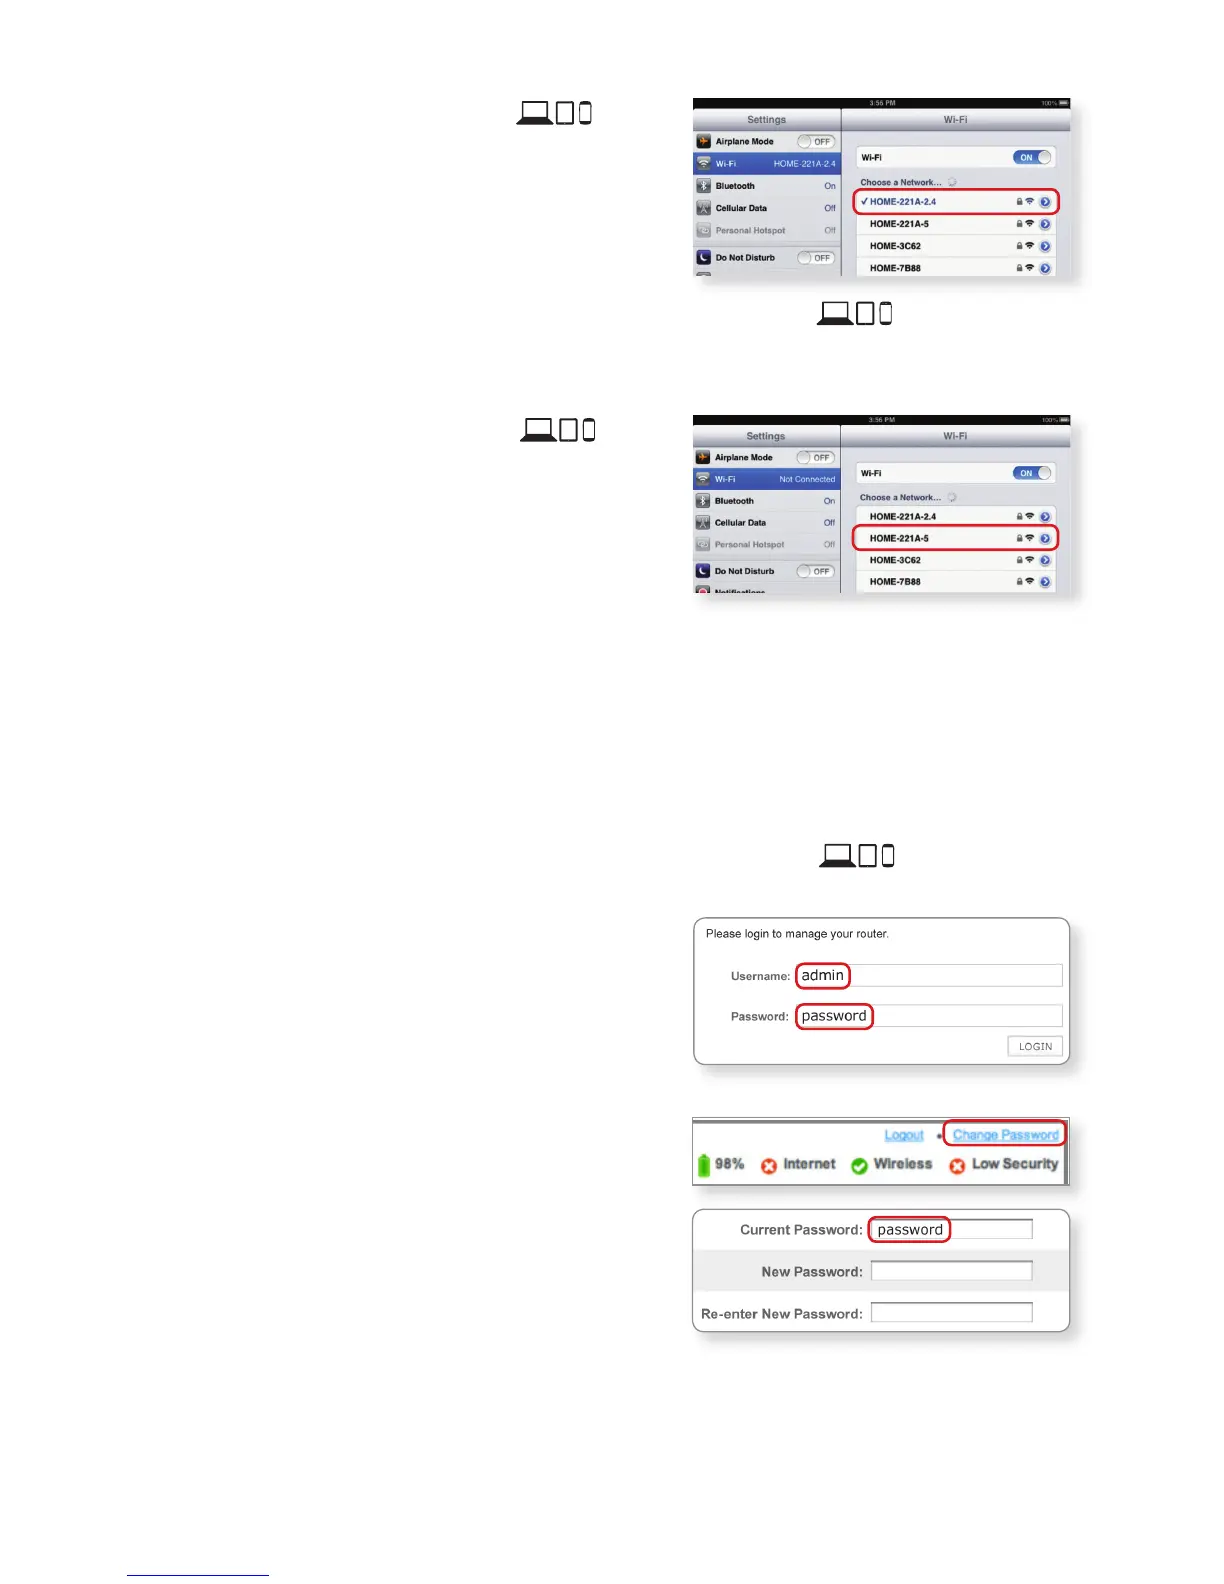
D CheckifyourWi-Fidevice is
connectedtoyourGHznetwork
If your Wi-Fi device is connected, you should
see a check mark (or other indication) next to
the Network Name (SSID) you had selected.
E TestyourInternetconnectiononyourWi-Fidevice
Open a web browser (Internet Explorer or Safari), and try to access a site, such as
www.xfinity.com.
F ConnectyourWi-Fidevice to
theGHzband
If your device supports 5 GHz, you should
see Home-XXXX-5. To connect to 5 GHz,
repeat Steps 2A-2E. If you don’t see your
5 GHz network or you don’t have a 5 GHz
Wi-Fi capable device, skip this step.
Note: For help with the above steps or to learn about Wi-Fi and 5 GHz, see p. 5-7.
Step 3. Log In and Secure the Admin Tool
You can manage your network and security settings using the Wireless Gateway 2’s
Admin Tool. To ensure better security for your Wireless Gateway 2 and home network,
we recommend changing the default password to a password of your own.
A Open a web browser from a connected wired or Wi-Fi device . Go to
http://10.0.0.1 and the Login page appears.
B Enter admin for Username.
1
Enter password
for Password.
C Click LOGIN and the At a Glance page
appears.
D Click CHANGE PASSWORD for Increased
Security (recommended).
1. Enter “password” in the Current Password
field.
2. Create a new password of your choice.
2
3. Re-enter your new password.
4. Click “Save”.
5. Your settings should now be saved.
1
The username “admin” cannot be changed.
2
The password must be at least 8 characters
and may include letters or numbers or a
combination of both (no symbols). For better
security, try using at least 1 number and a mix
of upper and lower case letters.