3
Step 2. Connect Your Wi-Fi Devices
Now that you have your wireless network information, you’re ready to connect your
Wi-Fi devices (laptops, tablets, mobile devices) to the Wireless Gateway 2.
Follow the steps below for each Wi-Fi device you want to connect to your home
network.
For the best experience from the Wireless Gateway 2, connect to both 2.4 and
5 GHz networks, if your Wi-Fi device supports both networks (p. 6). If it does not,
only connect to the 2.4 GHz network.
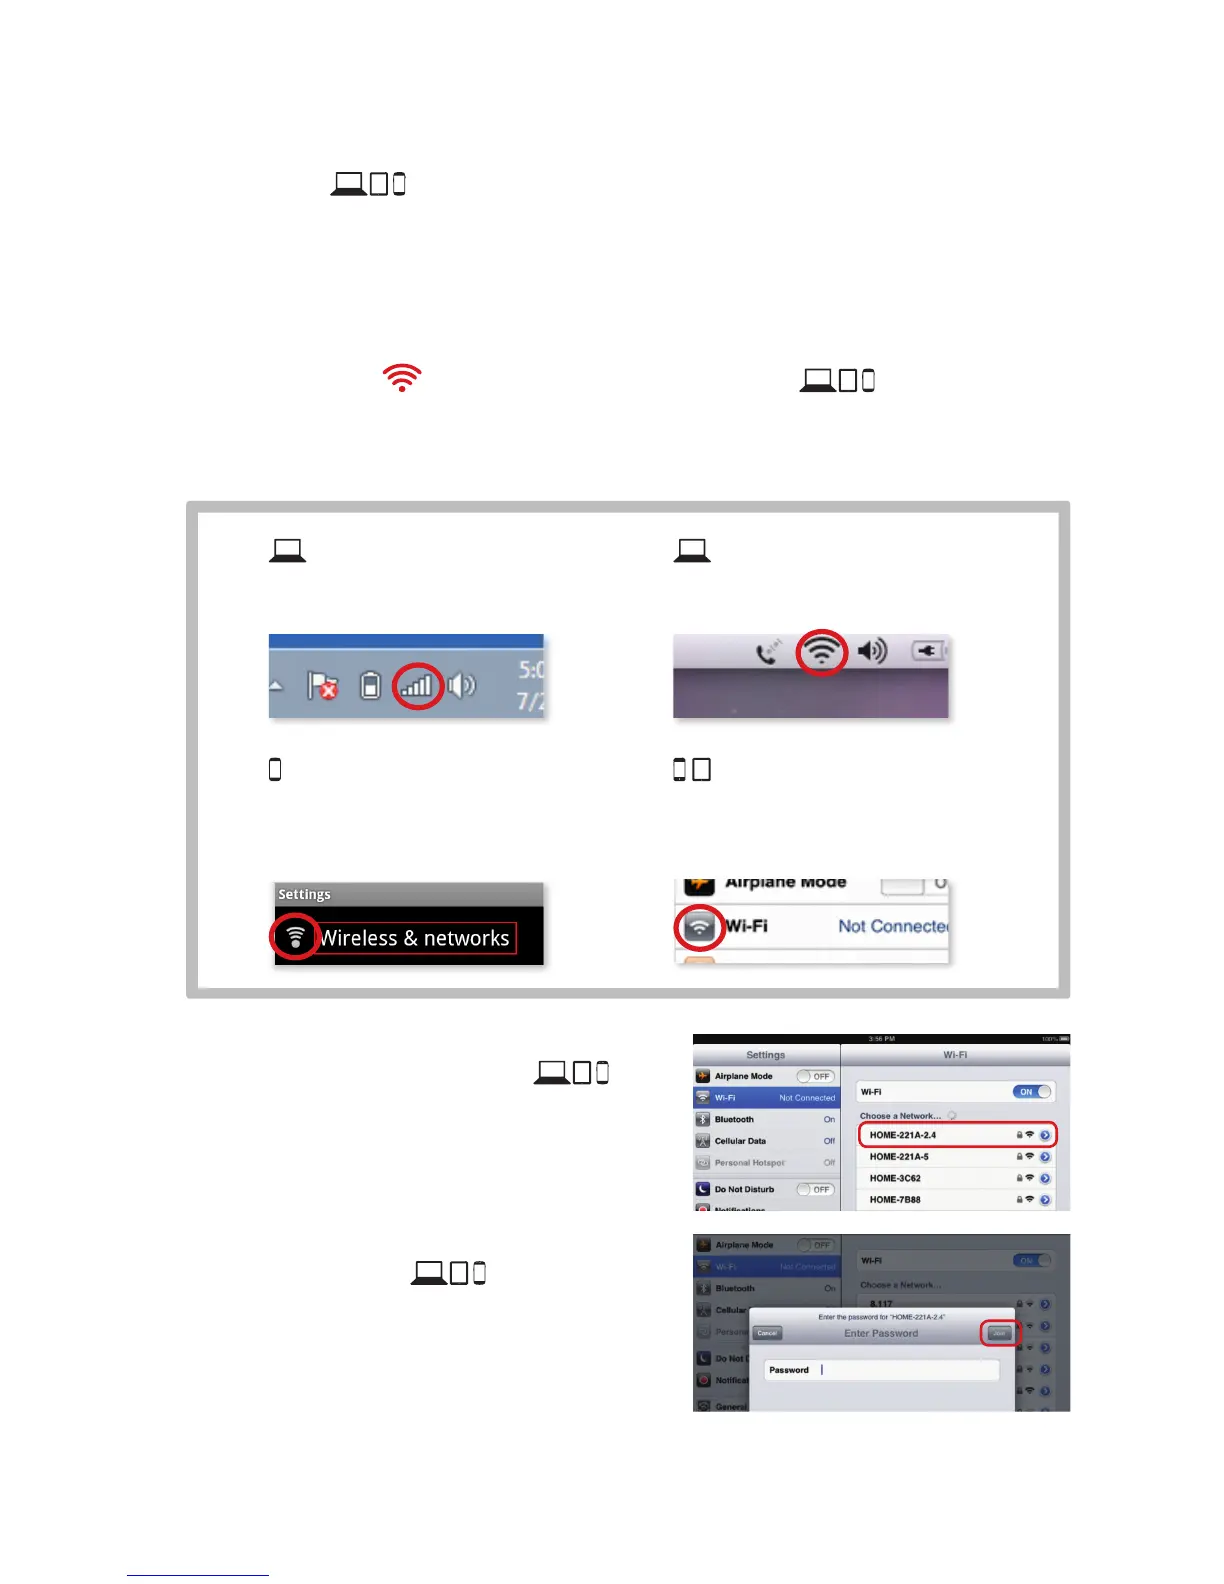
A GototheWi-Fi SettingsonyourWi-Fidevice andensure
Wi-Fiisturnedon
Directions to access the Wi-Fi settings for popular operating systems are below. If
your operating system is not listed, refer to the manufacturer’s guides.
Windows
On your Windows
®
Desktop,
click the Wireless Network icon.
Android
From the Apps screen, tap the
Settings icon. Tap Wireless &
Networks, then Wi-Fi Settings.
Apple Mac OS X
On your Mac
®
Desktop, click
the Wi-Fiicon.
Apple iOS
(iPad, iPhone, iPod Touch…)
From the Home Screen, tap the
Settings icon. Tap the Wi-Fi icon.
B SelecttheGHzNetworkName
(SSID)onyourWi-Fidevice
Under the Wi-Fi settings, the list of available
networks should appear. Select your home
network (such as Home-XXXX-2.4) from
Step1.
C EntertheNetworkKey(Password)on
yourWi-Fidevice
When prompted, enter the case-sensitive
Network Key (Password) from Step 1. Tap the
confirmation button—usually labeled Join,
Connect, or OK.