Americas Headquarters
Cisco Systems, Inc.
170 West Tasman Drive
San Jose, CA 95134-1706
USA
www.cisco.com
Small Business Support, Global: www.cisco.com/go/sbsc
Cisco and the Cisco Logo are trademarks of Cisco Systems, Inc. and/or its affiliates in the U.S. and
other countries. A listing of Cisco's trademarks can be found at ww w.cisco.com/go/trademarks.
Third party trademarks mentioned are the property of their respective owners. The use of the word
partner does not imply a partnership relationship between Cisco and any other company. (1005R)
© 2011 Cisco Systems, Inc. All rights reserved.
78-19197-02
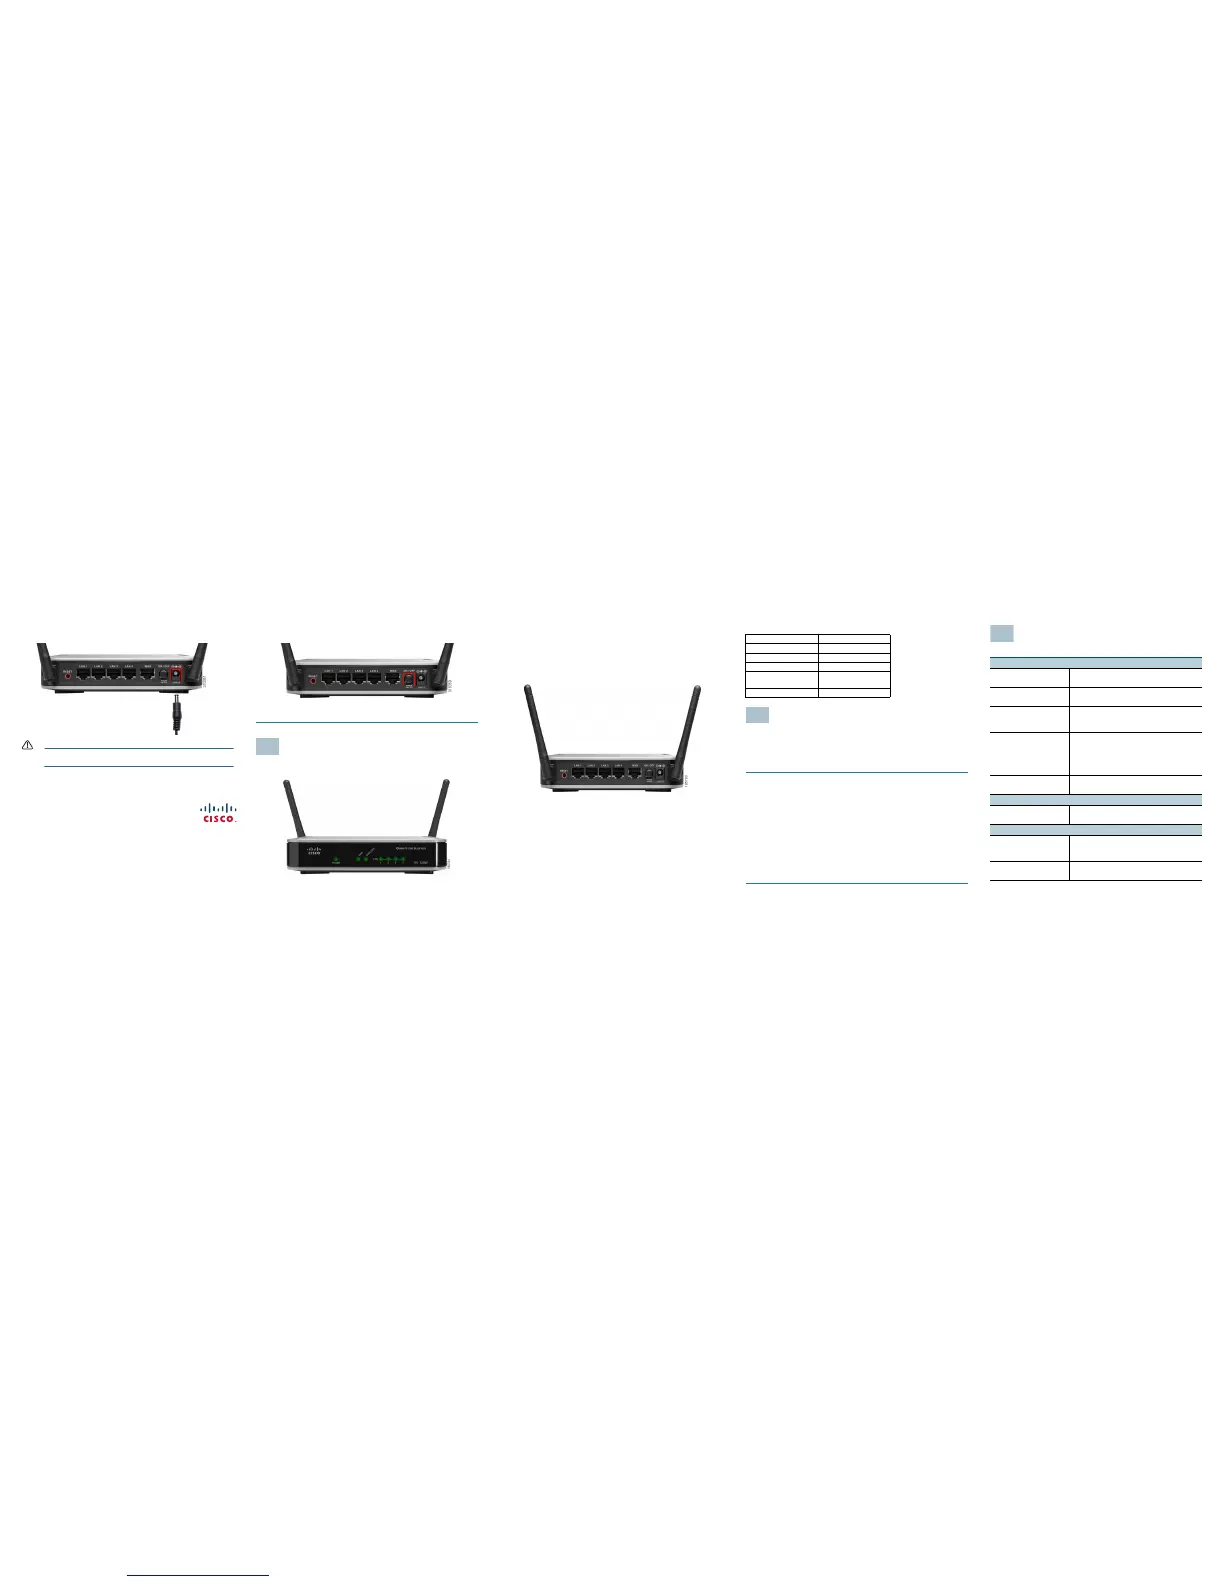
STEP 4 Connect the power adapter to the Cisco RV120W power port.
CAUTION Use only the power adapter that is supplied with the unit. Using
a different power adapter could damage the unit.
STEP 5 Plug the other end of the adapter into an electrical outlet.
STEP 6 On the Cisco RV120W, push in the ON/OFF POWER SWITCH button.
The POWER LED on the front panel lights up green when the power
adapter is connected properly and the unit is turned on.
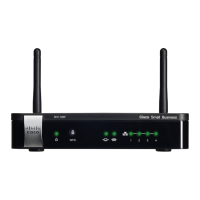
Cisco RV120W Features
Front Panel
Power—The Power LED lights up green to indicate the unit is powered on. It
flashes green when the power is coming on or software is being upgraded.
WAN LED—The WAN (Internet) LED lights up green when the unit is connected
to your cable or DSL modem. The LED flashes green when the unit is sending
or receiving data over the WAN port.
Wireless—The Wireless LED lights up green when the wireless module is
enabled. The LED is off when the wireless module is disabled. The LED flashes
green when the unit is transmitting or receiving data on the wireless module.
LAN—These four LEDs correspond to the four LAN (Ethernet) ports of the
Cisco RV120W. If the LED is continuously lit green, the Cisco RV120W is
connected to a device through the corresponding port (1, 2, 3, or 4). The LED
for a port flashes green when the Cisco RV120W is actively sending or
receiving data over that port.
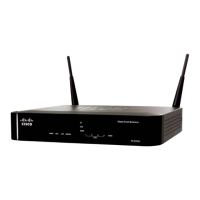
Back Panel
RESET Button—The Reset button has two functions:
• If the Cisco RV120W is having problems connecting to the Internet, press
the RESET button for less than five seconds with a paper clip or a pencil tip.
This is similar to pressing the reset button on your PC to reboot it.
• If you are experiencing extreme problems with the Cisco RV120W and have
tried all other troubleshooting measures, press and hold in the RESET
button for 10 seconds. This restores the factory defaults and clear all of the
Cisco RV120W settings.
LAN Ports (1-4)—These ports provide a LAN connection to network devices,
such as PCs, print servers, or additional switches.
WAN Po r t—The WAN port is connected to your Internet device, such as a
cable or DSL modem.
ON/OFF POWER SWITCH—Press this button to turn the Cisco RV120W on
and off. When the button is pushed in, power is on.
Power Port—The power port is where you connect the AC power cable.
Default Settings
Getting Started with the Device Manager
Before you begin to use the Device Manager, make sure that you have a
computer and browser as described in the Before You Begin section. The
Device Manager provides a Setup Wizard to perform basic configuration for
the firewall. You can also perform advanced configuration tasks in the Device
Manager, and access online help for your Cisco RV120W.
STEP 1 Connect your computer to the Cisco RV120W as described in the
Connecting the Equipment section. Your PC will become a DHCP
client of the firewall and will receive an IP address in the 192.168.1.XXX
range.
STEP 2 Start a web browser on your PC. In the Address Bar, enter the default
IP address of the firewall: 192.168.1.1. A message appears about the
site’s security certificate. The Cisco RV120W uses a self-signed
security certificate and this message appears because the firewall is
not known to your PC. You can safely click Continue to this website (or
the option shown on your particular web browser) to go to the web
site.
STEP 3 When you connect to the firewall, the Setup Wizard appears. Follow
the on-screen prompts in the Setup Wizard to configure your firewall.
Parameter Default Value
Username admin
Password admin
LAN IP 192.168.1.1
DHCP Range 192.168.1.100 to
192.168.1.254
Netmask 255.255.255.0
Where to Go From Here
Support
Cisco Small Business
Support Community
www.cisco.com/go/smallbizsupport
Cisco Small Business
Support and Resources
www.cisco.com/go/smallbizhelp
Phone Support Contacts www.cisco.com/en/US/support/
tsd_cisco_small_business
_support_center_contacts.html
Cisco Small Business
Firmware Downloads
www.cisco.com/cisco/web/download/
index.html
Select a link to download firmware for Cisco
Small Business Products. No login is
required.
Cisco Small Business
Open Source Requests
www.cisco.com/go/
smallbiz_opensource_request
Product Documentation
Cisco Small Business RV
Series Routers/Firewalls
www.cisco.com/go/smallbizrouters
Cisco Small Business
Cisco Partner Central
for Small Business
(Partner Login Required)
www.cisco.com/web/partners/sell/smb
Cisco Small Business
Home
www.cisco.com/smb
 Loading...