Connecting Cisco T1/E1 High-Speed WAN Interface Cards on Cisco 1861 Integrated Services Routers
T1/E1 HWICs
3
Cisco IOS Release 12.5(1)T
Cables
Use a straight-through RJ-48C–to–RJ-48C cable to connect a T1/E1 HWIC to a network.
Connecting a T1/E1 HWIC to a Network
To connect a T1/E1 HWIC to a network, follow these steps:
Step 1 Confirm that the router is turned off.
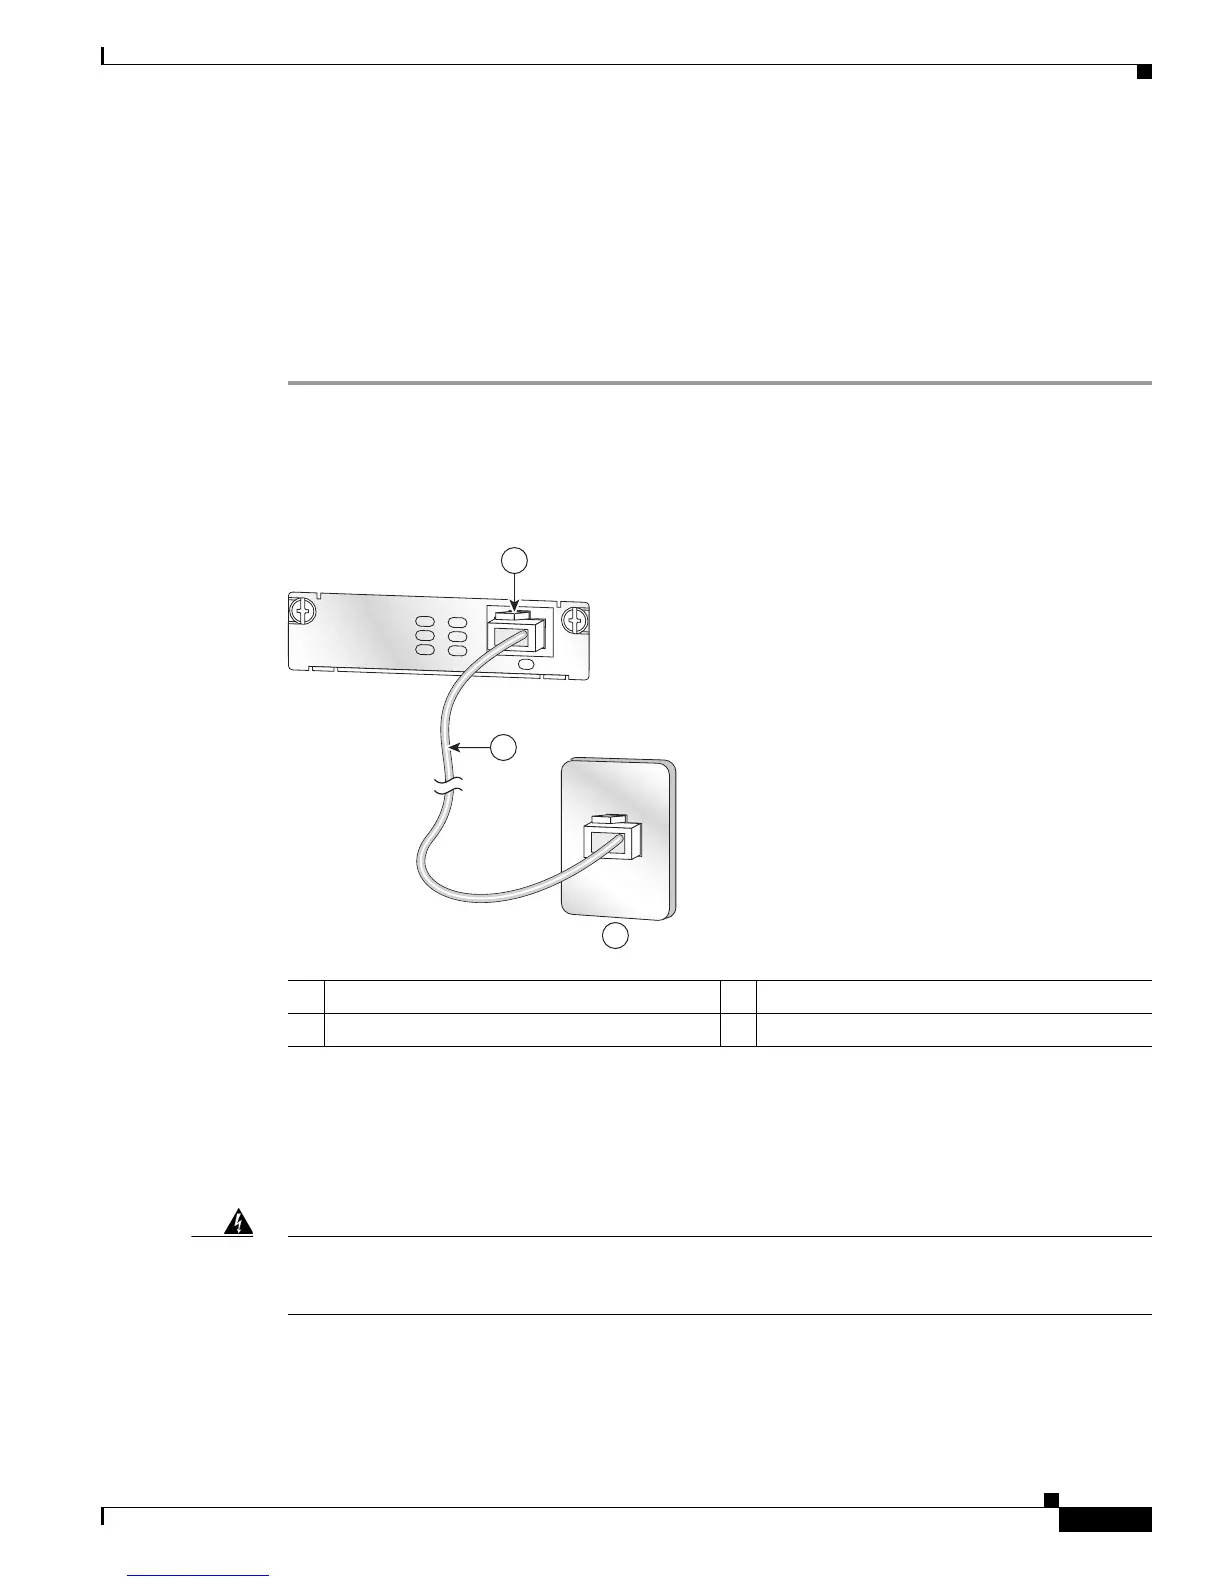
Step 2 Connect one end of the straight-through RJ-48C–to–RJ-48C cable to the RJ-48C port on the T1/E1
HWIC, as Figure 2 shows.
Figure 2 Connecting the T1/E1 HWIC to a T1 Wall Jack
Step 3
Connect the other end of the cable to the T1 wall jack.
Step 4 Turn on power to the router.
Step 5 Check that the CD/LP LED comes on, which indicates that the internal DSU/CSU is communicating with
the DSU/CSU at the T1 service provider’s central office.
Warning
To avoid electric shock, do not connect safety extra-low voltage (SELV) circuits to telephone-network
voltage (TNV) circuits. LAN ports contain SELV circuits, and WAN ports contain TNV circuits. Some
LAN and WAN ports both use RJ-45 connectors. Use caution when connecting cables.
Statement 1021
1 T1 (RJ-48C) wall jack 3 T1 port (RJ-48C)
2 Straight-through RJ-48C–to–RJ-48C cable
HWIC-
1T1/E1
CD/LP PO AL
232078
3
2
1
 Loading...