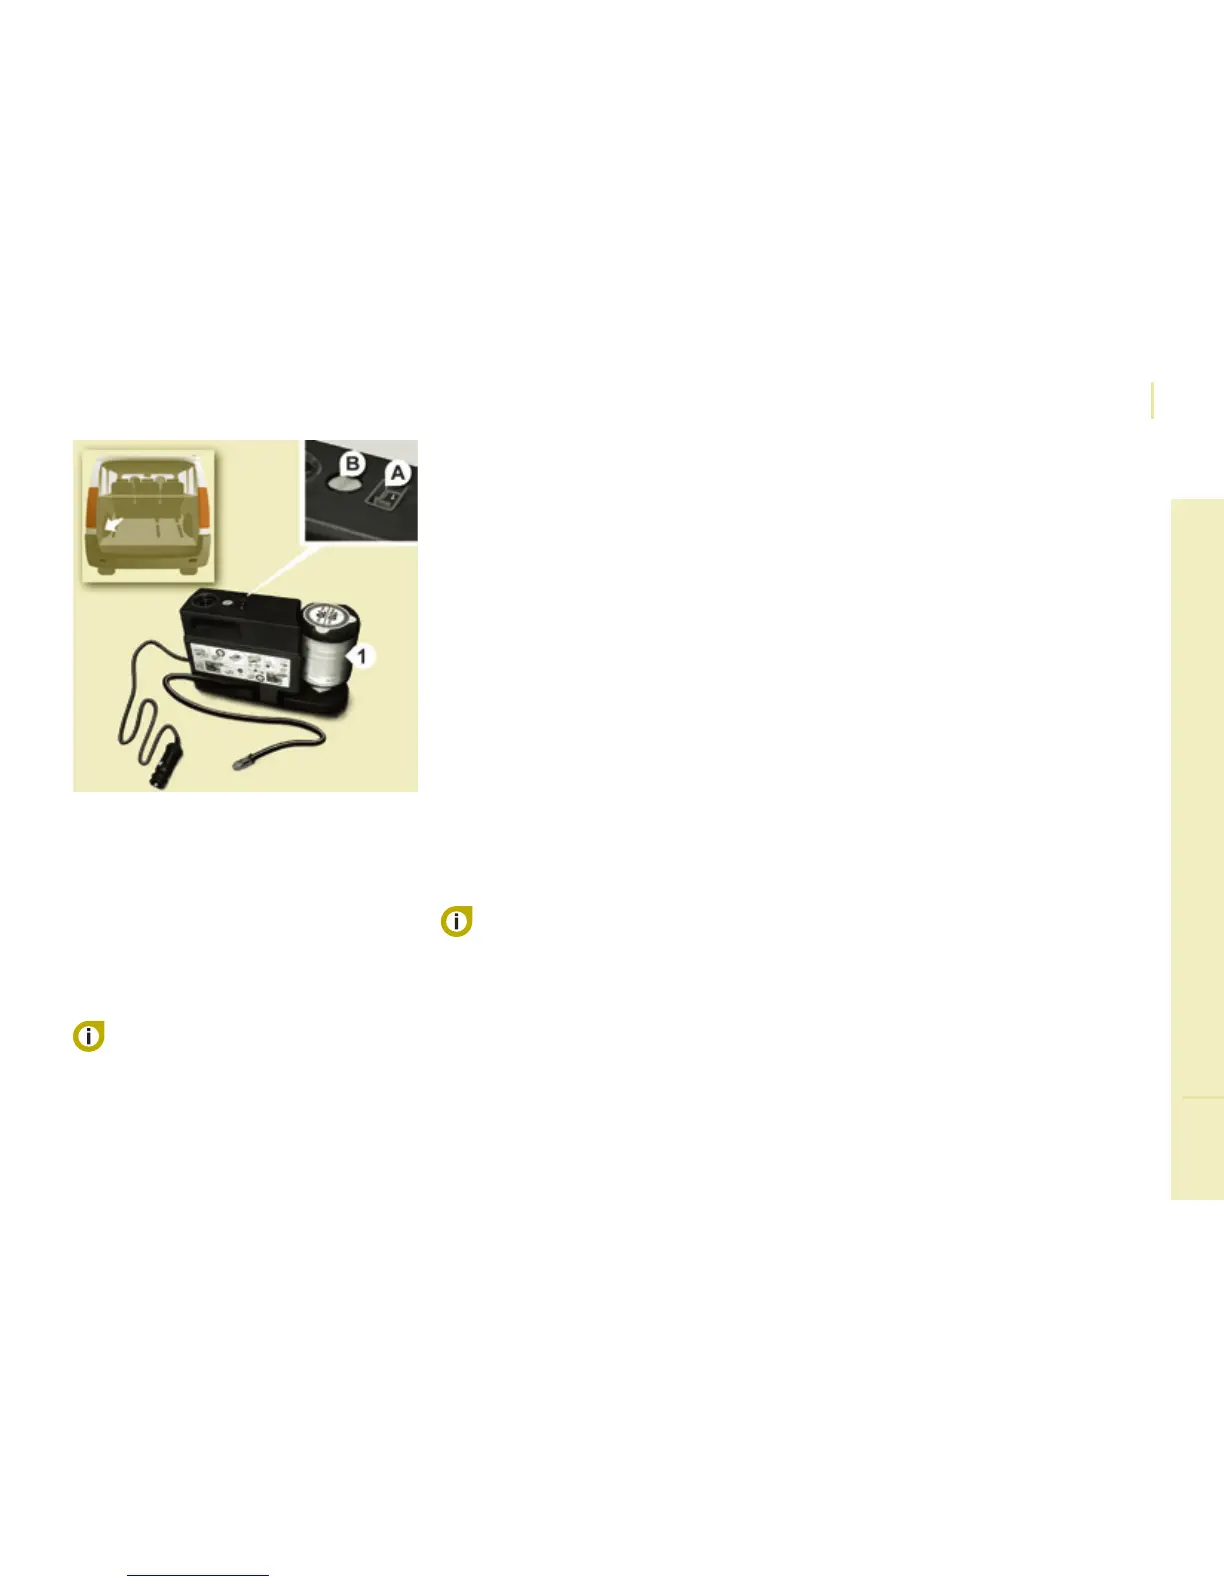
- switch off the ignition,
- affix the speed limitation sticker to the
vehicle's steering wheel to remind you
that a wheel is in temporary use,
- check that the switch A is at position " 0 ",
- connect the pipe of the bottle 1 to the
valve of the tyre to be repaired,
- connect the compressor's electrical plug
to the vehicle's 12V socket,
- start the vehicle and let the engine run,
- switch on the compressor by pressing
the switch A to position " 1 " until the tyre
pressure reaches 2.0 bars,
Vehicles supplied with a temporary
puncture repair kit do not have a spare
wheel or tooling (jack, wheelbrace, ...).
- remove the compressor, unclip and
store the bottle in a sealed bag to avoid
staining your vehicle with traces of fluid,
- drive immediately, for approximately
two miles (three kilometres), at reduced
speed (between 12 and 37 mph (20 and
60 km/h)), to seal the puncture,
- stop to check the repair and the
pressure,
If, after approximately five to ten
minutes, you are not able to obtain
this pressure, the tyre cannot be repaired;
contact a CITROËN dealer or a qualified
workshop for roadside assistance.