Step 1: Remove all the stakes from around the exterior
of the tent and tuck the external anchors back in the
pockets on the side panels. Place the stakes back in the
pouch and put that back in the carry bag.
Step 2: If used, remove the vertical door support rods
from pockets at the bottom of the panel, pull apart,
and refasten them with the Velcro straps located
diagonally on the panels next to each side of the door.
Step 3: From the inside of the tent, pull down the two
roof hubs holding the roof up. Or push down from the
outside of the tent if you can reach them.
Step 4: Push in the side wall panels from the outside of
the screen tent until all the hubs are collapsed.
Step 5: Once the shelter is completely collapsed grab
one corner of the tent and fold it in half on itself. Once
in half, you can now condense the shelter to fit into the
carry bag.
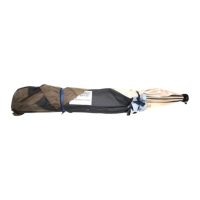
Step 6: Carefully lift and insert into the carry bag. Pay
close attention not to twist or distort the hubs or fabric
while inserting into bag. Fold the floor and divider
panel, if necessary, and place those int he carry bag
too.