II.
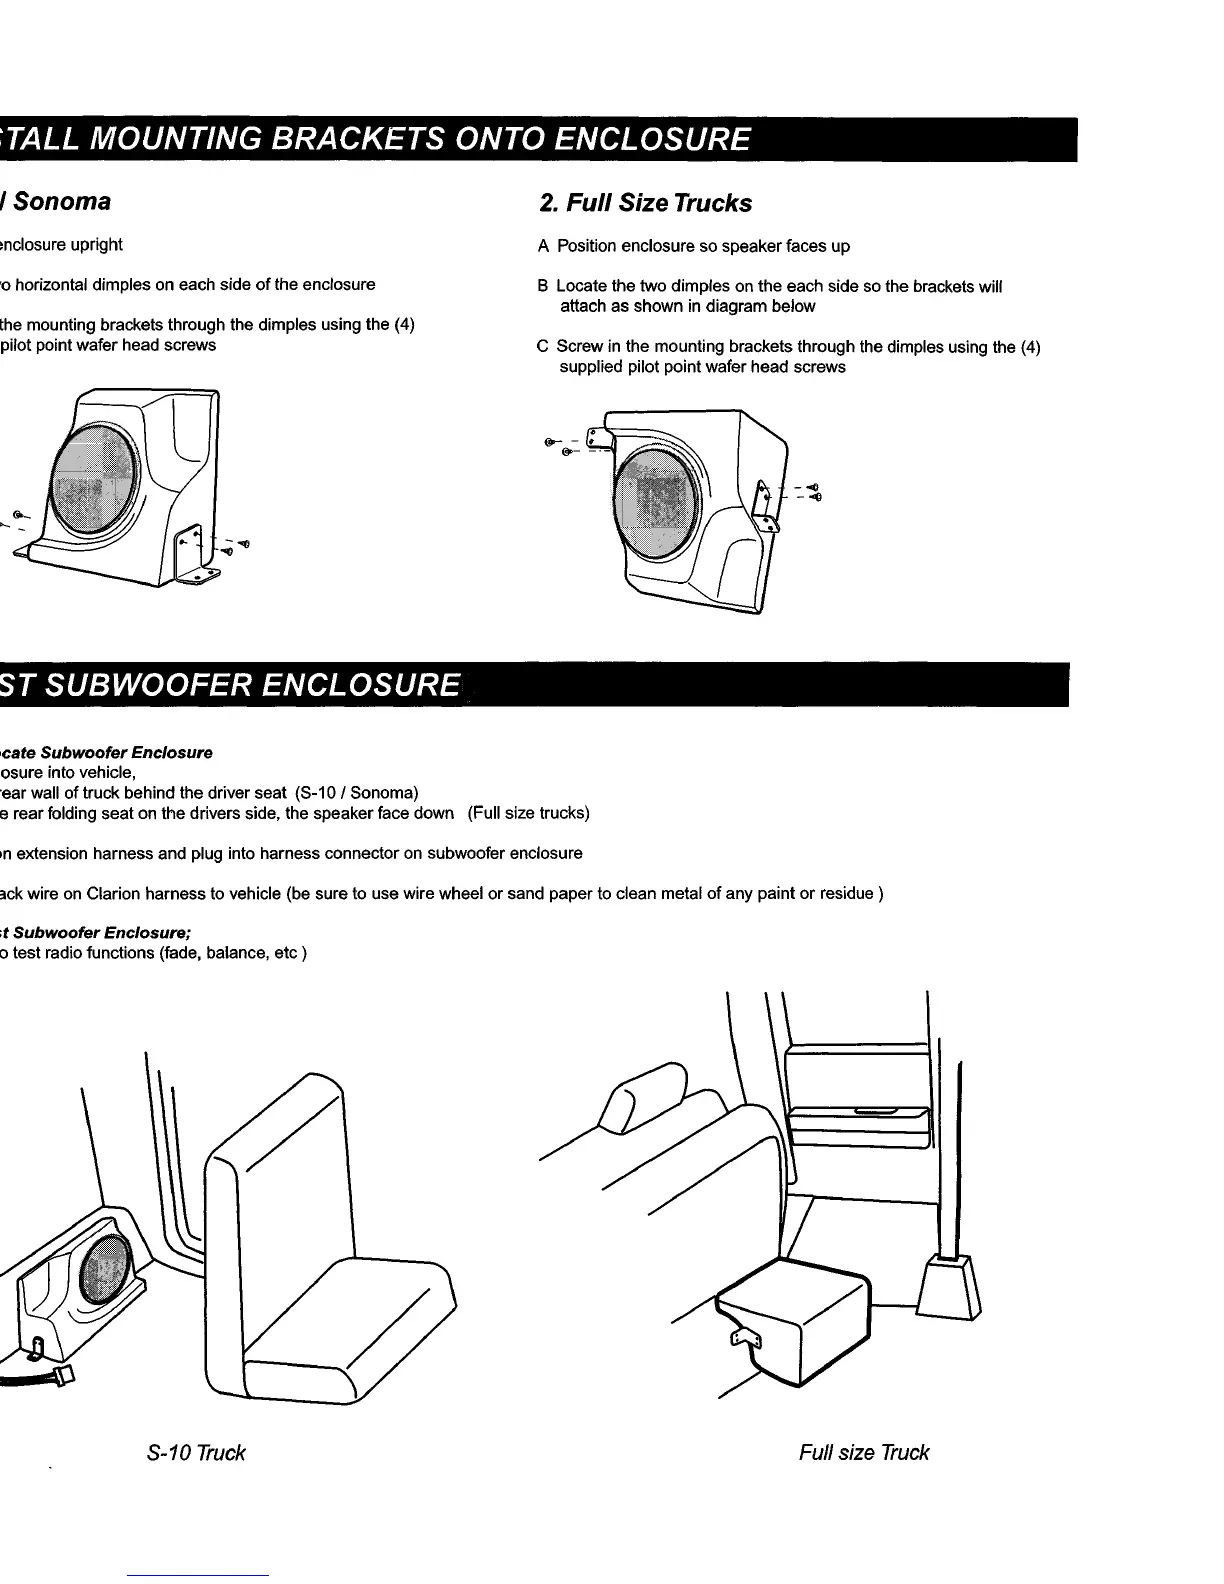
INSTALL MOUNTING BRACKETS ONTO ENCLOSURE
1.
S-10
I Sonoma
A Position enclosure upright
B Locate two horizontal dimples on each side
of
the enclosure
C Screw
in
the mounting brackets through the dimples using the (4)
supplied pilot point wafer head screws
III.
TEST SUBWOOFER ENCLOSURE
2.
Full
Size Trucks
A Position enclosure so speaker faces up
B Locate the two dimples on the each side
so
the brackets will
attach as shown in diagram below
C Screw in the mounting brackets through the dimples using the (4)
supplied pilot point wafer head screws
STEP
1:
Locate
Subwoofer
Enclosure
A Place enclosure into vehicle,
- against rear wall
of
truck behind the driver seat (S-10 I Sonoma)
- under the rear folding seat on the drivers side, the speaker face down (Full size trucks)
B Run Clarion extension harness and plug into harness connector on subwoofer enclosure
C Ground black wire on Clarion harness to vehicle (be sure to use wire wheel or sand paper to clean metal
of
any paint
or
residue)
STEP 2: Test
Subwoofer
Enclosure;
also test radio functions (fade, balance,
etc)
$-10
Truck
- 3 -
Full size
Truck
 Loading...