13
Parts & Service: 020 8988 7400 / E-mail: Parts@clarkeinternational.com or Service@clarkeinternational.com
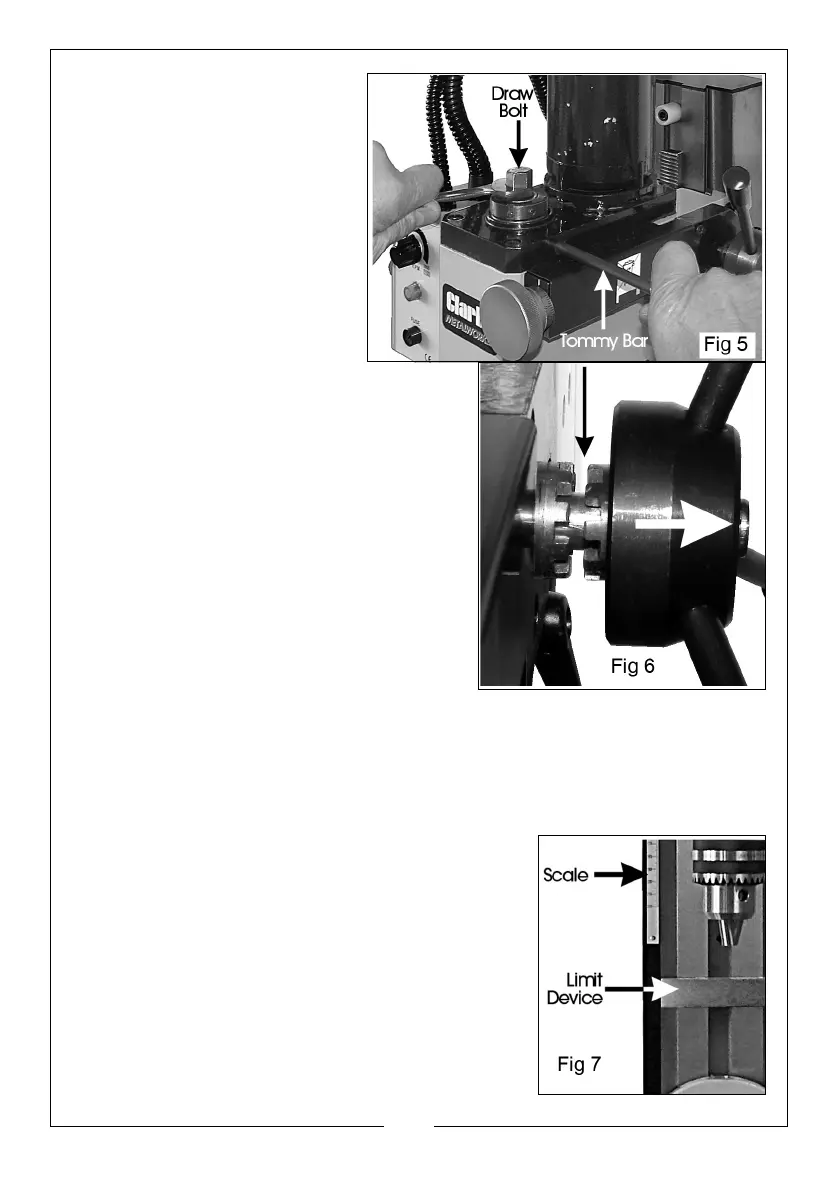
3. In order to hold the spindle,
insert the tommy bar into
the hole in the side of the
head so that it locates in
the hole in the spindle, see
Fig. 5. Hold the spindle still
whilst nipping up the draw
bolt.
4. Place the drill chuck on to
the end of the taper shank
with a sharp upward
movement.
5. The drill is lowered using the
levers on the right side of the machine,
however, in order to do so, it is first of all
necessary to disconnect the Dog
Clutch, shown in Fig. 6. Simply pull back
on the hub to disconnect.
6. Now by turning the handles, the drill
head may be lowered.
7. In order to ensure the drill chuck is firmly
secured on the spindle, place a piece
of wood on the table then lower the drill
head so that the nose of the drill chuck
comes into contact with it. Pull down
sharply one time.
8. When drilling using a mill/drill machine, it must be remembered that without
care, the drill bit could easily come into contact with the surface of the
table.
9. Drill head travel must always be restricted therefore before proceeding to
drill, otherwise damage to the table and/or drill bit could occur.
10. A limiting device is provided, mounted on the
post slide, shown in Fig. 7.
11. When through drilling, wind the drill head, with
drill bit installed, down to the maximum depth
required, and hold in place whilst sliding the
limit device up to meet it. Lock the limit device
in place using its locking lever.
• The limit device is also used if you wish to drill
to a predetermined depth.


 To Next Page