EasyManua.ls Logo

Clean Remote CR1R - User Manual

Default Icon
2 pages
Print Icon
To Next Page IconTo Next Page
Loading...
INSTRUCTIONS FOR CR1R AND CR3BCB
Battery Installation:
1. To open cover: With keypad facing you, first slide dark lens cover away from you (photo A, step 1)
and then lift lid upward from the back (photo A, step 2)
2. When placing two
AAA batteries
in the compartment note the + and - symbols on the metal hinge
should make contact with the corresponding + and - end of each battery (photo B).
3. Closing cover:
With keypad facing away from you
gently close cover by pressing downward
(photo C, step 1) and sliding it toward the front (keypad) until it is aligned. (photo C, step 2)
4. Test remote by pressing the power button; the LED should light, indicating that the batteries are in
correctly. If the LED doesn’t light, then the batteries are either in wrong or the batteries are bad.
Photo A Photo B Photo C
Open with
keypad facing you
Close with
keypad facing away
from you
EASY TV SETUP
1.
Turn ON the TV and then
stand back about 5 feet from TV and point the remote at the CENTER
of the front panel of the TV
.
It will not be necessary to point the remote at that exact area once the
remote is set-up.
2.
Press and
firmly Hold down the SETUP button
, do not release. The LED will blink once and then
after 7 seconds it will start code search. The LED will continue to blink every 2 seconds.
Once your
TV shuts OFF immediately remove your finger from the SETUP button
; the code automatically
locks in.
3.
Testing the remote:
For TV Only:
Test Power, Volume and Channel Functions,
if all work correctly setup is
complete.
If not, you may not have an exact code match. Start again at step #1. The code
search will continue where it left off.
For TV Plus Cable Box
: Only test Power and Volume function,
DO NOT CHANGE
CHANNELS
. If these functions operate correctly please turn page over and
see
Page 2
.
Important Note: If you think you missed the code or you intend to use the remote on a
different brand TV: See trouble shooting guide on page 2.
PAGE 1
Copyright© 2017, Starlight Electronics LLC, Command In Hand Inc. rev.04-11-2019
Optional screw for
the battery
compartment is in
bag with remote
Question and Answer IconNeed help?

Do you have a question about the Clean Remote CR1R and is the answer not in the manual?

Summary

Battery Installation

Easy TV Setup

Cable Box Setup

Trouble Shooting

Resetting Remote for TV or Different Brands

Procedure to reset the remote for TV or different brand TV code searches by holding SETUP and CC buttons.

Resetting Remote for TV Only

Procedure to reset the remote for TV operation only, by holding SETUP and power button.

Overview

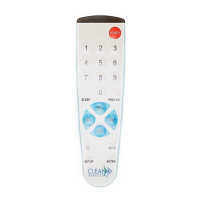
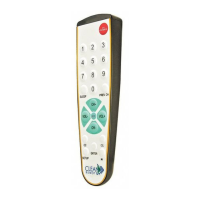
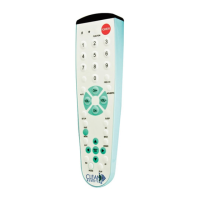
This document provides instructions for the CR1R and CR3BCB remote controls, focusing on battery installation, TV setup, and cable box setup.

Function Description:

The CR1R and CR3BCB remotes are designed to control televisions and, optionally, cable boxes. They feature a simple interface for basic functions like power, volume, and channel control. The setup process involves a code search mechanism to identify and program the remote for specific TV and cable box brands.

Important Technical Specifications:

  • Battery Type: Requires two AAA batteries.
  • LED Indicator: An LED light is used to provide feedback during battery installation, setup, and operation.
  • Setup Buttons: Dedicated "SETUP" and "ENTER" buttons are used for programming the remote.
  • Code Search: The remote employs a code search function that blinks an LED every 2 seconds during the search process.
  • Direct Access Codes: A list of three-digit direct access codes is provided for various cable box brands.

Usage Features:

Battery Installation:

  1. Opening the Cover: With the keypad facing you, slide the dark lens cover away (Step 1, Photo A), then lift the lid upward from the back (Step 2, Photo A).
  2. Inserting Batteries: Place two AAA batteries, ensuring the + and - symbols on the metal hinge align with the corresponding + and - ends of each battery (Photo B).
  3. Closing the Cover: With the keypad facing away, gently close the cover by pressing downward (Step 1, Photo C) and sliding it toward the front (keypad) until it aligns (Step 2, Photo C).
  4. Testing: Press the power button. The LED should light up, indicating correct battery installation. If not, check battery placement or replace batteries. An optional screw for the battery compartment is included in the bag with the remote.

Easy TV Setup:

  1. Preparation: Turn on the TV. Stand approximately 5 feet from the TV and point the remote at the center of the TV's front panel. (Once set up, precise aiming is not necessary).
  2. Code Search Initiation: Press and firmly hold down the "SETUP" button. Do not release it. The LED will blink once, then after 7 seconds, it will start code search, blinking every 2 seconds.
  3. Code Lock-in: Immediately remove your finger from the "SETUP" button the moment your TV shuts OFF. The code will automatically lock in.
  4. Testing the Remote (TV Only): Test Power, Volume, and Channel functions. If all work correctly, setup is complete. If not, you may not have an exact code match; restart from Step 1, and the code search will continue from where it left off.
  5. Testing the Remote (TV Plus Cable Box): Only test Power and Volume functions. DO NOT CHANGE CHANNELS. If these functions operate correctly, proceed to Cable Box Setup (Page 2).

Cable Box Setup (Requires TV Setup to be complete):

  1. Initiate Cable Box Setup: With the cable box ON, press and hold both the "SETUP" and "ENTER" buttons simultaneously until the LED light turns on and remains ON.
  2. Enter Direct Access Code: Enter the three-digit direct access number for your cable box brand from the provided list. The LED light will turn off, confirming acceptance.
  3. Testing the Remote: Point the remote toward both the Cable Box and TV. Test the CH+ and CH- buttons, as well as channel numbers. Verify that VOL+, VOL-, and TV power (ON and OFF) functions work. If successful, setup is complete. If not, repeat these steps with all listed access numbers for your brand, then try the "Other" codes.
    • Hint: If your Cable Provider is not listed, search by the manufacturer of your cable box.
    • Note: If your cable box has a power button, use the "CBL" button on the Clean Remote to power it on or off.

Troubleshooting:

Resetting the Remote (If you missed the TV code or want to use it on a different TV):

To reset the remote to the beginning of the code search: Press and hold the "SETUP" button down, then simultaneously press and hold the "CC" button down until the red LED light blinks quickly 3 times. Release both buttons. The code list is now reset to the beginning. Then follow the "Easy TV Setup" instructions on Page 1.

Resetting Remote for TV Only (After setting up for both TV and Cable Box):

If you have already set up the remote for both a TV and a Cable Box and now wish to operate the TV only (without the cable box): Hold down the "MUTE" button and "SETUP" button together until the remote blinks 3 times quickly. Immediately release both buttons. Then follow the "Reset" instruction in the paragraph above.

Maintenance Features:

The document does not explicitly detail maintenance features beyond battery replacement and troubleshooting steps for resetting the remote. Regular cleaning of the remote's surface with a soft, dry cloth is generally recommended for electronic devices.

Clean Remote CR1R Specifications

General IconGeneral
BrandClean Remote
ModelCR1R
CategoryRemote Control
LanguageEnglish

Related product manuals