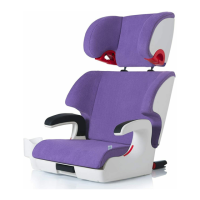
2
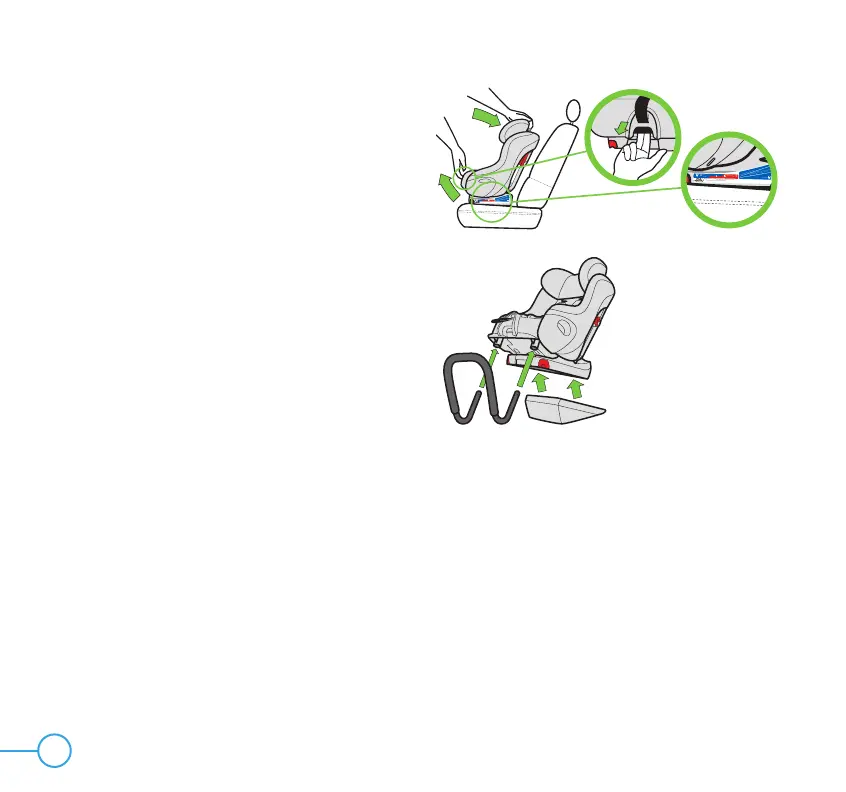
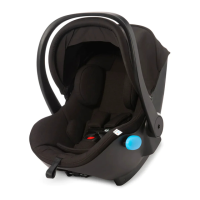
Step 1
Prepare car seat for Rear-Facing Installation:
• Fully recline car seat to Recline Position
3 by pulling Recline Handle out and
rotating car seat back as shown in
Figure 1.
• Install Rear-Facing Base to bottom of
seat. See “Installing/Removing Rear-
Facing Base” in your car seat manual.
• Remove Seat Cushion and install
Anti-Rebound Bar. See “Installing/
Removing Anti-Rebound Bar” in your
car seat manual.
Note: This car seat can be used Rear-Facing
in recline position 2 or 3 only.
Step 2
Select a forward-facing vehicle seating
location which has a vehicle belt which can
be used with this car seat.
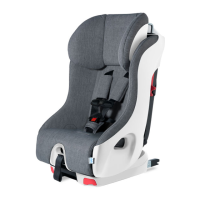
2
t
atio
n
’arr
i
ère
O
r
ie
n
tat
i
on
v
Pour ajust
Pour dév
errouiller les
c
maximum puis tirez sur les poignées de déve
rro
uilla
ge DUA.
1
3
2
Orientation
v
ers l’arrière
Or
ie
ntat
i
on ve
rs
l
’ava
nt
• Pour ajuster les connecteurs rigid
es
inférieurs du
DU
A : Tirez
sur
la poign
ée d’ajust
ement
DUA
et
gli
ssez
le
s
iège dans l
a
positi
on
souh
ai
tée.
• Pour
déve
r
rouill
e
r les
co
nn
e
cteurs rigid
es
inférieurs du
DU
A
: Étirez les co
nnect
eurs a
u
maximum puis tirez sur les poignées de déverr
o
uill
age
DUA.
• Le niveau du
so
l doit
être dans la pl
ag
e
d’i
nclinaison prévue pour
l’âge
d
e l’
enfan
t.
Plage d’
i
nc
linai
so
n
T
o
us les enfants
o
rientés
ve
rs
l’arri
è
re
1
an et pl
us
cuando la línea adecuada para el peso del niño es paralelo al suelo
UTILICE ESTA LÍNEA PARA BEBÉS BAJO 22 libras (10 kg)
UTILICE ESTA LÍNEA PARA LOS NIÑOS ENTRE 22–50 libras (10 a 22.7 kg)
Viendo hacia atrás
1
3
• Para soltar los conectores inferiores del sistema LATCH rígido: Extienda totalmente los conectores
y luego tire de las manijas rojas para soltar el sistema LATCH rígido.
2
Viendo hacia adelante
Viendo
hacia atrás
El asiento infantil está debidamente inclinado en modo mirando hacia atrás
Figure 1