12
Open the velcro fastener on the cape.
Slide the end of the cape as far as the opening.
Pull out one end and slide it completely out of the cape holder (see
8.4).
(2) Dismantle the helmet
suspension.
Push the four white plastic tabs out of the wedge-shaped holders on
the inner shell.
(3) Remove the vinyl sweatband.
Unfasten buttons A + B in Figure 2.
(4) Adjust the helmet suspension.
The helmet suspension fits head sizes 6.5 to 8 (marked on the
headband slits).
Push the headband tongue into the front holder until the correct fit is
achieved.
Adjust evenly on both sides.
Press the selected slits onto the pins on the front band.
(5) Reattach the vinyl sweatband.
Fasten buttons A + B in Figure 2.
(6) Check the helmet suspension.
Ensure the helmet suspension is properly adjusted.
(7) Check the suspension strap.
Check the suspension strap is in place.
(8) Reassemble the helmet
suspension.
Push the four white plastic tabs back into place (see (2)).
Reverse the procedure described in (1).
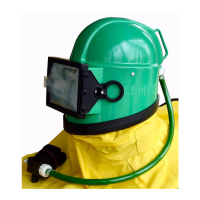
The helmet suspension ensures a sufficient distance between the head and helmet. It must be
properly installed and adjusted to provide the protection and comfort that the helmet is designed
to achieve.
8 Maintenance / Replacing Parts
The helmet, all lines, the air inlet and all connections should be inspected for the presence of dust and
debris and cleaned before use. All parts should be inspected for wear and tear.
Regularly inspect and clean the foam filter and screen filter in the air control valve and air inlet in the
helmet.
After use, the helmet should be hung by the handle in a clean place.