Disassembly
2 - 8 Removing the Optical (CD/DVD) Device
2.Disassembly
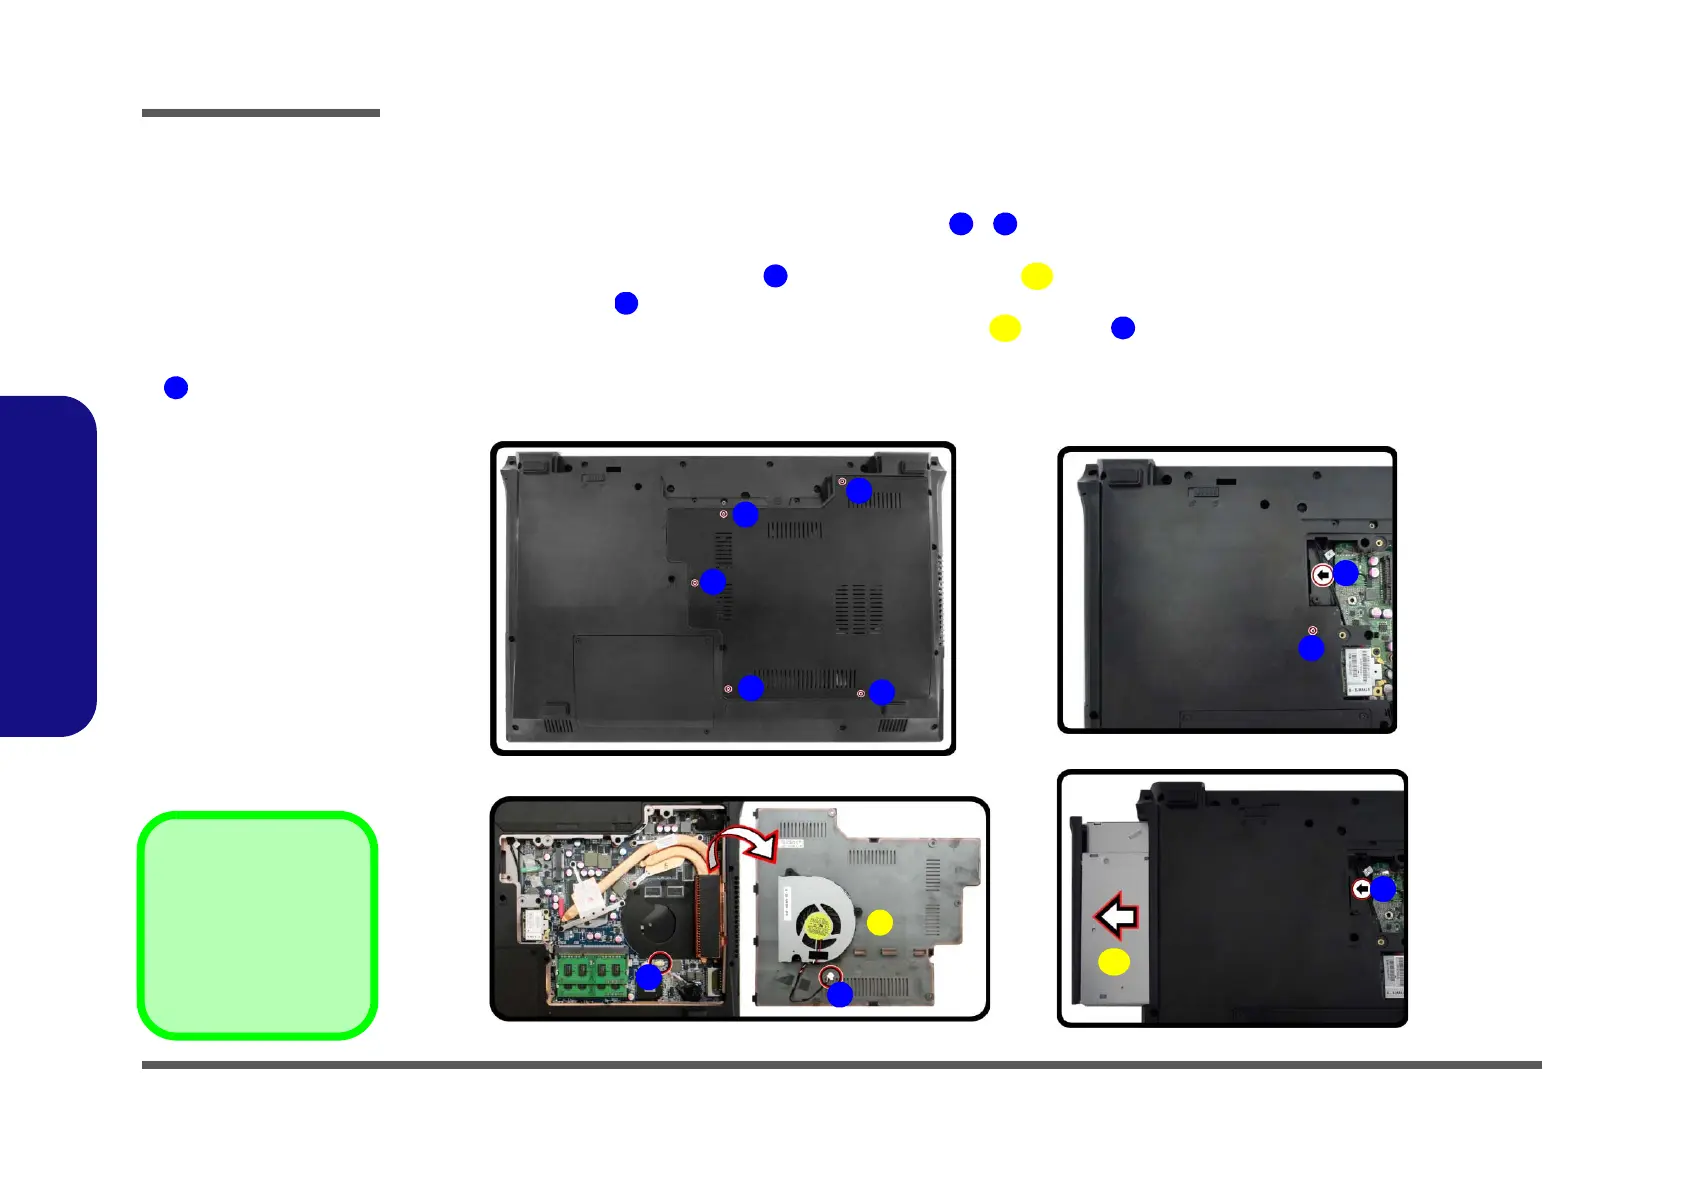
Removing the Optical (CD/DVD) Device
Figure 4
Optical Device
Removal
a. Remove the screws.
b. Remove the bay cover.
c. Remove the screw.
d. Use a screwdriver to
carefully push out the
optical device at point
.
1. Turn off the computer, remove the battery (page 2 - 5).
2. Locate the component bay cover and remove screws - (Figure 4a
).
3. Carefully (a fan and cable are attached to the under side of the cover) lift up the bay cover.
4. Carefully disconnect the fan cable , and remove the cover .
5. Remove the screw .
6. Use a screwdriver to carefully push out the optical device
at point (Figure 4b).
7. Insert the new device and carefully slide it into the computer (the device only fits one way. DO NOT FORCE IT; The
screw holes should line up).
8. Restart the computer to allow it to automatically detect the new device.
7. Component Bay Cov-
er
10. Optical Device
•6 Screws