EasyManua.ls Logo

Clevo W310CZ-T - Page 34

Clevo W310CZ-T
90 pages
To Next Page IconTo Next Page
To Previous Page IconTo Previous Page
Loading...
Disassembly
2 - 8 Removing the Hard Disk Drive
2.Disassembly
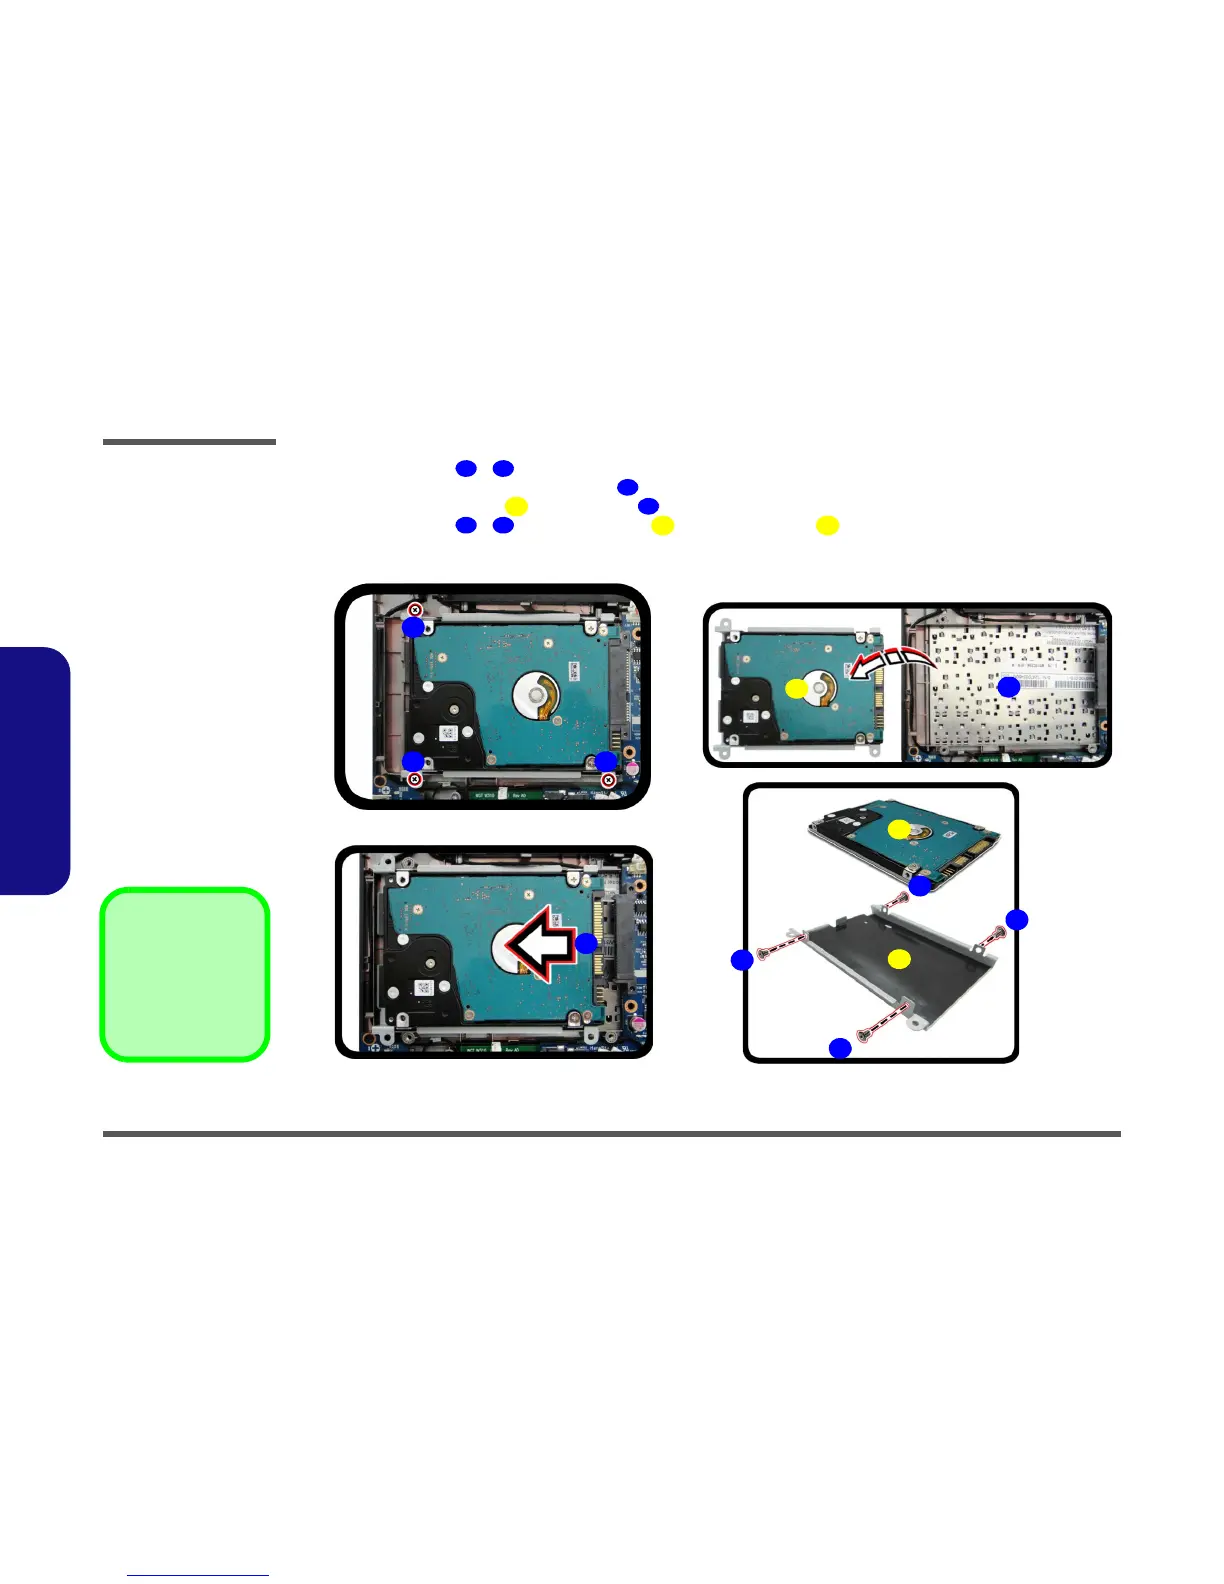
5. Remove the screws - (Figure 4c).
6. Slide the hard disk in the direction of arrow (Figure 4d).
7. Lift the hard disk assembly out of the bay (Figure 4e).
8. Remove the screws - , and bracket case from the hard disk
(Figure 4f).
9. Reverse the process to install a new hard disk (do not forget to replace all the screws and cover).
10
12
13
14
15
16
19
20
21
14. HDD assembly
20. HDD Bracket Case
21. HDD
•7 Screws
Figure 4
HDD Assembly
Removal (cont’d.)
c. Remove the screws.
d. Slide the HDD in the di-
rection of the arrow.
d. Lift the HDD assembly
out of the bay.
e. Remove the screws and
bracket case from the
HDD.
c.
d.
e.
14
12
13
21
20
f.
16
17
19
18
15
11
10

Table of Contents

Related product manuals