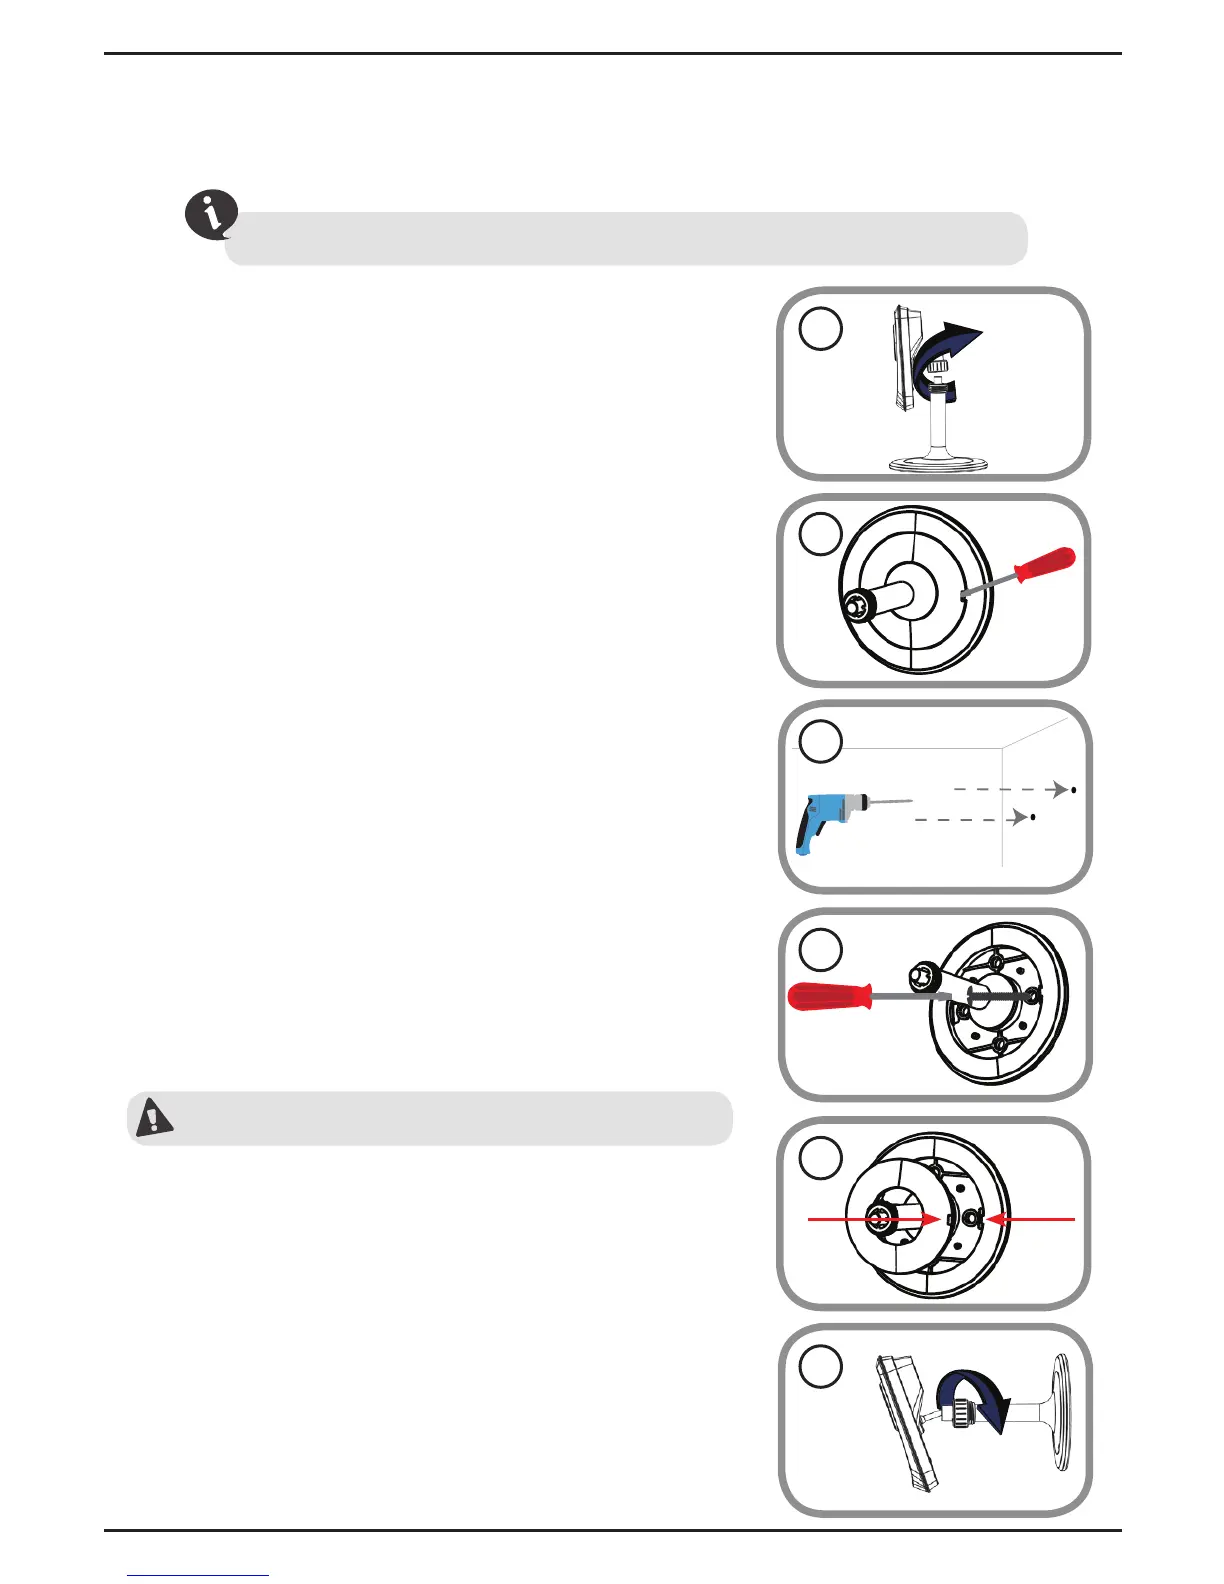
Mount the Camera
Please refer to the steps below to assist you with mounting the camera.
Do not overtighten the screws as this may crack the base.
We suggest that you congure the camera before mounting.
2. Use a athead screwdriver to remove the
base cover from the mounting base. Place the
mounting base where you want to position
the camera and use a pencil to mark the
holes.
1. The camera must be separated from the base
to expose the holes in the mounting base.
Unscrew the camera head from the mounting
base by turning it counterclockwise.
3. Depending on the material of the wall or
ceiling, use a 6mm drill bit to drill two holes
where you marked. If the wall is made out
of concrete, after drilling the holes, insert the
plastic anchors to support the screws.
4. Position the mounting base over the holes that
you drilled, and align the mounting base holes
with the holes in the wall. Use the supplied
screws to attach the mounting base to the
surface of the wall.
5. Place the base cover on the base. Make sure to
align the base cover notch with the mounting
base for future removal. Afterwards, reattach
the camera head onto the mounting base.
6. Adjust the angle of the camera as desired,
then tighten the collar on the camera stem to
lock it in place.
1
2
3
4
5
6
9
ENGLISH