Registering (Activating) Your Clover Mini
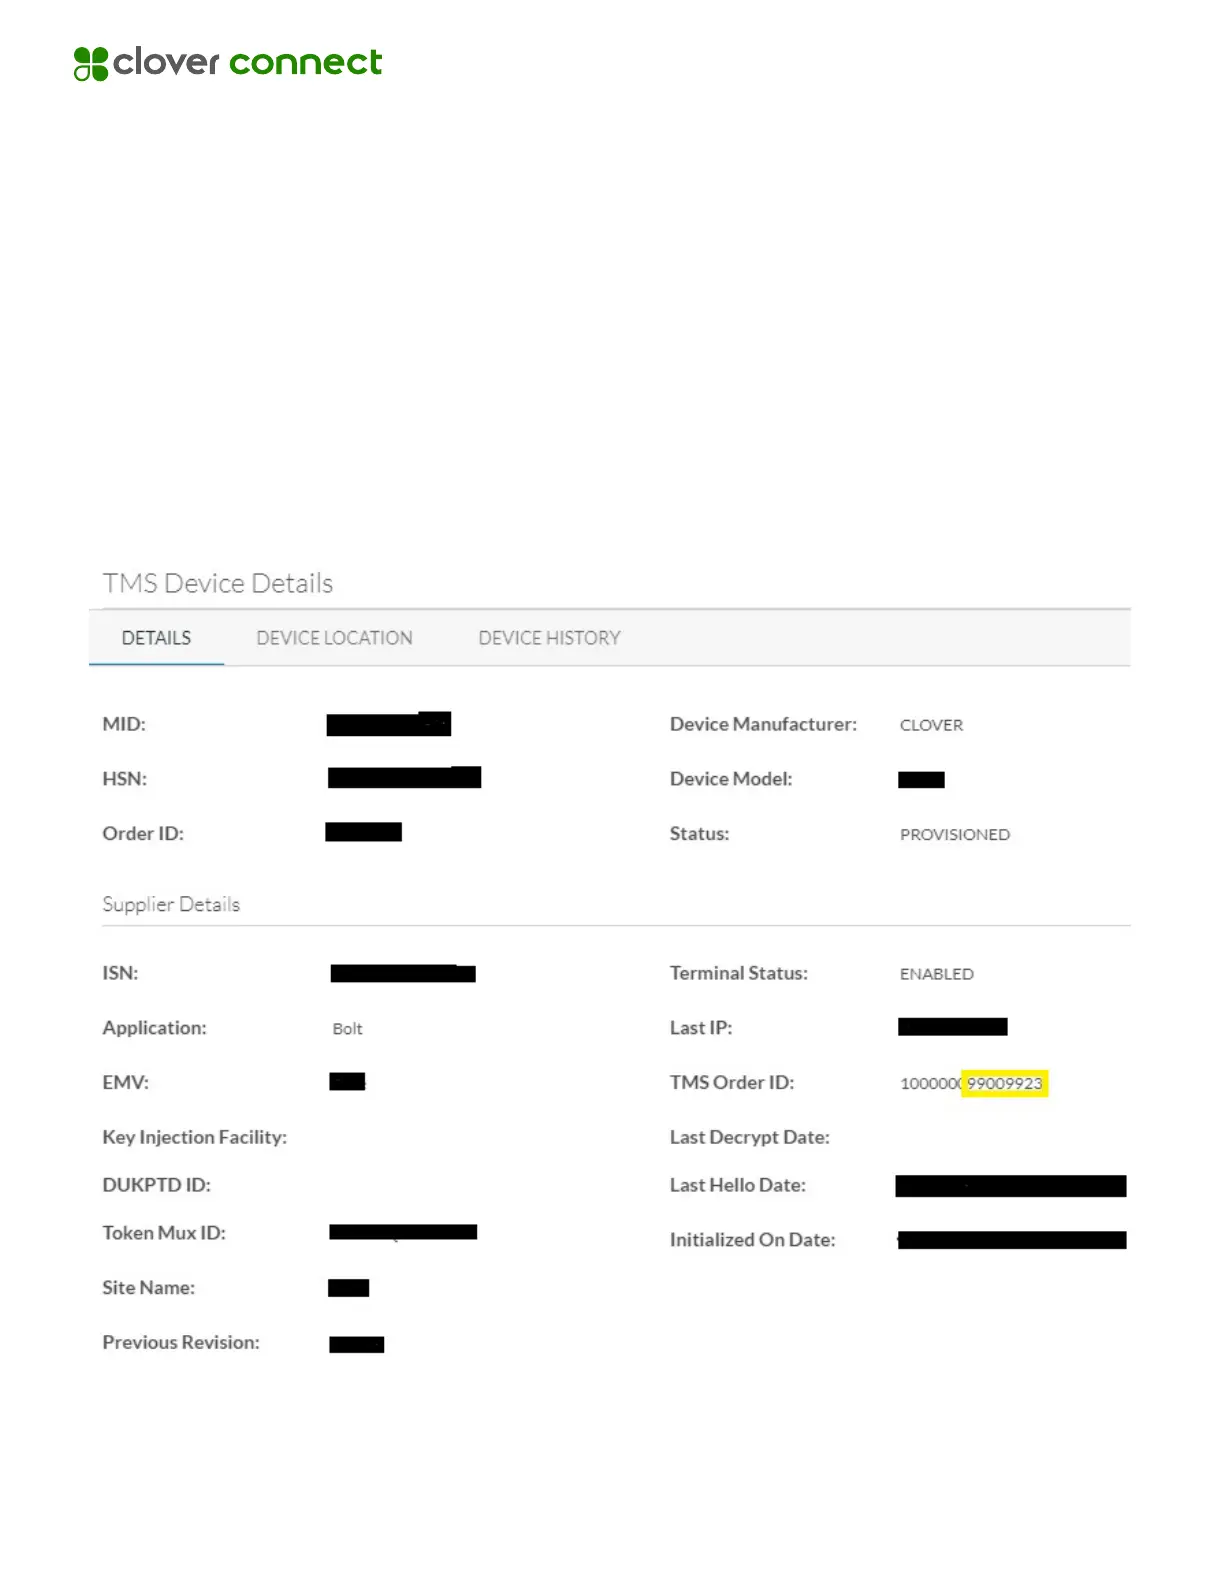
The last eight (8) digits of the TMS order ID is provided via email (see screenshot)
when the terminal is shipped, and is used as the Bolt Registration Code. The TMS
order ID can be found in the Equipment Devices Detail model within CoPilot, and
the last eight (8) digits can be provided to the merchant if needed.
> Locate Merchant Record in CoPilot
> Click Devices (under Equipment on left hand side)
> Click on Bolt on Clover Device ID
1. Connect the power cable to the charging cradle.
2. Place the Clover Flex on the charging cradle.
3. Press and hold the power button until the Clover logo is displayed.
4. The device will turn on and display a welcome screen. Select a languge.
5. On the ‘Connect to network’ screen, configure the device's network connection:
a. To connect to a Wi-Fi network, tap ‘Configure’ next to the Wi-Fi option,
and select your network. PCI Compliance standards require the device to
connect to a secure, password protected network.
b. To connect to an LTE network, tap ‘Configure’ next to Mobile (SIM card).
The device displays ‘Successfully Connected to Server’ upon connecting.
6. Click ‘Next’ to proceed. The device will now download and install the Bolt App.
a. Once complete, the Bolt App launches and displays the Terminal
Registration screen.
7. Continue to Activation Workflow Clover Mini for more information.