2Clover Mini Install Guide — EU 1.01
Set Up the Hardware
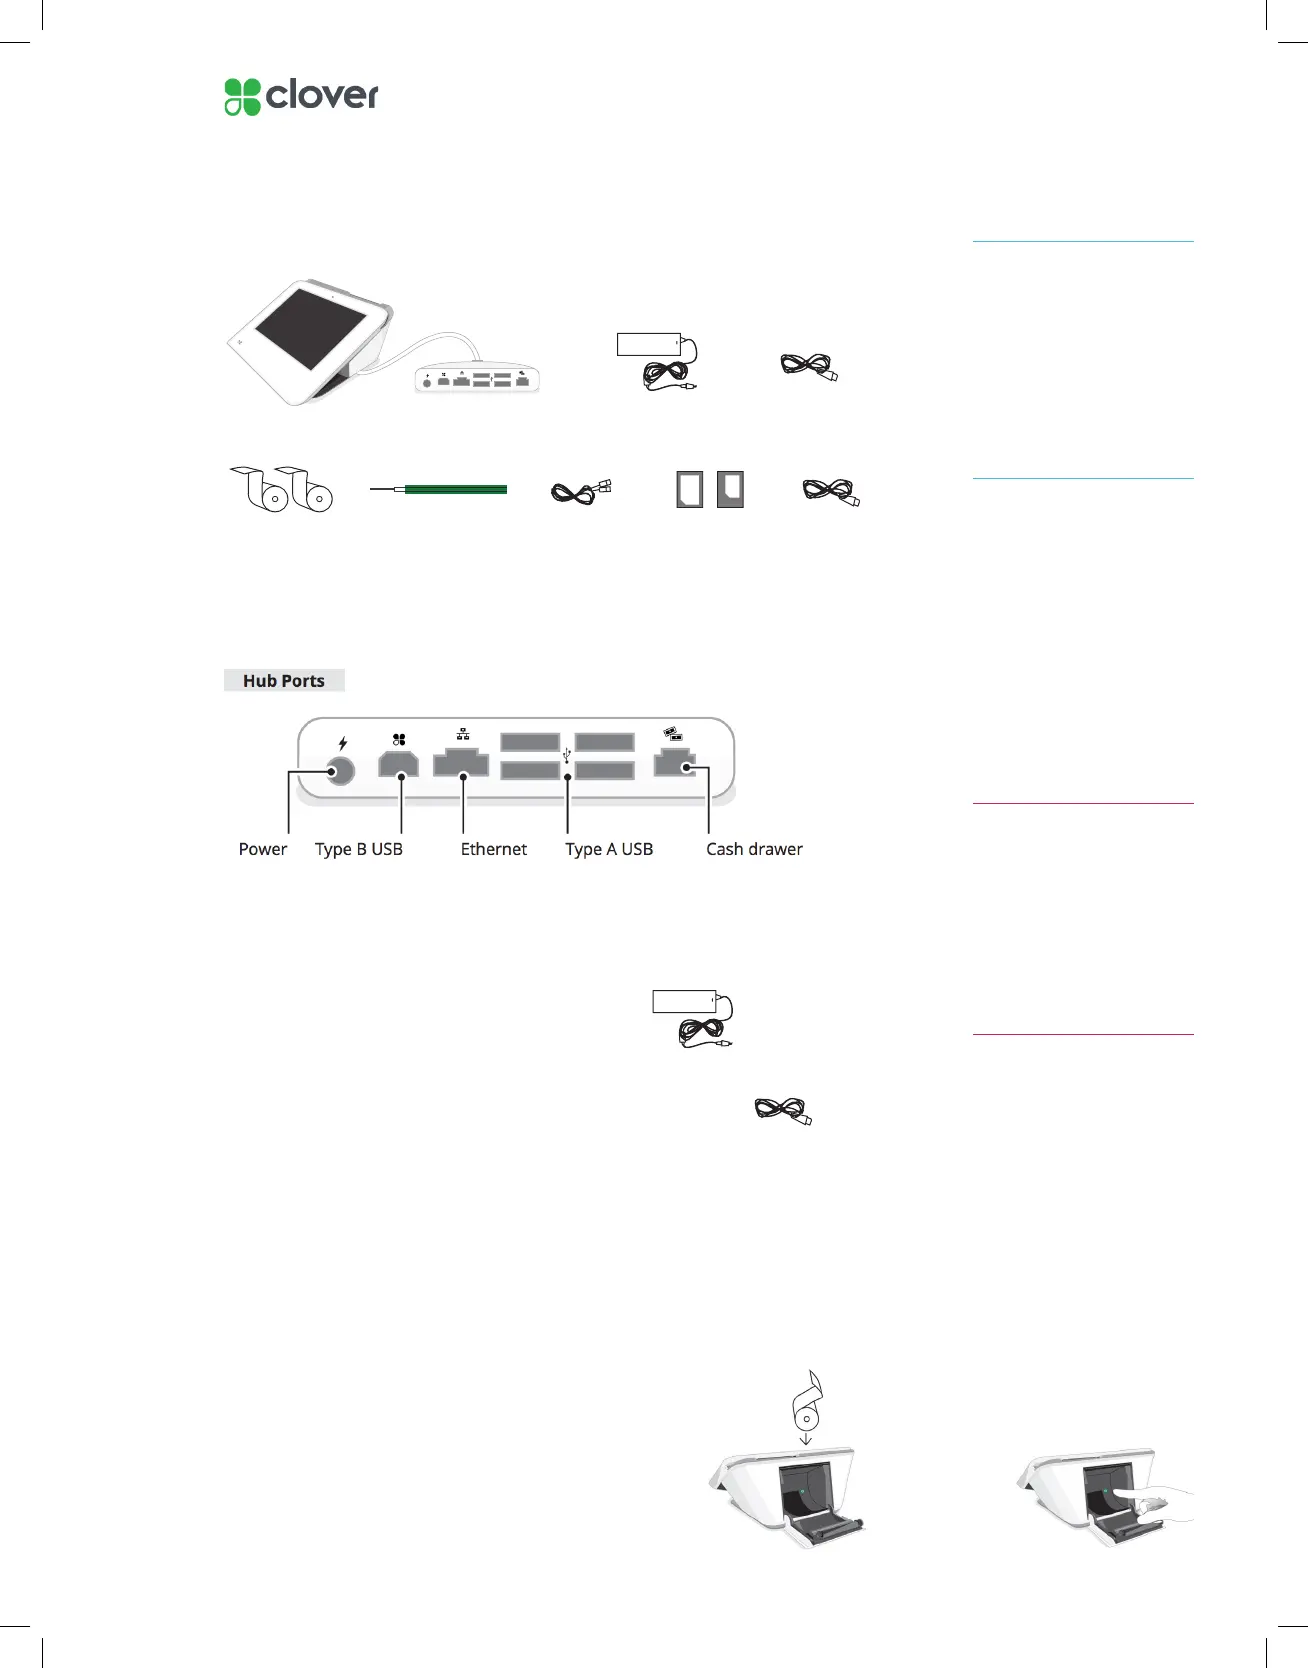
What’s included
Plug in the cables for your Clover Device
1. Based on your desired setup, plug the ethernet cord, cash drawer cord,
and USB cords for accessories into Clover Mini’s hub
2. Plug the black power brick’s circular cord
into the white Hub
3. Plug the black power cord into the black power brick
on one end and plug the other end of the cord into
a wall outlet
When Clover Mini powers on, you will see a Clover logo appear on screen
Insert Printer Paper into Clover Mini
1. Pull open the back panel of the Clover Mini
2. Insert the paper roll so that the paper is sticking
out of the top
3. Pull the paper out and close the panel, pushing
until you hear a click
Clover Mini
Power brick
PIN Shield PIN Entry Aid
USB
Hub
Receipt paper x2 2 Power cords
Screwdriver
Ethernet
In order to switch the
direction of Clover Mini’s hub
cord, turn Clover Mini over
to access underside. Use
provided screwdriver to loosen
green screw and switch cable
to desired direction. Tighten
green screw until the screw’s
head is level with the charging
cable
NOTE
The white USB cord provided
can be used to plug into the
Hub and connected to other
accessories (such as the cash
drawer, scanner, etc.)
NOTE
If you’ve plugged in the power
cable and Clover Mini has not
powered on:
IMPORTANT
1. Leave Clover Mini plugged into a
power source for at least 30 min-
utes to allow the backup battery
an opportunity to charge.
2. Unplug all cables from Clover
Mini hub
3. Press and hold the power button
for 20 seconds,
located in the back receipt com-
partment of Mini
4. Plug the black power cable back
into Clover Mini hub